Did you know that bubbles are more than play things? Scientists study them. Today I'm going to show you how bubbles work. We'll also learn about surface tension, bubble layers and more. Watch the video above and follow the instructions below to create your own bubbles, bubble container and wand. Remember--the sky's the limit!
Whip Up Some Bubbles
This is a basic recipe for bubbles, but many more are available on the internet. Some use glycerin in place of the corn syrup – glycerin is usually available at craft or drug stores. I’ve even seen recipes that call for honey, corn starch or baking power. Experiment to find which recipe works the best for you.
Ingredients:
- 3 cups water
- ½ cup light corn syrup
- 1 cup dish soap (not an “ultra” concentrated version – if you do use ultra soap, you will need to double the amount of corn syrup to 1 cup)
Instructions:
Pour water into a bowl. Add corn syrup and stir. Pour in dish soap and stir gently. Stirring too hard may cause the solution to foam on the surface, making bubbles more difficult to blow.
You can use your bubble solution right away, but for better results wait until the next day. This allows the corn syrup to dissolve and the ingredients to combine better.
Create Your Own Container
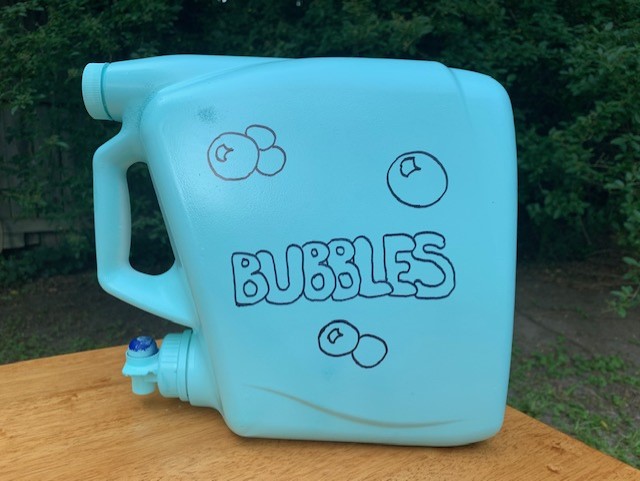
Bubble solution is easy to spill, and if it does it can make a big, sticky mess. To store your solution and make it easier to pour out when you want to blow bubbles, make this easy bubble solution container.
Materials:
- Empty laundry detergent container
- Paint (made for plastic)
- Permanent Marker
Instructions:
Simply take an empty laundry detergent container and rinse it out. You can use it immediately, but what’s the fun in that?
If it has a paper label, soak it off. (My container had decals on the side that would not come off, not matter what I did. I painted right over them and it worked just fine.)
Paint your container – make sure your paint is meant to be used on plastic. Once the paint is dry, use a permanent marker to decorate your container.
Don't Forget the Wand
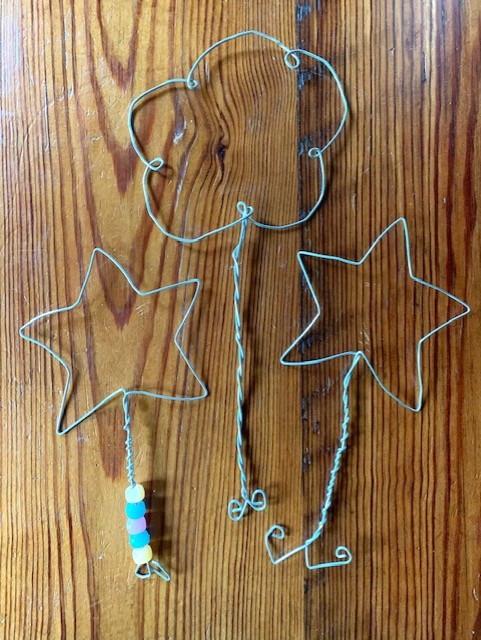
You can use a plain-old plastic bubble wand, or you can make your own fancy version.
Materials:
- Wire
- Scrap of wood
- Finishing nails (these nails have a small head on them, which makes it easier to slip the wand off the form)
- Pen or pencil
- Hammer
- Wire cutter
- Beads (optional)
Instructions:
First, decide what bubble wand shape you want to make.
Sketch out the shape on the piece of wood.
Pound a nail into each place where the wire needs to bend.
Leaving about 6 inches of wire for the handle, wrap the wire around the shape.
At the end, leave another 6 inches, then cut off the wire.
Twist the wires together to form the handle, adding beads if desired.
At the bottom, leave about an inch untwisted. Curl the ends of the wires to finish.
________________________________________________________
💡 Learning Moment:
"The most effective sources of early learning are immediate, meaningful, and involve children’s discovery and choice. Bubbles not only involve children in learning, but they are fun, easy to use, and ever-changing. In addition, many science processes such as, investigation, discovery, experimentation, observation, definition, comparison, and classification can be learned simply by playing with bubbles. Bubbles help children develop self-concept as they learn about themselves and the world around them, and language development is enhanced when children learn new words to describe bubbles, explain tasks, and label and record bubble experiments."
- Angie Dorrell, M.A., former Director of Curriculum for La Petite Academy and NAEYC accreditation validator and commissioner.