Did your school switch to Microsoft Teams, and you don't know where to start?
Tip 1: Not a fan of downloading?
Microsoft Teams can be used in a web browser or through the app/client. You will need to go to office.com and enter your school login information to access both these options. After logging in, click on the Teams Icon. The interface for both is very similar, but if you or your child is more comfortable in a web browser, you can click on cancel when the app tries to launch. There should then be an option to run the program in browser.

Note: Microsoft Teams will not run in Safari and certain features are not available in Firefox. If you want the full experience, the client is your best bet.
Tip 2: Use Teams for class discussions
It’s likely that your classes will be categorized into Teams. The Team section is perfect for group discussions because anything typed into that chat box will be visible to everyone in the class. Think of it like a virtual classroom. It is here that teachers will likely post announcements and share resources to facilitate further learning. As a student, you might be able to post answers to discussion questions or ask questions about assignments—but make sure to check if there aren’t separate channels specifically for those!

Tip 3: Looking for something in particular? Try Channels!
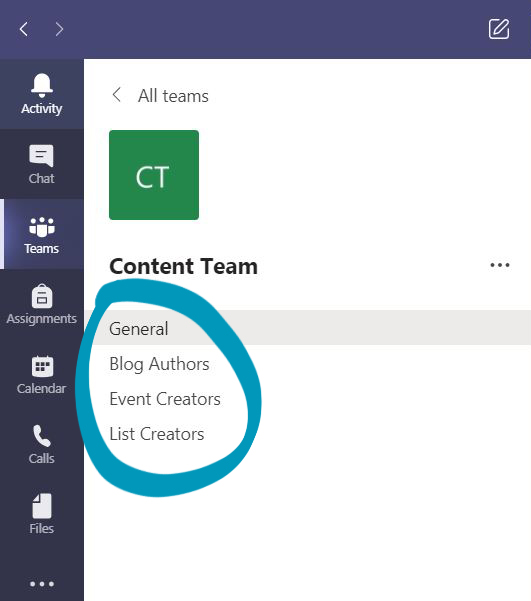 Channels are different subject threads that are found underneath your Team’s name. This is an excellent tool to give separate discussions their own space. If your teacher assigns any questions they want discussed as a group, each question might get its own channel. Your teacher might also have a channel specifically for asking questions about assignments as to not clutter the General channel where announcements are kept. This way, you won’t get confused when trying to access the information you need in order to be successful.
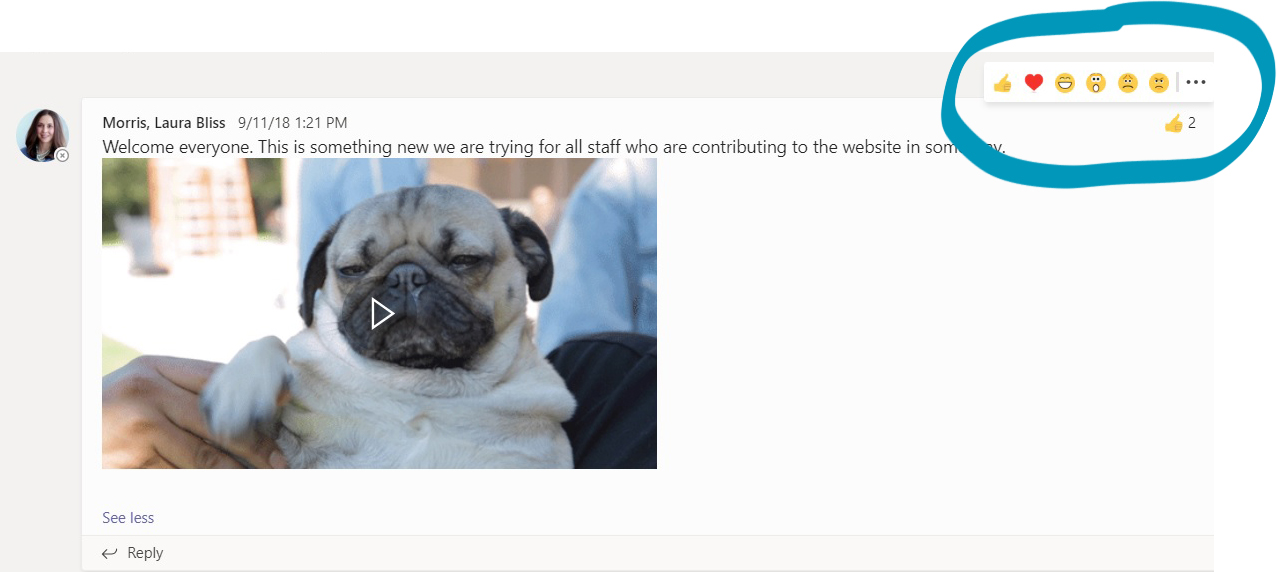
Tip 4: Express yourself!
Microsoft Teams encourages communication. Like many social media platforms, in Teams, you can easily reply to messages other students posted. You can include emojis, gifs, stickers, and more. You can also react to something using the three dots in the corner of the post.
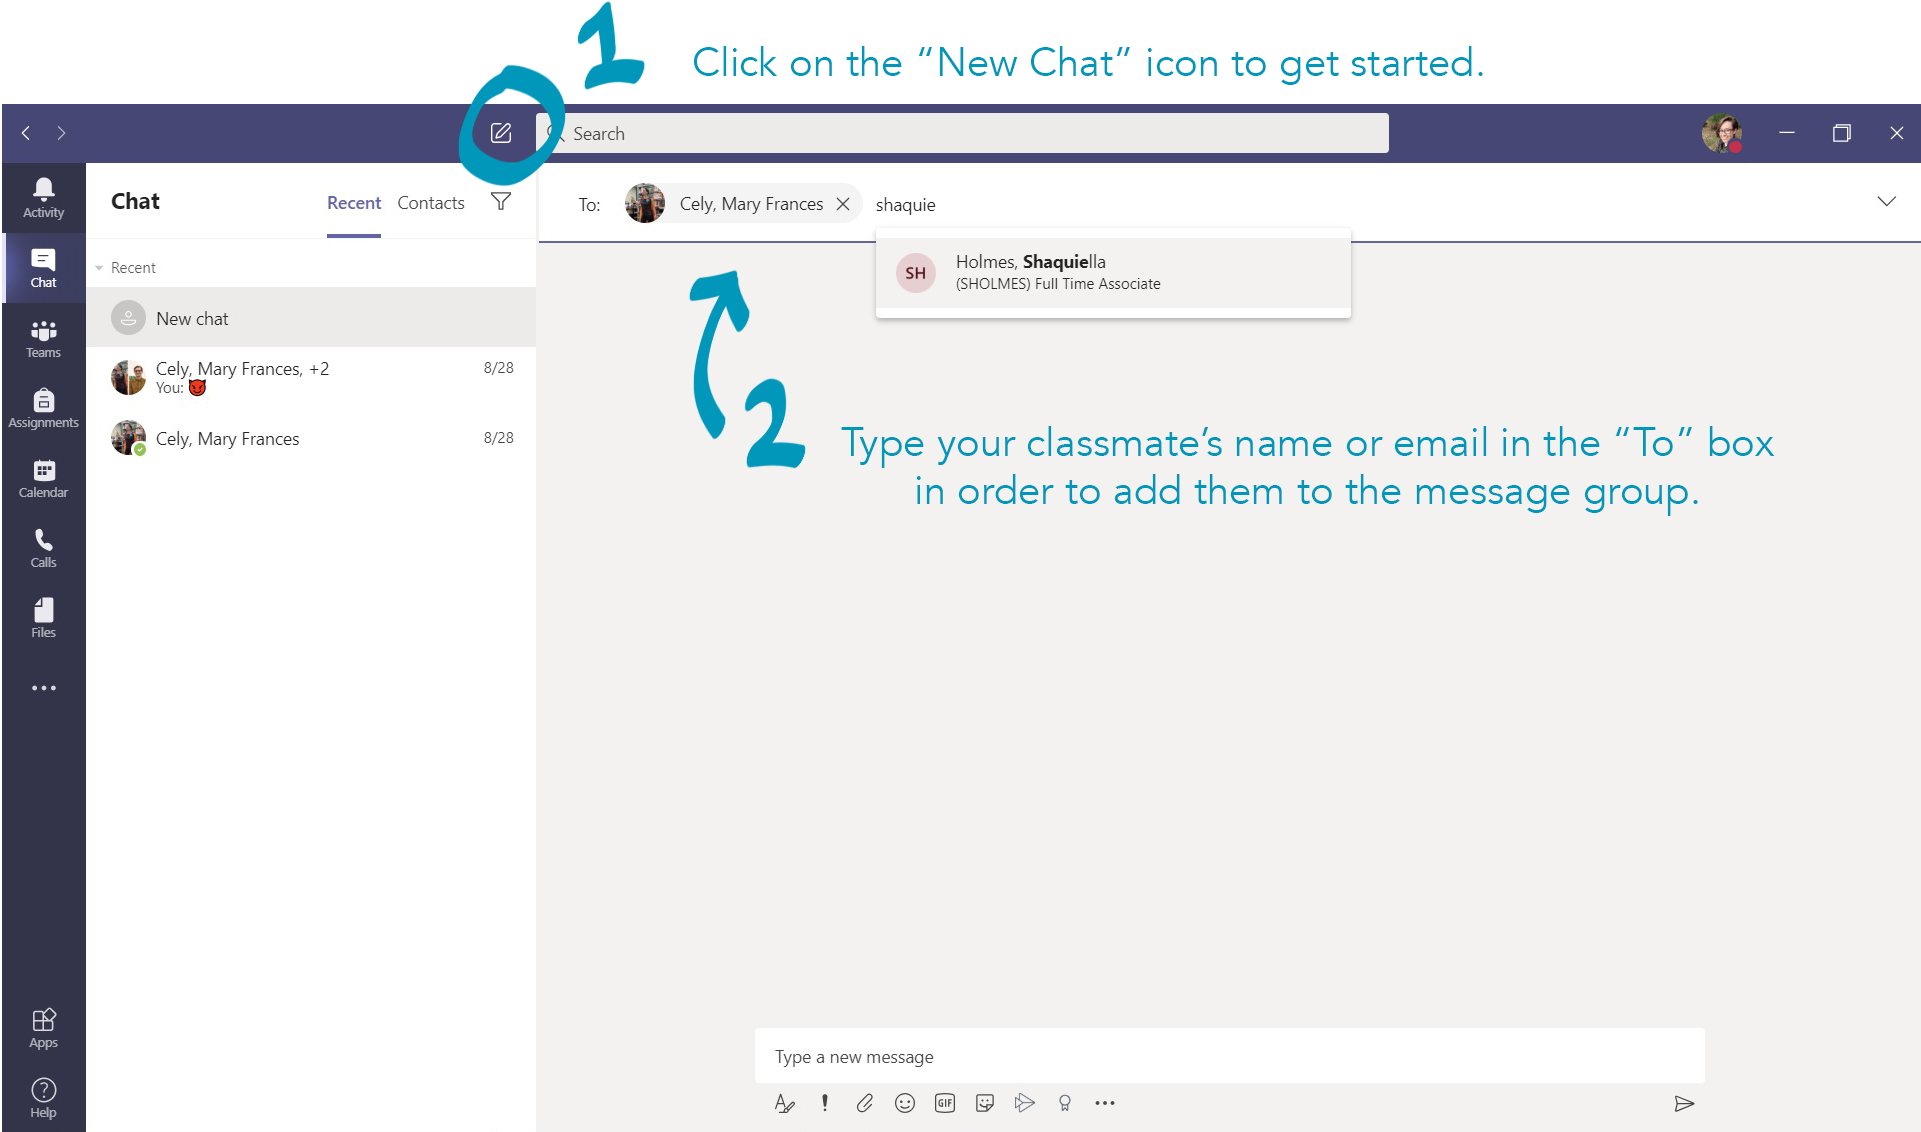
Tip 5: Use Chat for private conversations or to create smaller groups
Conversations in Teams is great because it allows for class discussions, but sometimes you might need to work with a smaller group on a project or simply want to talk with someone one-on-one. Chat is the tool to use. By clicking on the “New message” icon and adding everyone needed for recipients, you can message only those select people instead of the whole class.
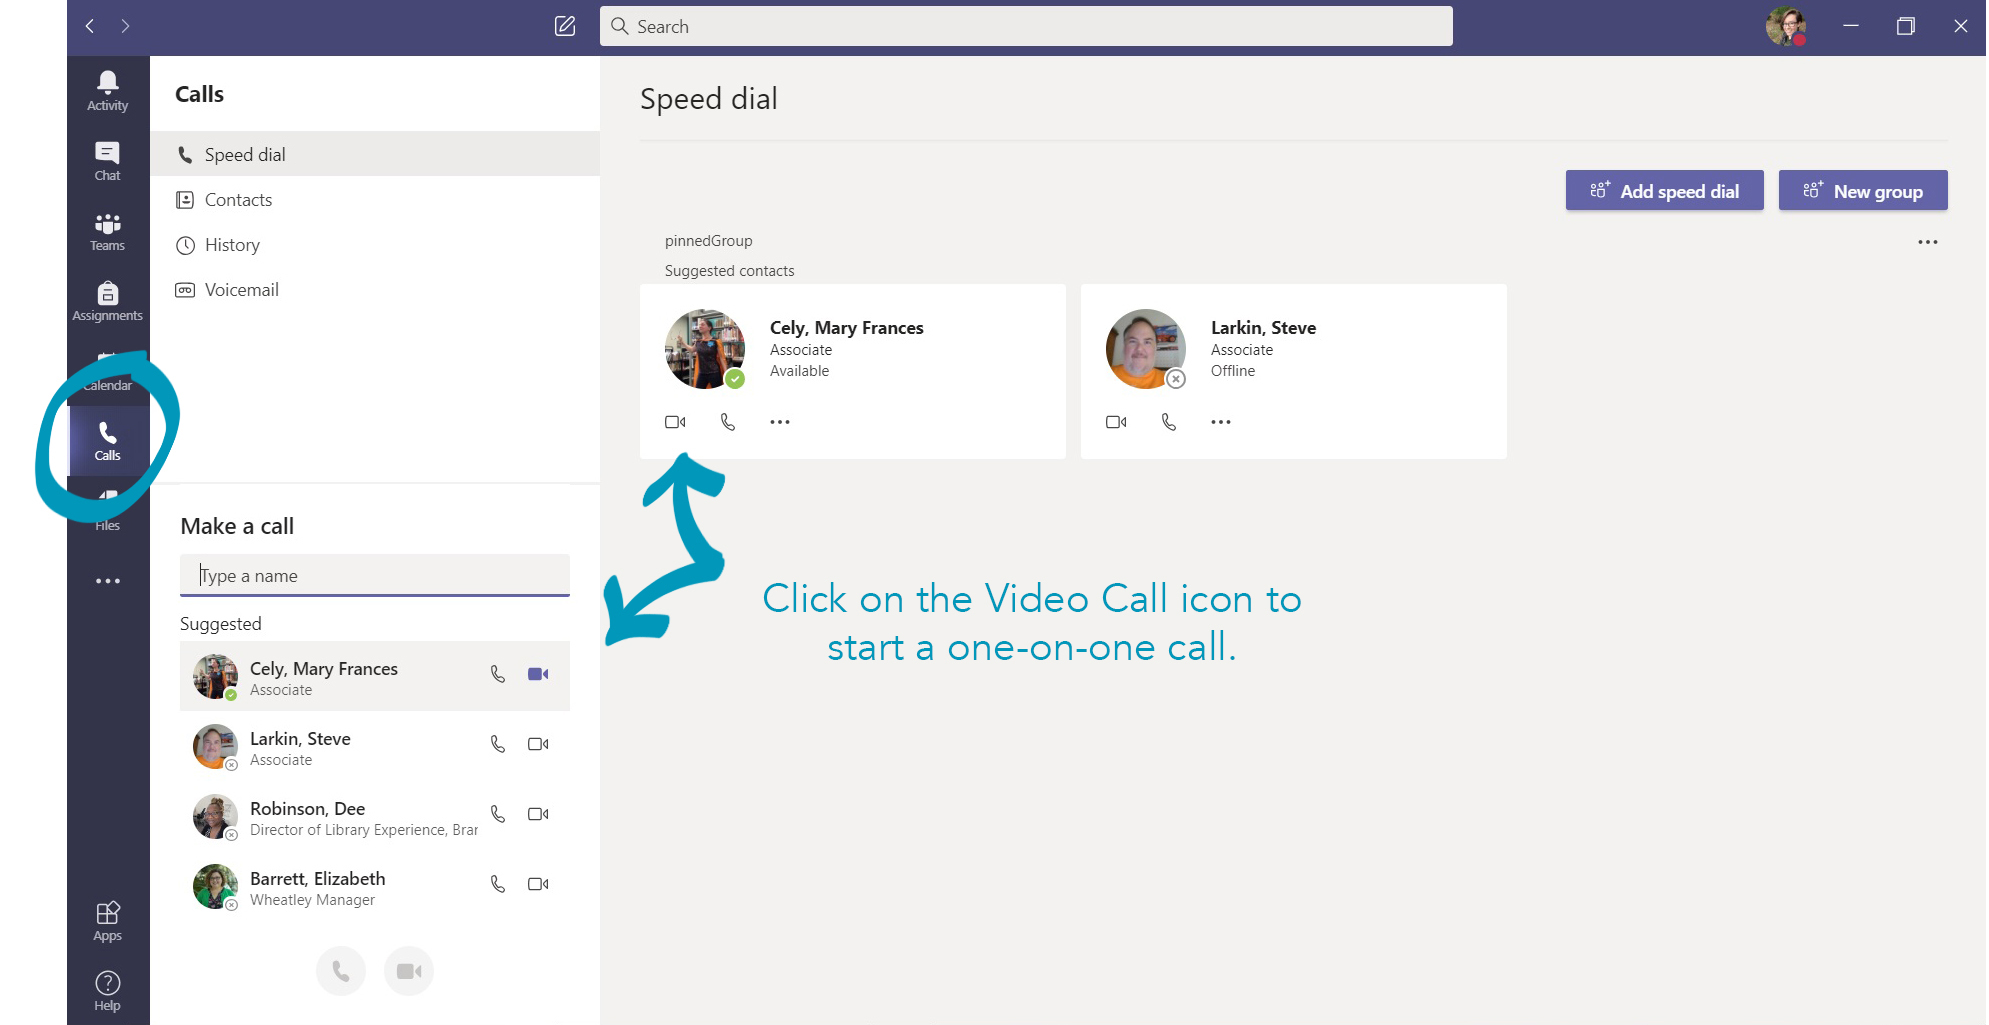
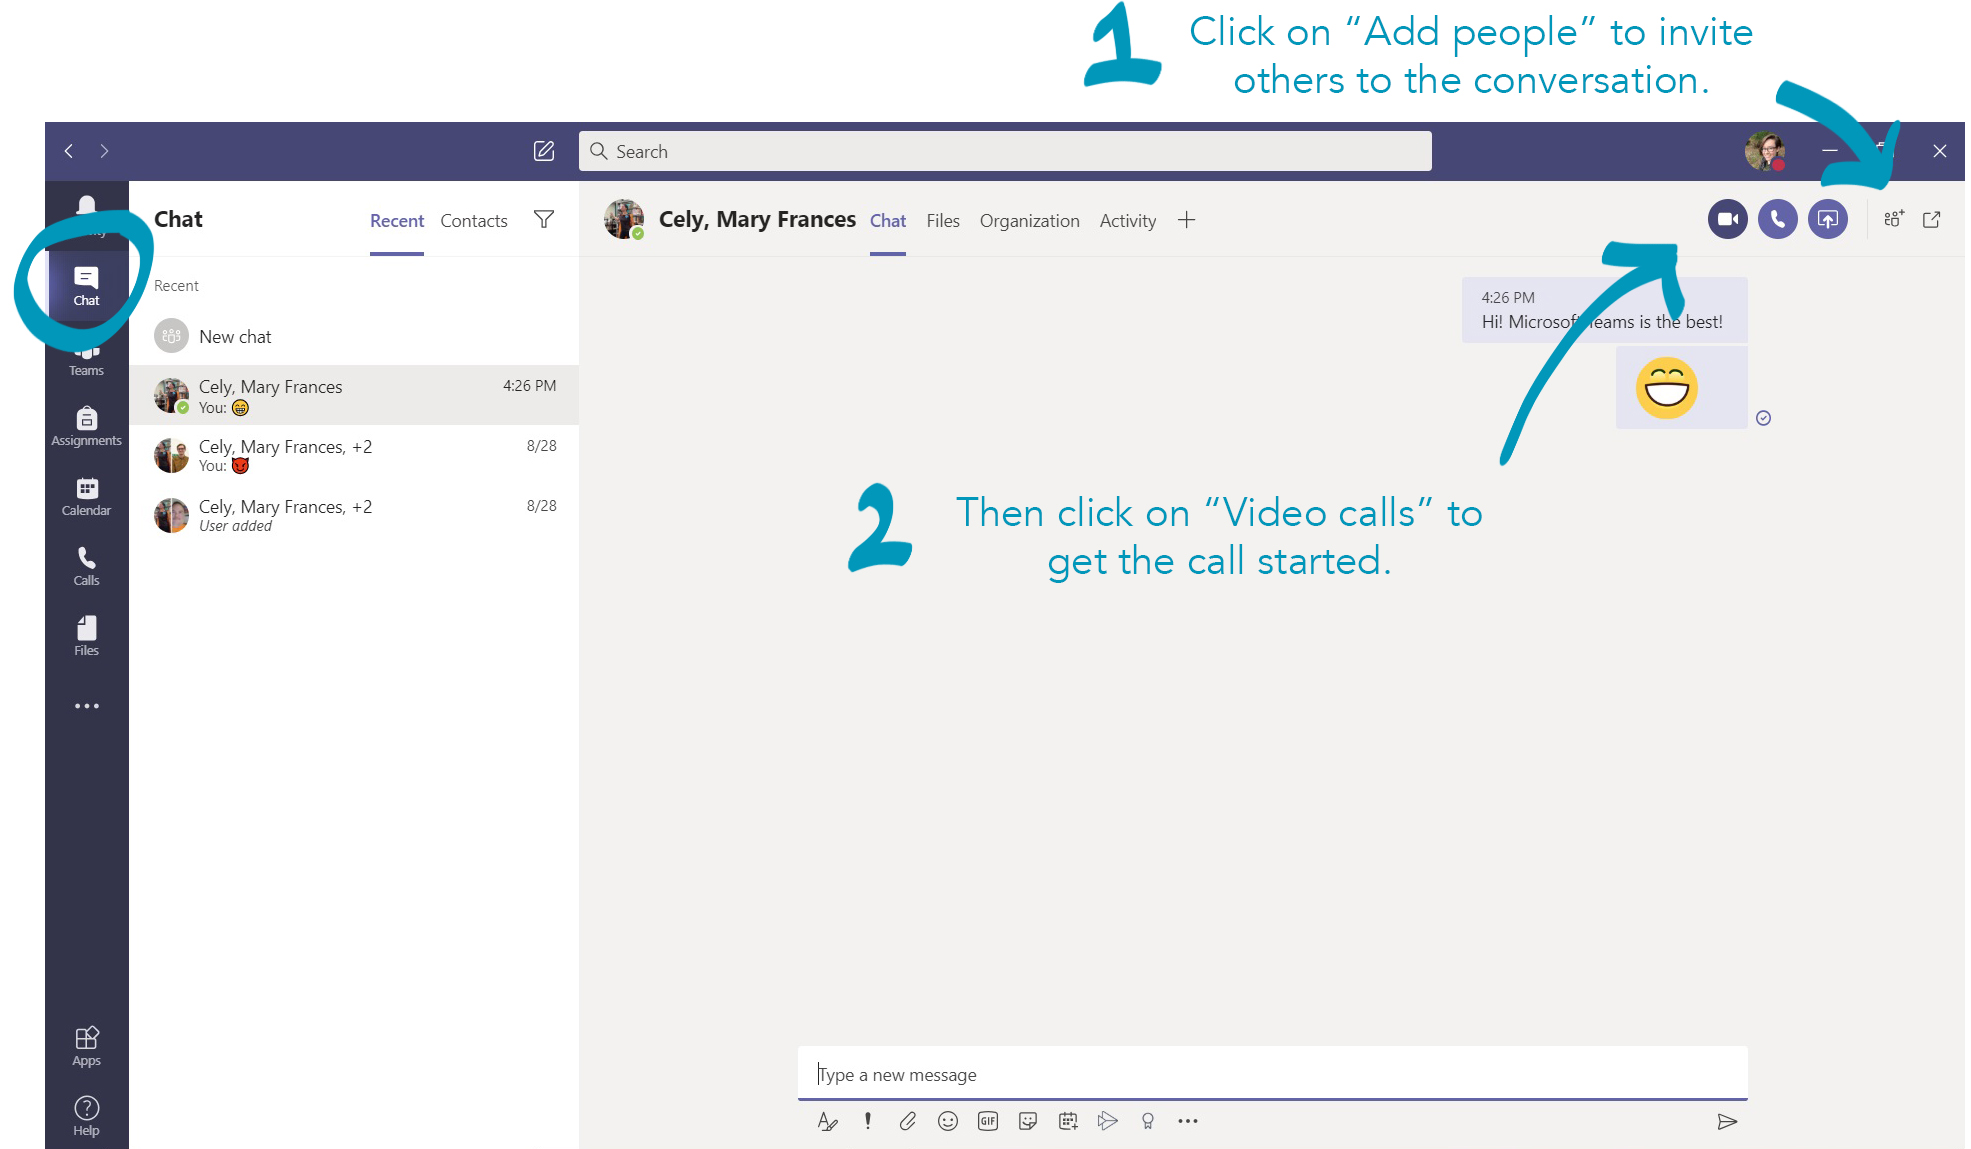
Tip 6: Video Calls
You can start a video call under the Calls icon. However, if you want to speak to multiple people at a time, I suggest starting in Chat. Add the members you wish to speak to and then click on the Video Call icon in the upper right corner. If you use the chat interface while on the call, all chat and shared documents will be automatically saved to this area for you to visit anytime.
To make video calls from the Calls icon:
To make video calls from the Chat icon:
Note: Video calls will not work in Firefox—I learned that the hard way. Use the downloadable client, Chrome, or Microsoft Edge instead.
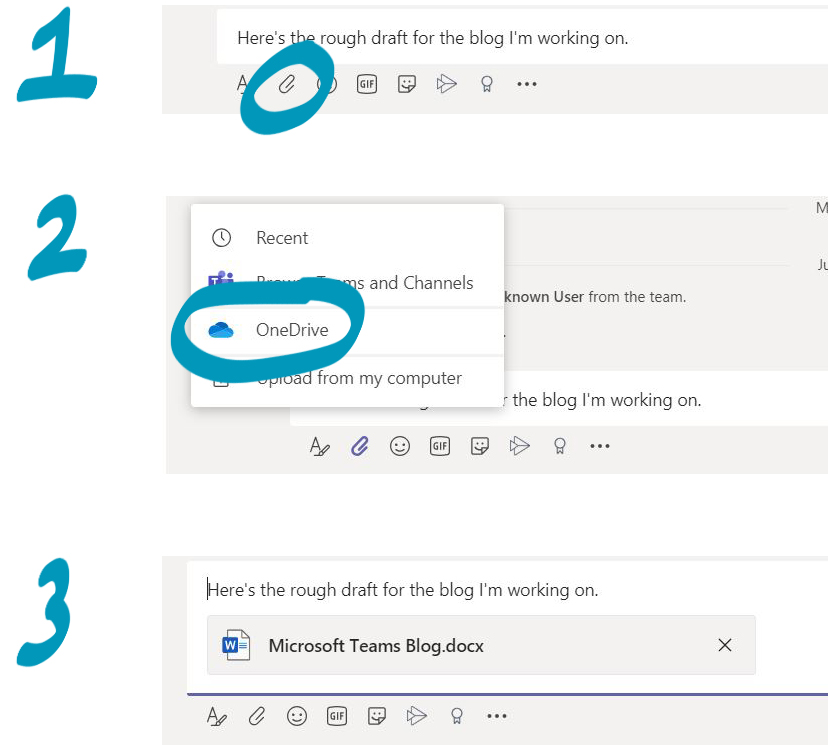
Tip 7: Share and collaborate on assignments
Microsoft Teams uses Microsoft’s cloud service called OneDrive to allow easy sharing of materials. Just look for the Attach icon whenever posting to Teams, Chat, or during a Video Call. Because everything’s in the cloud, students can work on shared documents simultaneously—even in real-time!
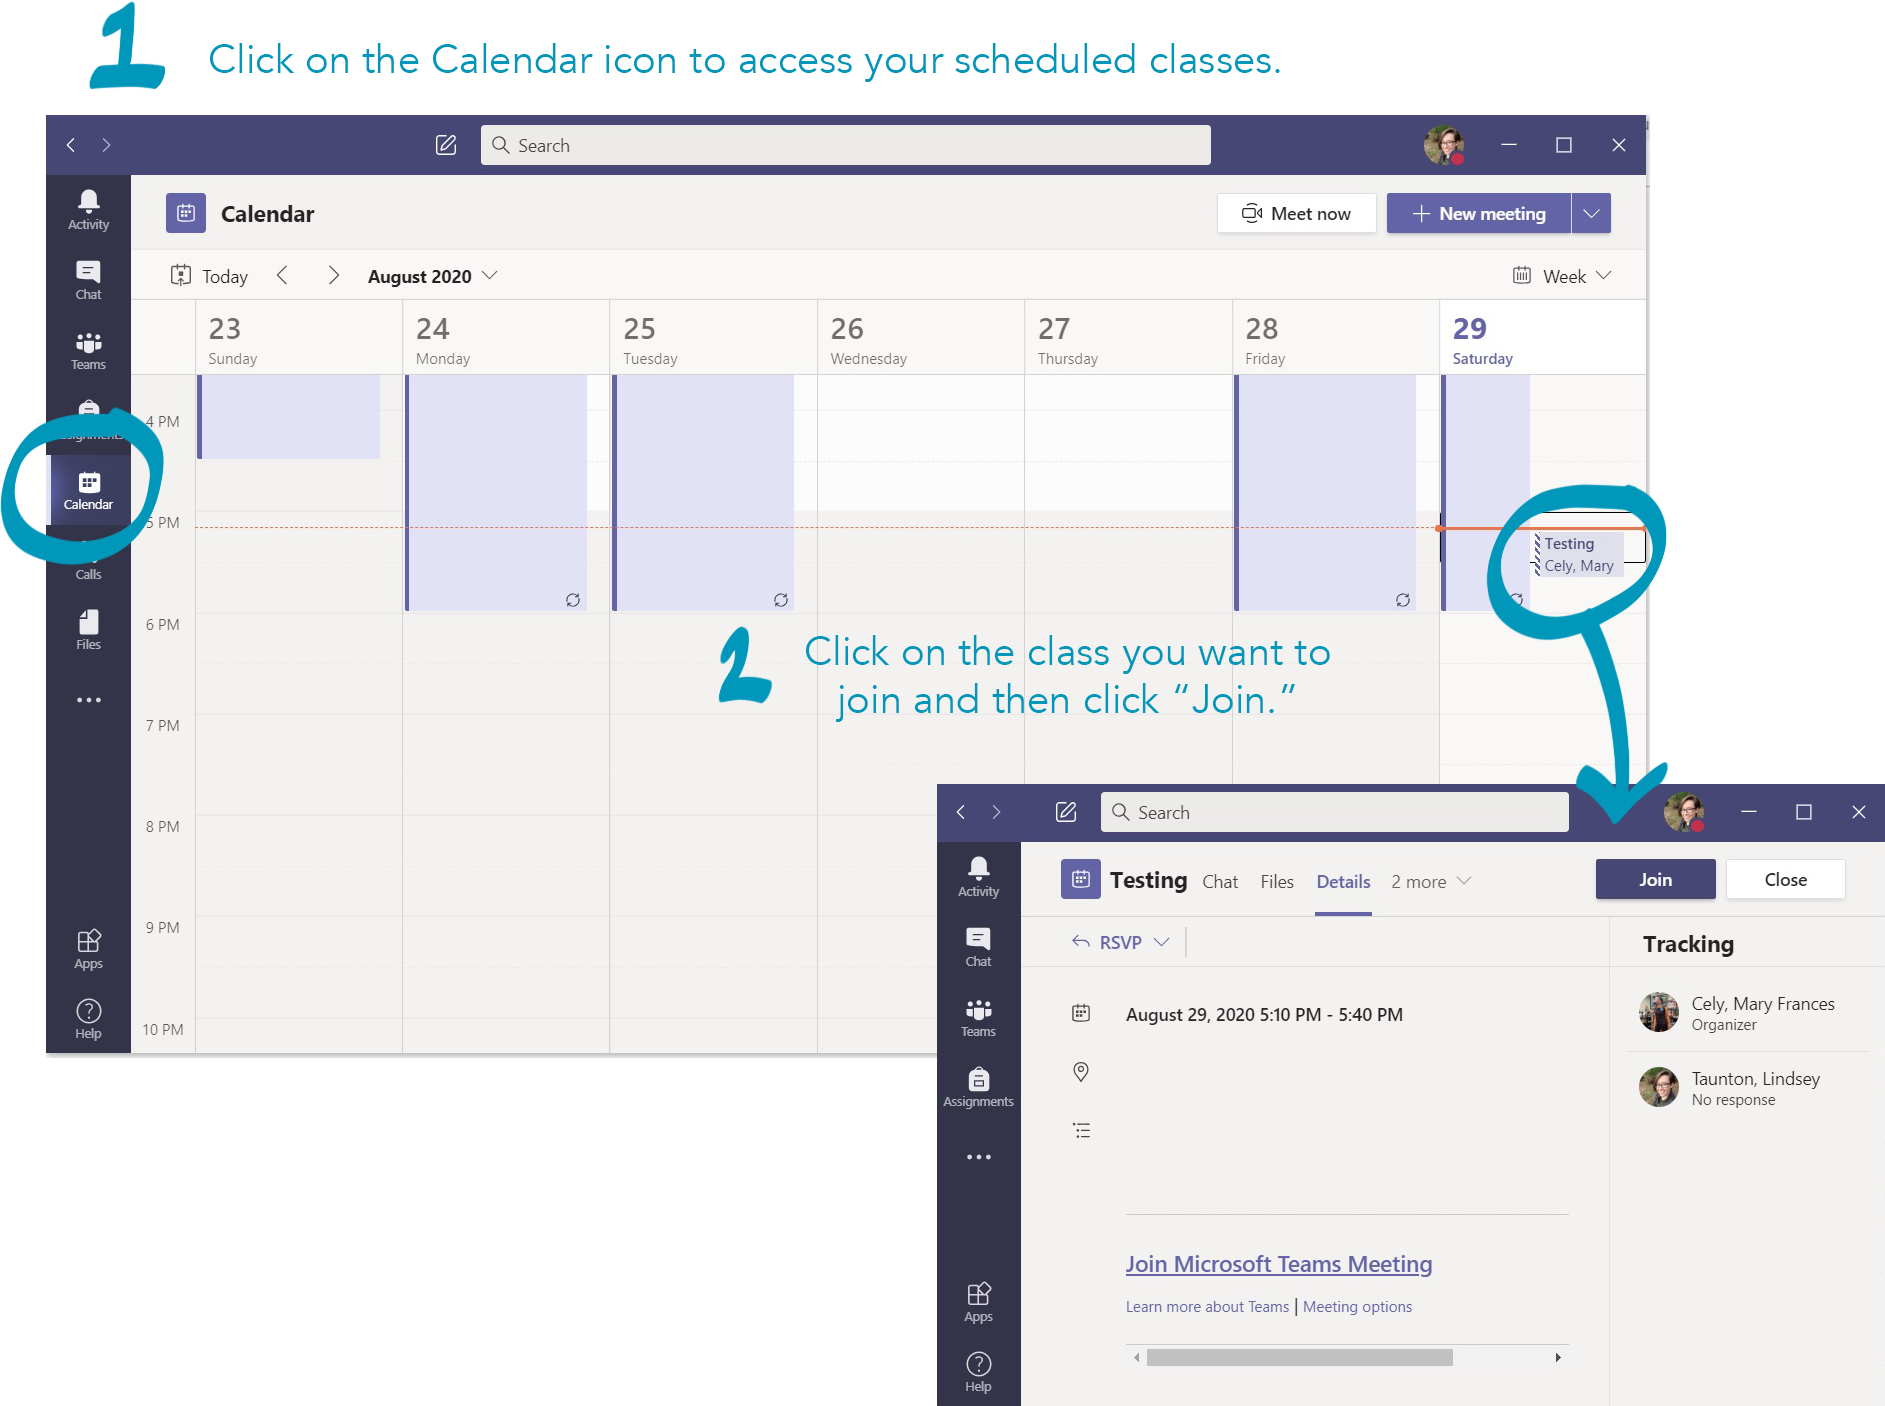
Tip 8: Joining Scheduled Classes
Scheduled classes are located under the Calendar icon pinned to the left side of your screen. Simply click on the class you want to join and then click "Join" to get started. It’s likely many teachers will schedule reoccurring lectures like this because it’s integrated into each student’s calendar.
Tip 9: Recording Lectures
I know all you are Zoom experts by now, so this will be a breeze for you because many of Microsoft Team’s video commands are the same. You can mute, participate in chat, and share your screen. But Microsoft Teams has even more options! For example, you can record the video call. Have trouble with math? Save the video so you can revisit it later as you do homework. Just click on the three dots on your menu bar and select “Start recording.”
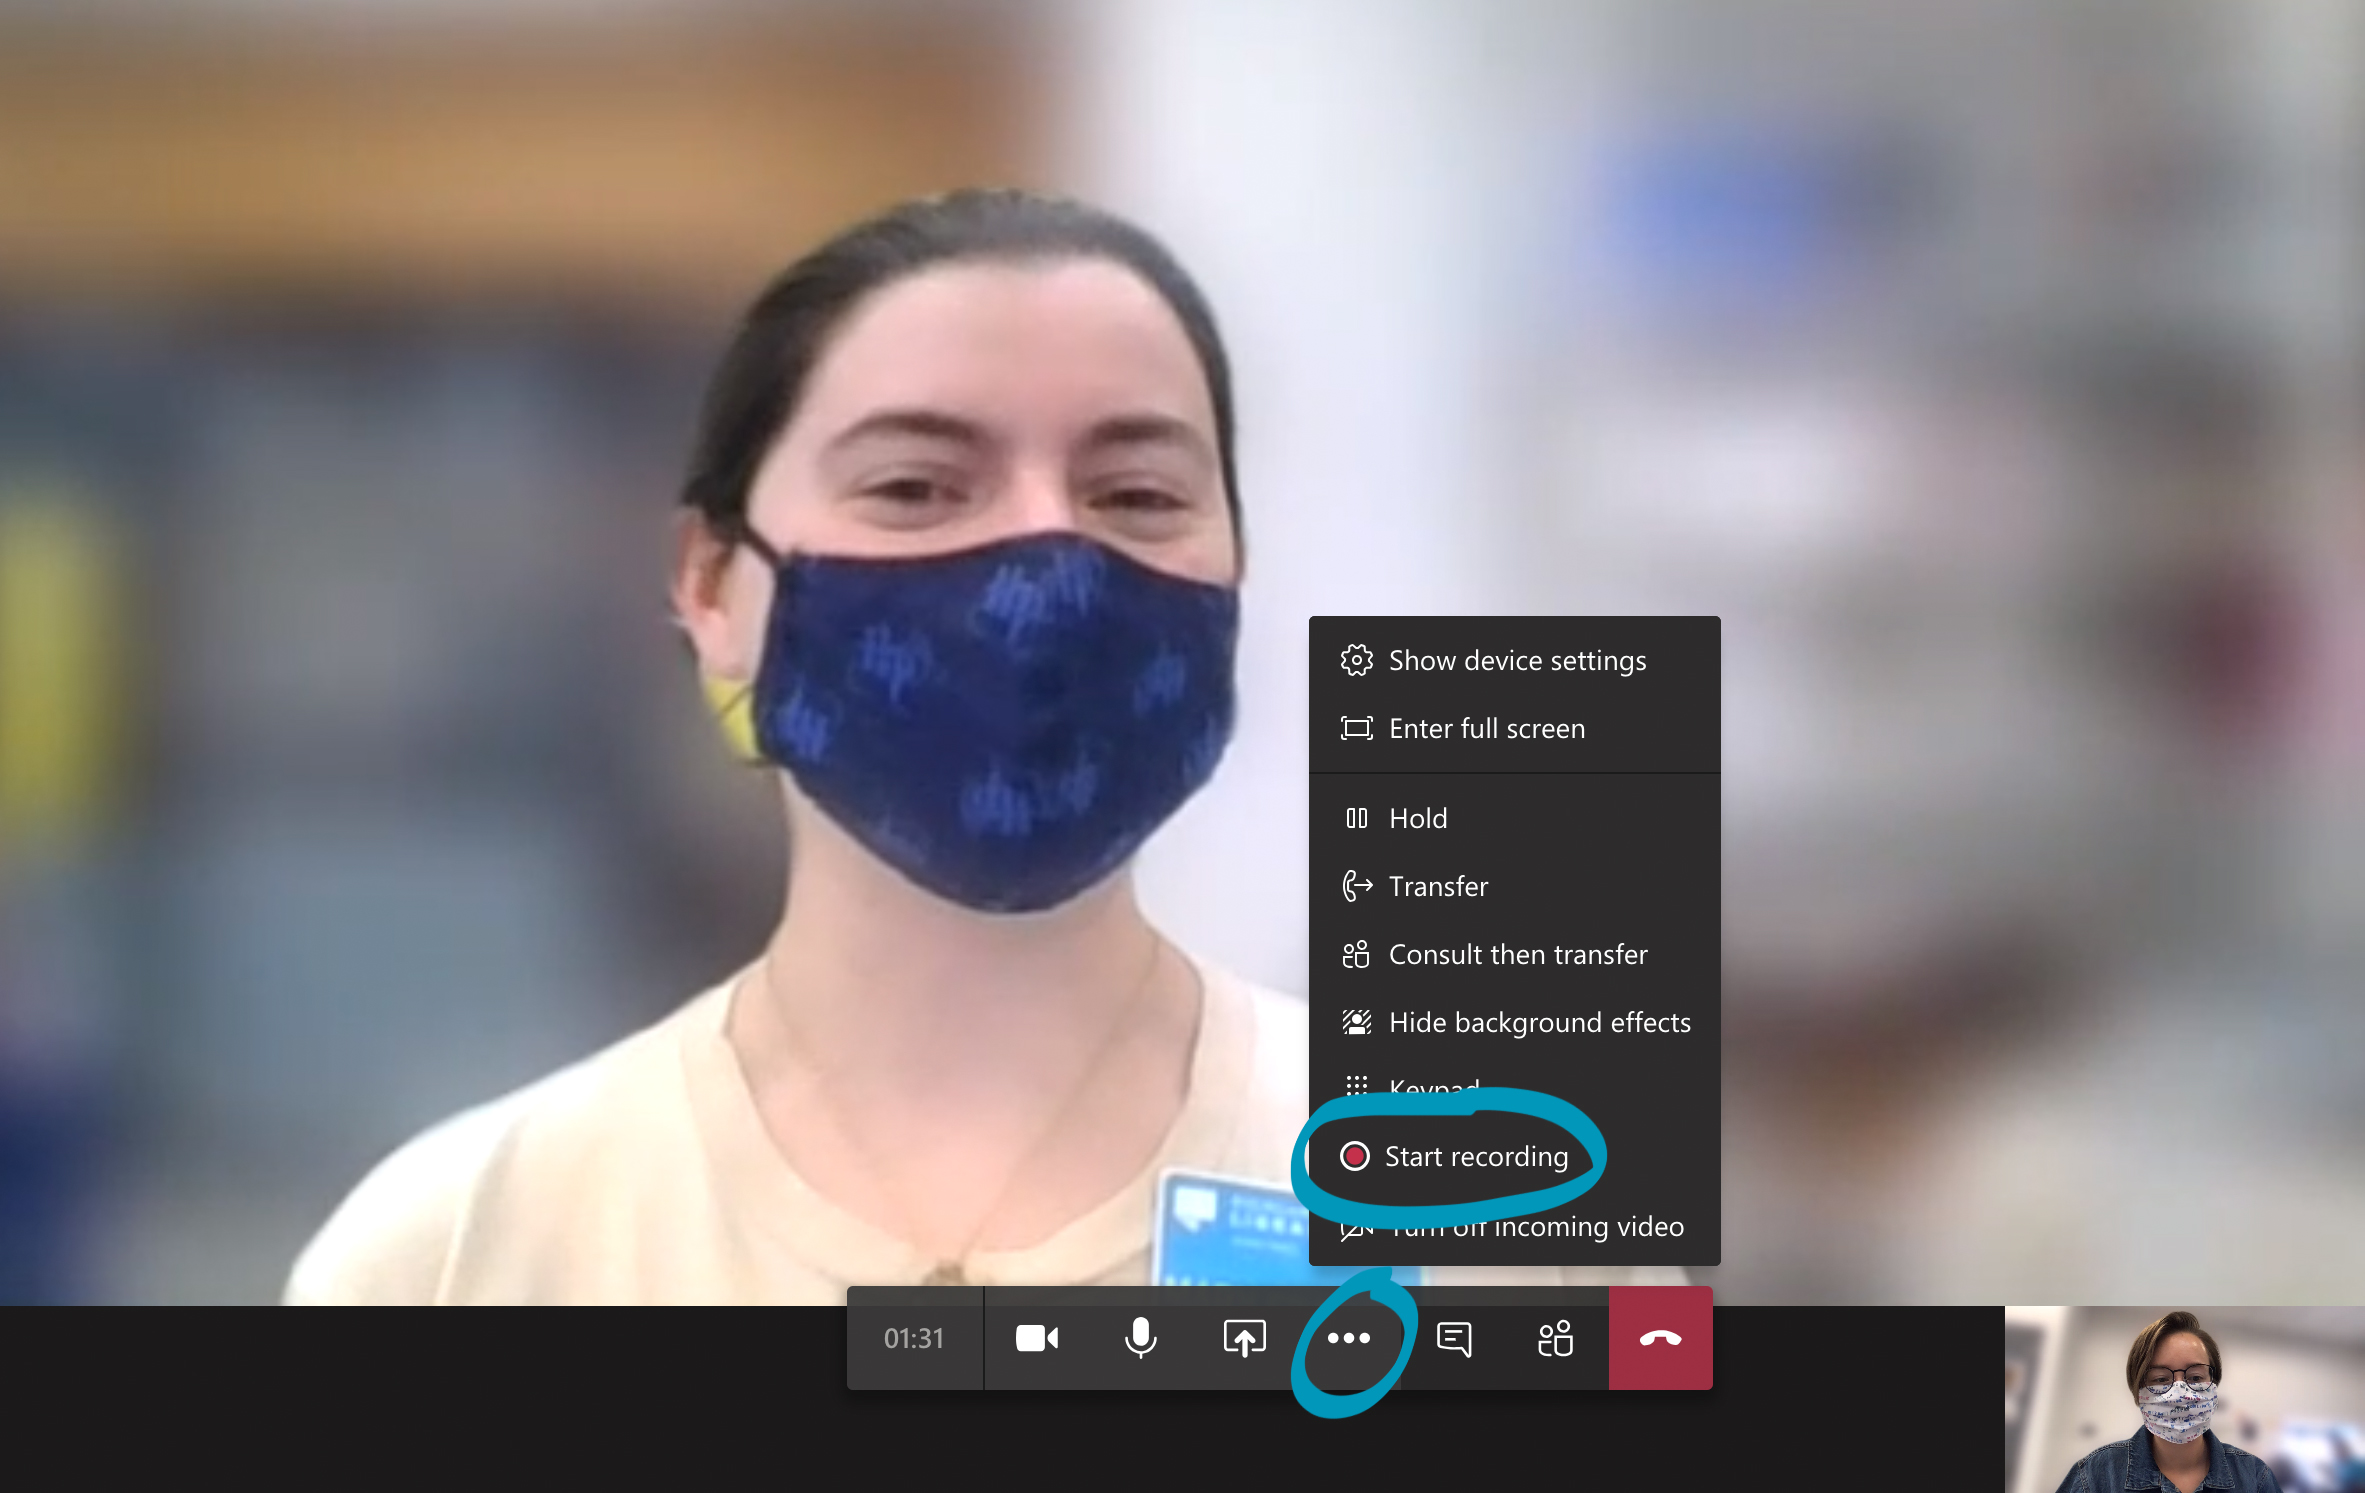
Note: This picture was taken from the Calls icon, but the record option is available for both Calls and Chat.
Tip 10: Blurring your Background
If only Zoom had this option! Luckily for you, it’s available on Microsoft Teams, and it is exactly what it sounds like. Not only does this marvel hide the mess in your room, it also eliminates distractions for other students on the videocall. To blur your background, click on the three dots and select “Show background effects.”
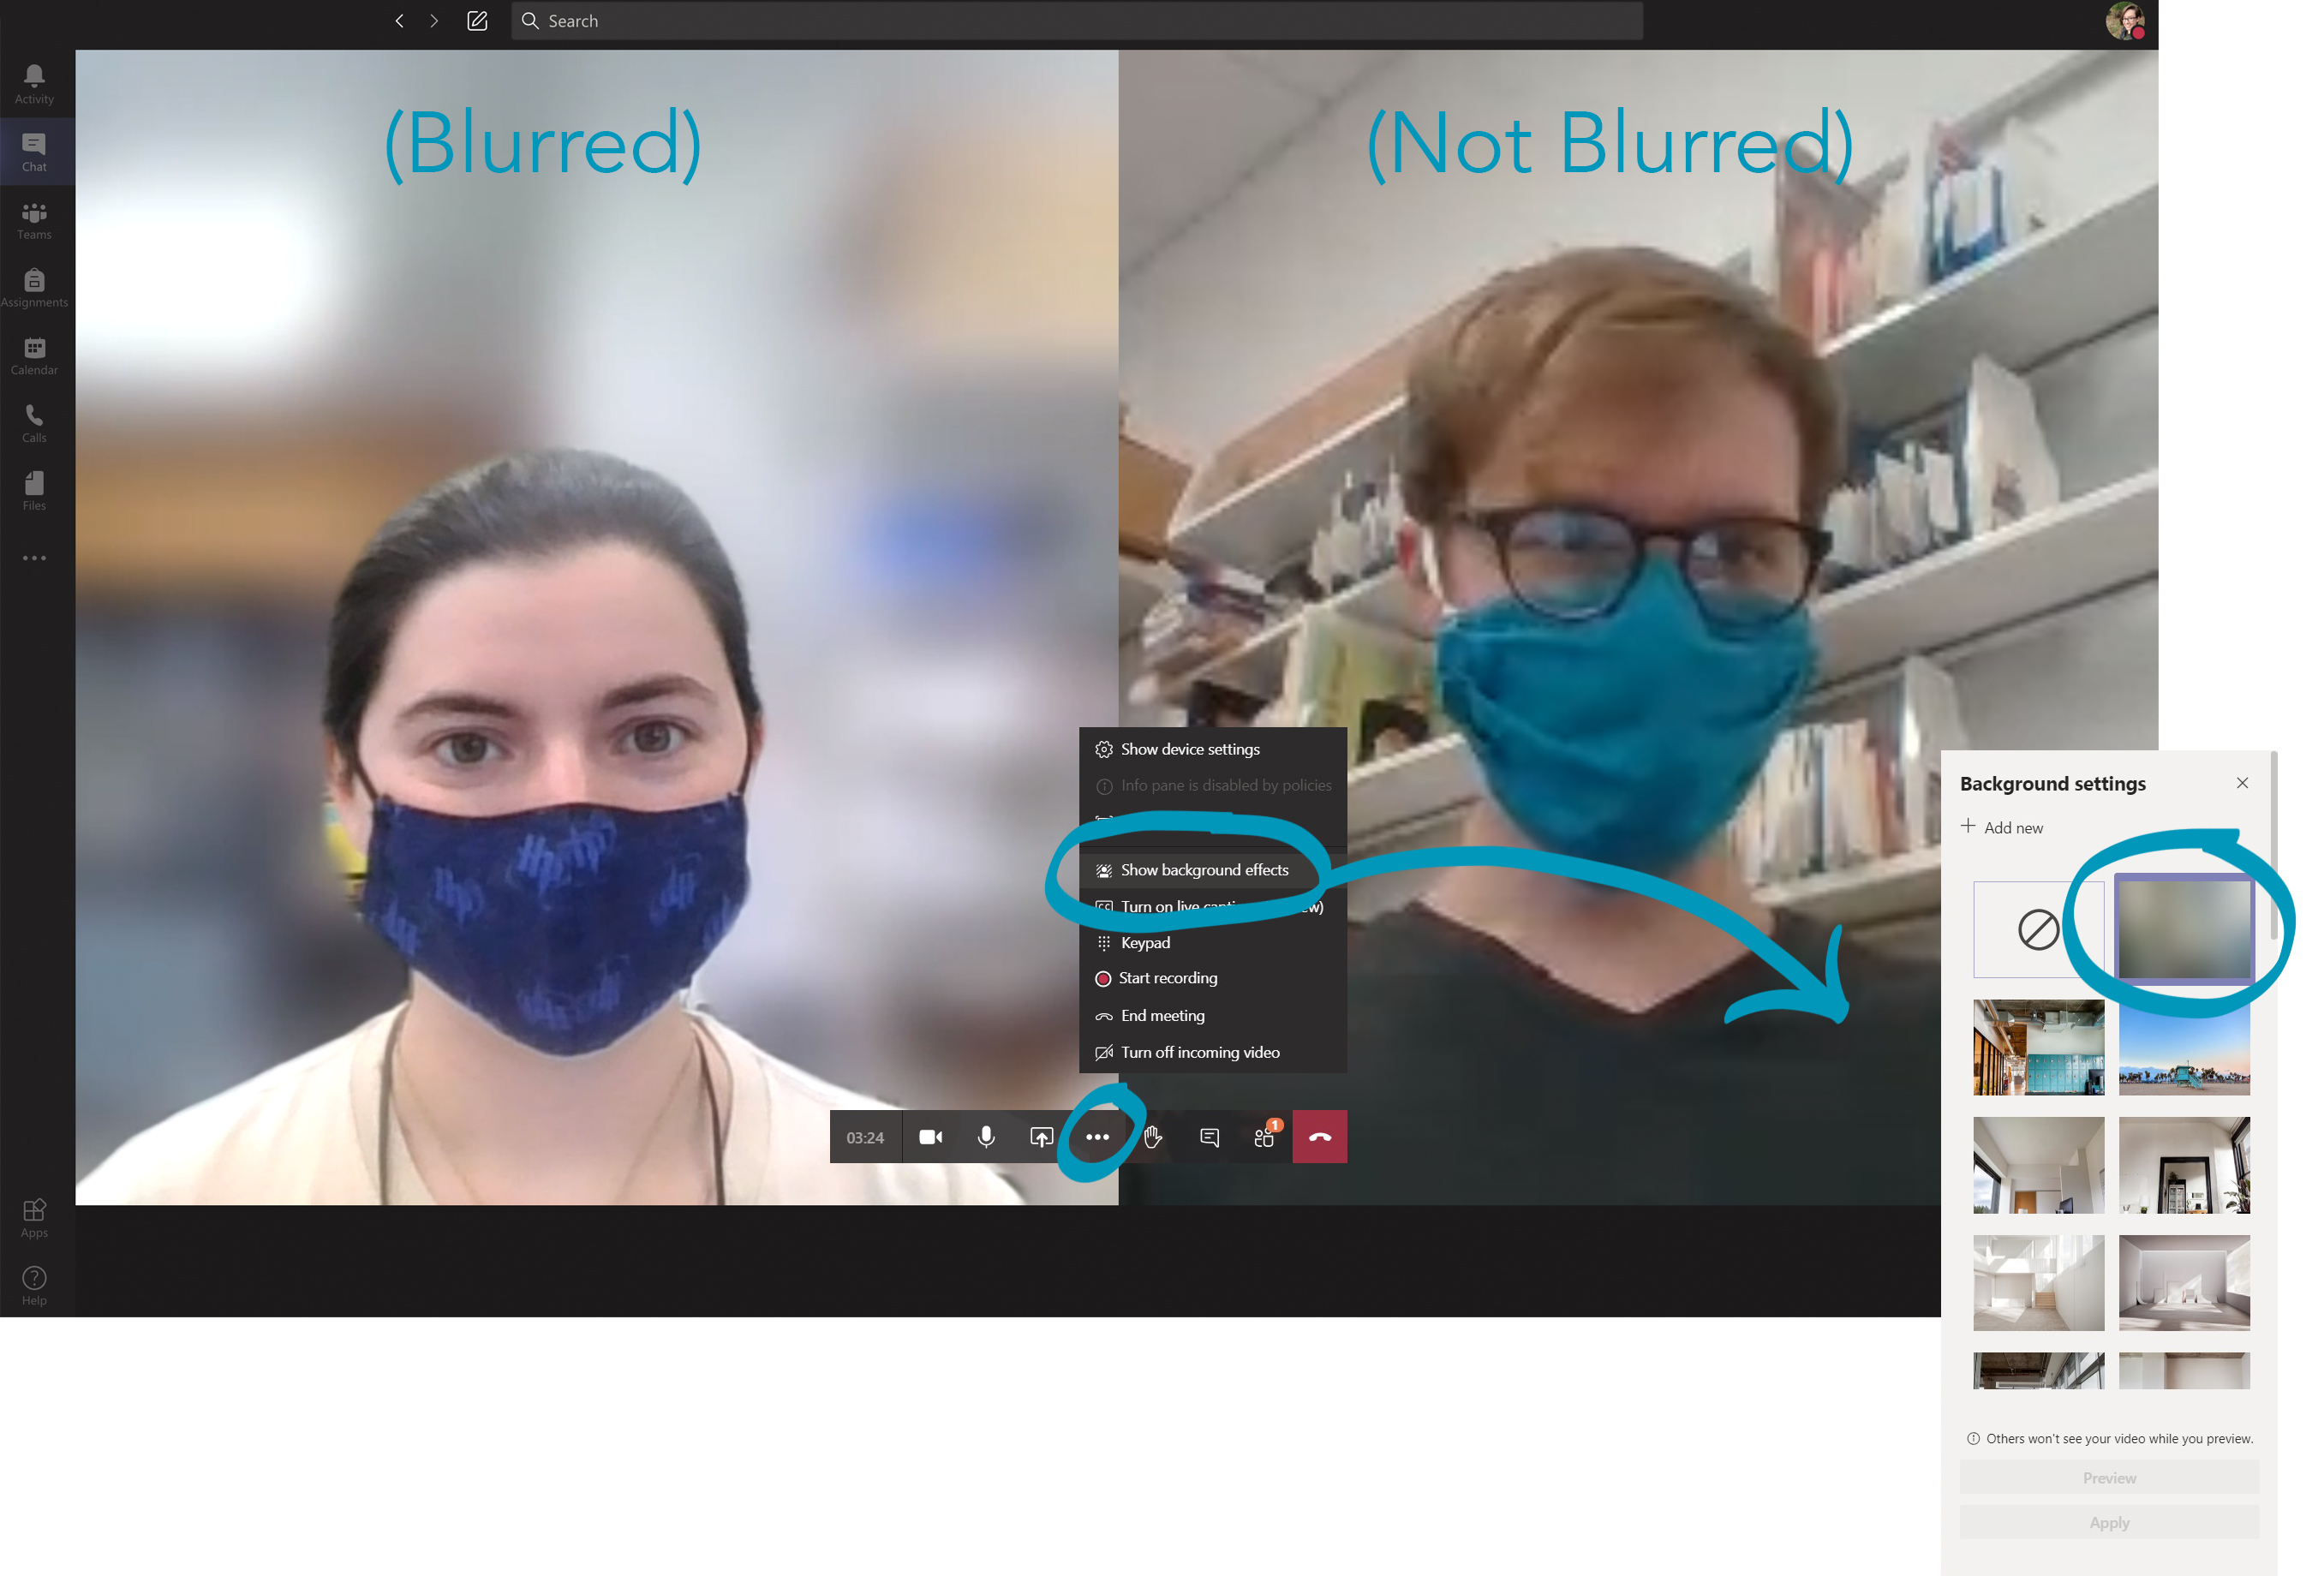
Note: You can only use this feature in the Microsoft Teams client.