When I first took up knitting almost two years ago, I did it because I wanted to learn a new skill.
Kristin Amsden
Knitting has become rather trendy in the last few years and many millennials are taking up knitting needles or crochet hooks and channeling their inner 1940s housewife and posting their creations to social media. Instead of paying $150 for a knitted blanket on Etsy, you can simply learn to make your own now. It’s a wonderful feeling to be able to look at something and think I made that, or have someone ask you where you bought your infinity scarf and be able to proudly tell them that you knitted it yourself.
However, as I began down this knitted path, I discovered that knitting is actually good for your mental health. The rhythm of knitting helps with serotonin release. This is the chemical transmitter that helps regulate anxiety, happiness, and mood. There is also a strong connection between knitting and the feelings of calm and happiness in the brain. Some of the other benefits include:
• Lowered blood pressure
• Slowed onset of dementia
• Distraction from chronic pain
• Increased sense of well-being
• Reduced loneliness and isolation
As someone who has struggled with depression and anxiety for most of my life, learning these scientifically proven facts has given me a new found appreciation for the skill. When I knit, I feel my anxiety decrease and my body relax. I gain a sense of happiness and pride from watching a single strand of yarn be transformed into something entirely different simply through the creation of stitches. In addition, I know that every time I learn a new stitch or take on a new pattern that I’m increasing the neural pathways in my brain which leads to increased memory and recall.
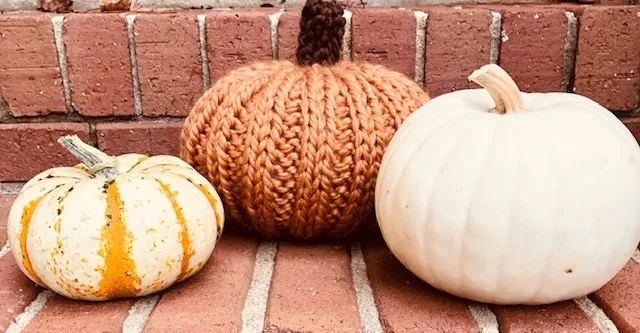
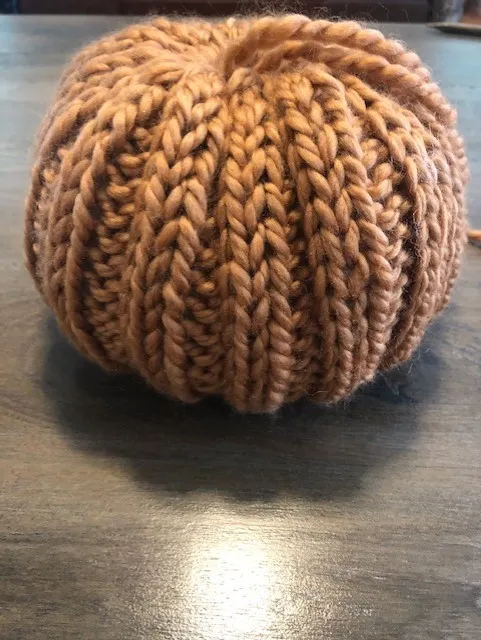
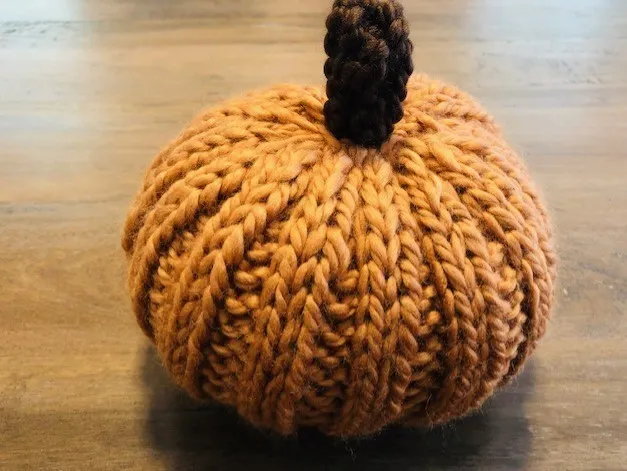
Up until now, I’ve only knitted scarves, but I decided to take on something new in celebration of fall (my favorite time of year) - pumpkins. It was something different and relatively straight forward, but it combined many skills I had previously learned, and I have to say, I’m quite proud of how it turned out for my first attempt.
For more knitting ideas, be sure to check out Richland Library’s catalog.
To make your own knitted pumpkin you will need:
• 1 skein of super bulky yarn in orange (or white or grey depending on what color you want your pumpkin to be) – I used Cozy Wool Laine Douillette in Harvest (found at Michaels)
• 1 skein of super bulky yarn in brown (for stem) – I used Cozy Wool Laine Douillette in Chocolate (found at Michaels)
• Size US 15 (24 inch) circular knitting needles
• Size US 15 straight needles (to make the stem)
• Poly-Fil or stuffing material of choice
• Jumbo tapestry needles (you will need two if you are also making the stem)
• Yarn Scissors
Level - Beginner
Gauge - Not important for this pattern
Instructions
To create your pumpkin:
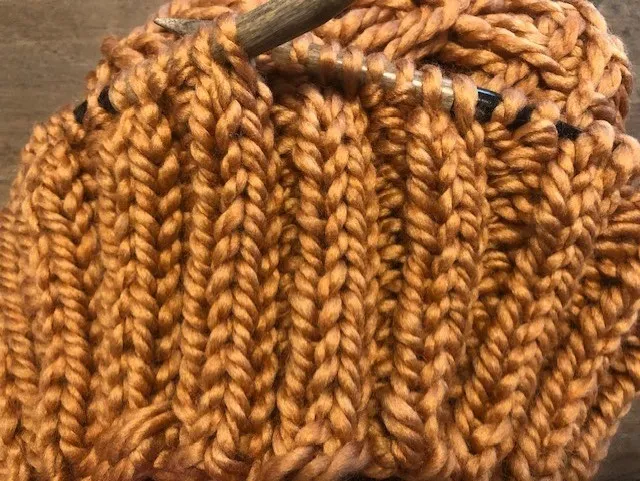
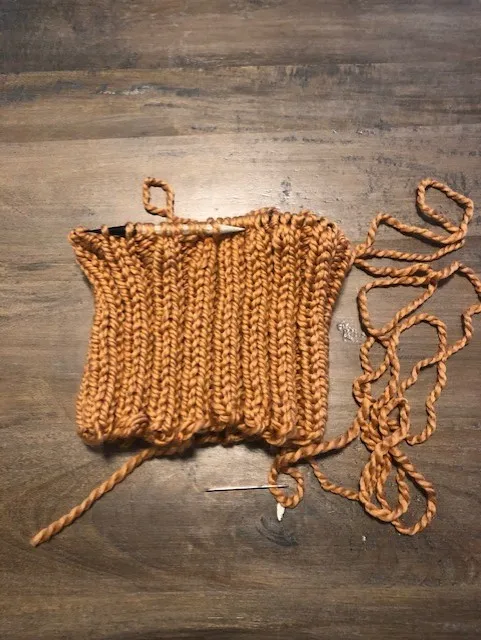
Using your US 15 (24") circular needles, cast on 68 stitches. I used the long tail cast on method.
Ensure that none of your stitches are twisted on the needles and that they are all facing inward.
Place a stitch marker and join in the round. Knit 2, purl 2 for all stitches. This creates a 2 by 2 rib pattern that will create the ridges on the pumpkin.
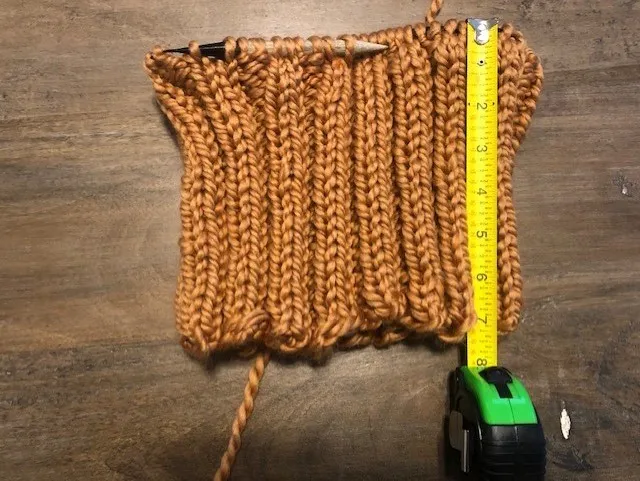
Continue to knit 2, purl 2 until the length measures 7" (or however tall you would like your pumpkin to be).
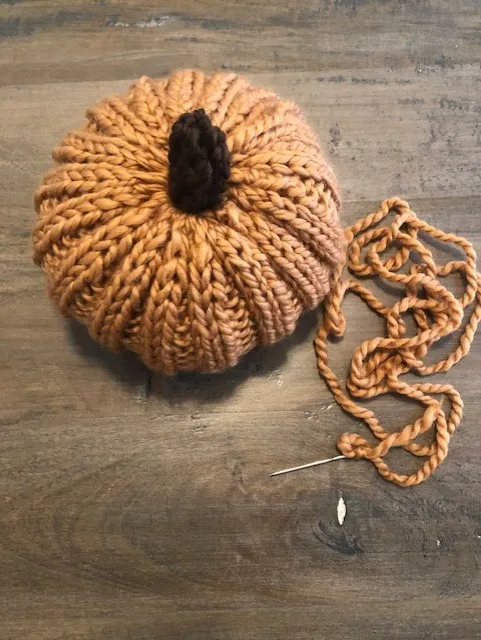
Do not bind off. Take your yarn and measure out enough yarn to go full around your pumpkin at least twice. Cut your yarn from the yarn ball and thread it onto your jumbo tapestry needle.
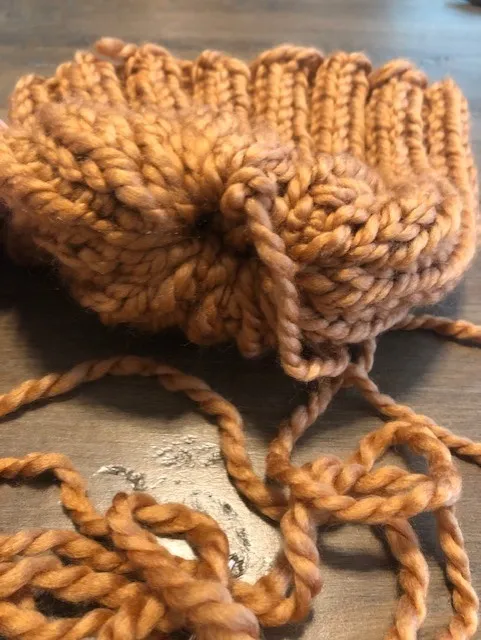
Then, pull your yarn through your stitches and pull them off your needle. Once all your stitches are off your needle and threaded onto your yarn, start to pull on the yarn tail. This will start to pull in the edges on one side. Once you have it pulled tight, flip it inside out. Your yarn tail will be pulled up through the bottom.
Using your tapestry needle and yarn tail, create a running stitch on the top row of stitches. When you have gone about ¾ of the way around, start to stuff your pumpkin. You want a good amount of stuffing inside to keep a nice shape. However, don't overstuff it. This will cause your ribbing to pull apart and the white stuffing to show through.
Once you have stuffed your pumpkin, complete your running stitch and then pull on the yarn tail to pull the sides of your pumpkin in. Turn your pumpkin upside down, so the top now becomes the bottom.
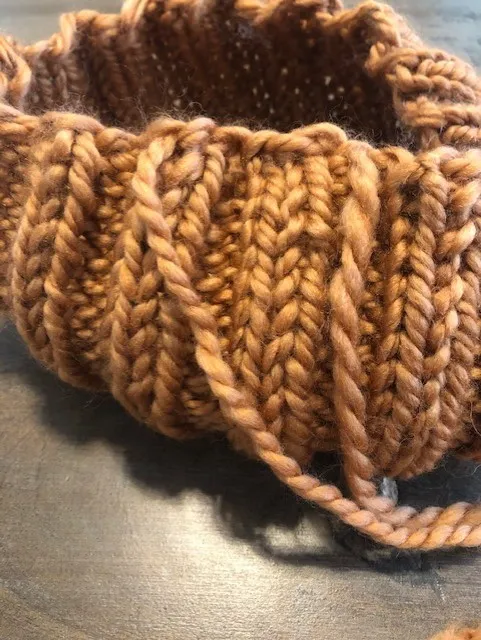
If you are going to knit your own stem, leave your yarn tail attached and do not remove your tapestry needle.
If you are going to use a twig for a stem, go ahead and remove your tapestry needle and weave in your ends.
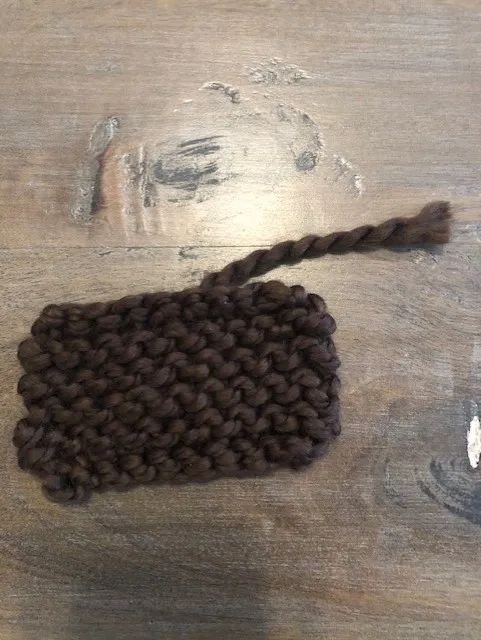
To create your pumpkin stem:
Using size US 15 straight knitting needles, cast on 10 stitches.
Knit all the way across each row for 10 rows.
Bind off, but leave a long tail.
Pull the two long sides together to create the stem shape.
Using your second jumbo tapestry needle and the long yarn tail, stitch the two long sides together. Weave in any loose ends.
Insert your stem into the hole left in the top of the pumpkin. You can make the stem as long or as short as you want, depending on how far you stuff it into the pumpkin.
Using the leftover yarn and tapestry needle from making the pumpkin, stitch the stem into the top of the pumpkin and weave in any loose ends.