Here's a fun and simple craft you can do with your family or friends this winter! Make them into ornaments for your family tree or surprise your coworkers with a surprise gift for their workspace!
MATERIALS
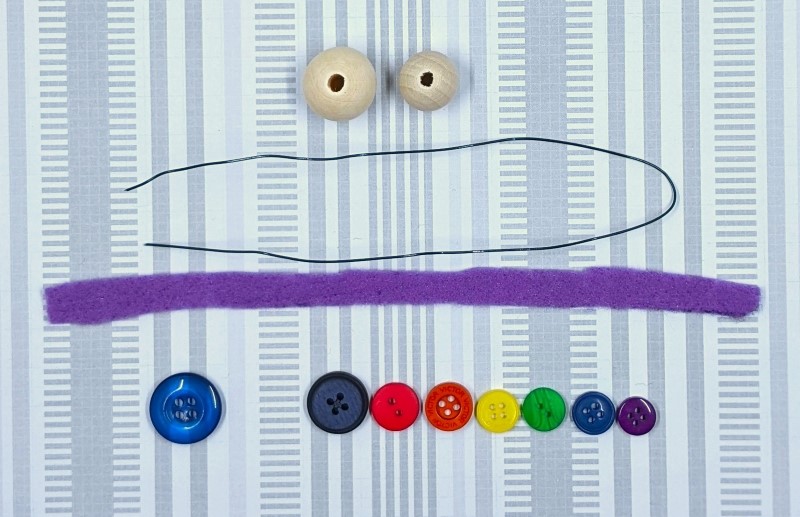
- Two beads (pictured here are a 20mm and a 16mm wooden bead)
- 12" of wire (floral wire, craft wire, wire dug out from an old toolkit) gently folded in half, as shown
- 8" piece of felt cut into a thin strip as in the photo (or you can use fabric or lace or ribbon)
- 4 to 8 buttons (1 for the base and 3 to 7 for the hat)
TOOLS
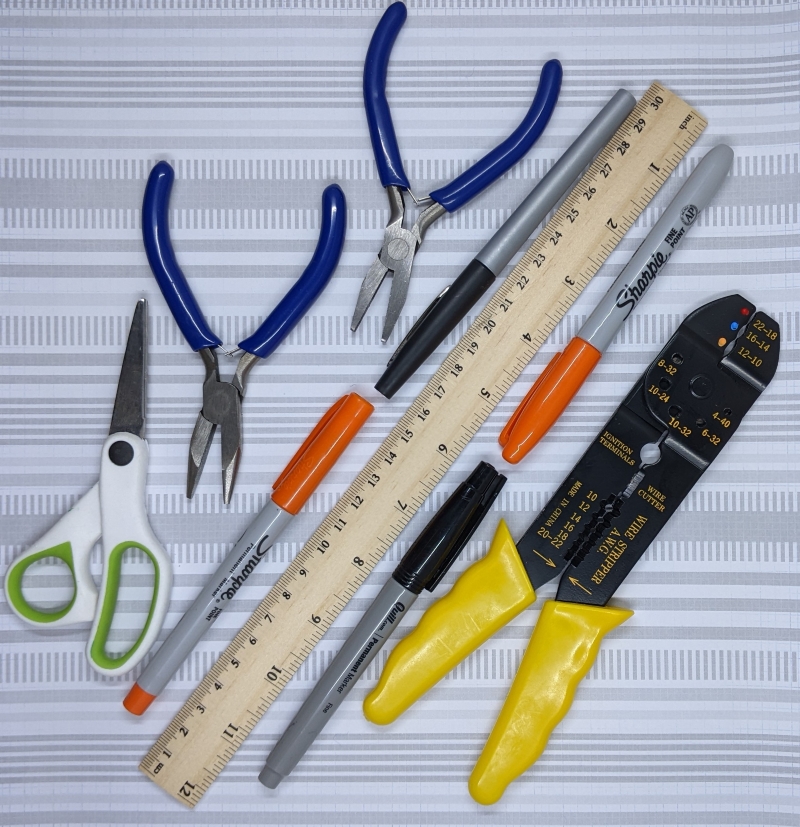
- Scissors
- Two pairs of pliers
- Ruler
- Permanent markers
- Wire cutters
OPTIONAL MATERIALS
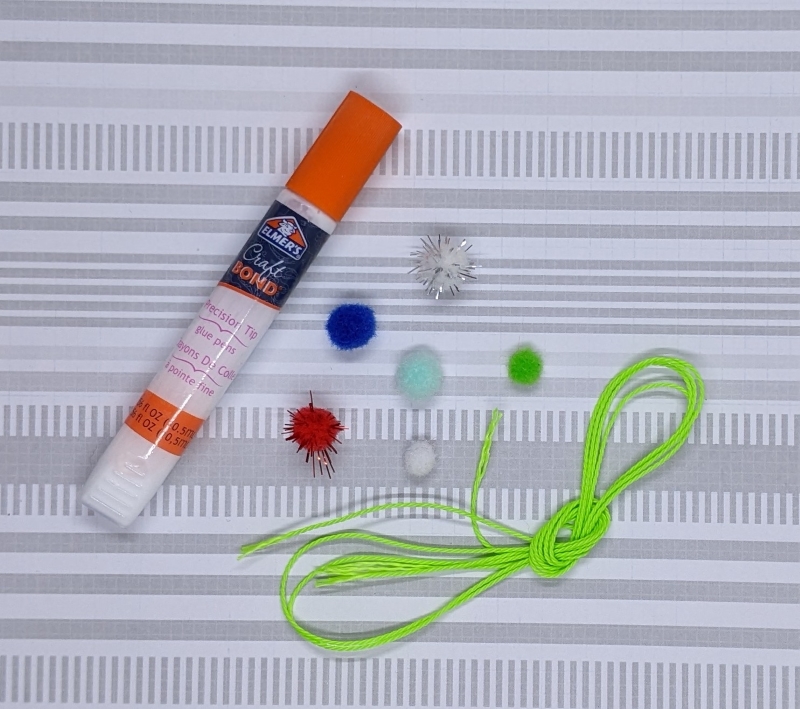
- Craft glue (or hot glue or superglue)
- Tiny and small pompoms (or other embellishments)
- Waxed cord (or thread or yarn)
STEP 1 : Add the button you're going to use as the base to the wire
TIP : If you would prefer for your ornament to stand instead of hang, make sure the base button you choose has a lip or indentation. If you slide it on the wire with the lip/indent facing down, the wire will lie snuggly within and not make it wobble.
CONSIDER : Would you like your base button to act as boots or ground? If boots, choose a button that's only slightly larger than the bigger bead and in the shoe color of your choice. If ground, what kind of ground? Choose a large (much larger than the bigger bead) white or blue button for snow or ice; green or brown for grass or dirt.
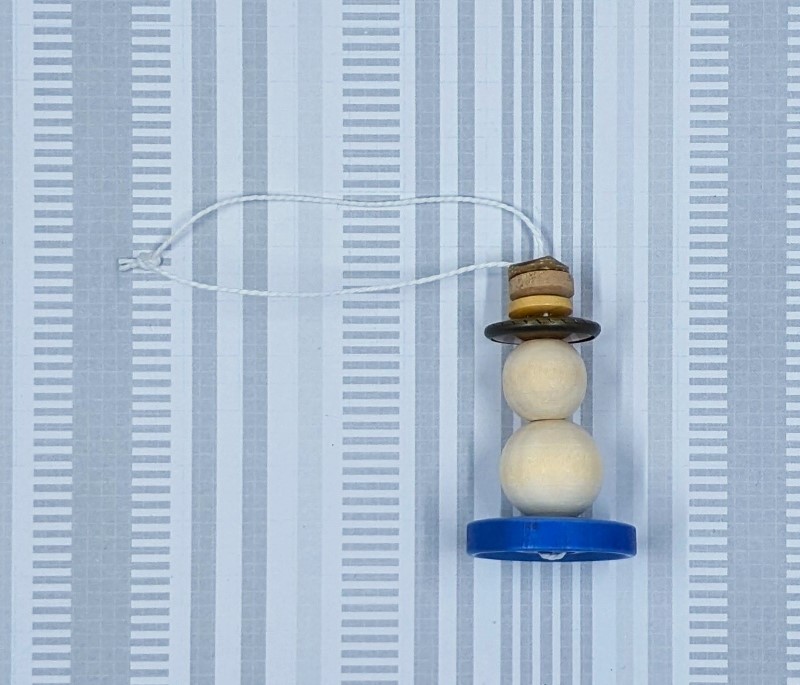
You also don't have to use wire! You can use string, thread, yarn, or waxed cord to make these! It's the same technique as using the wire. See the example below...
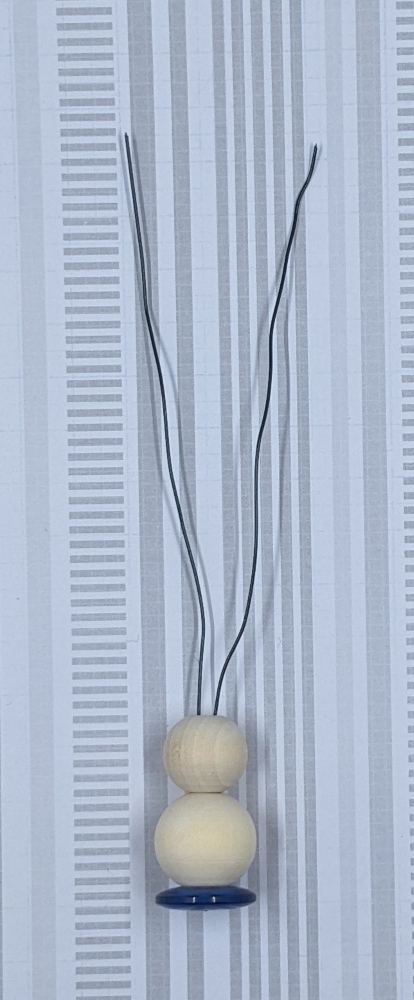
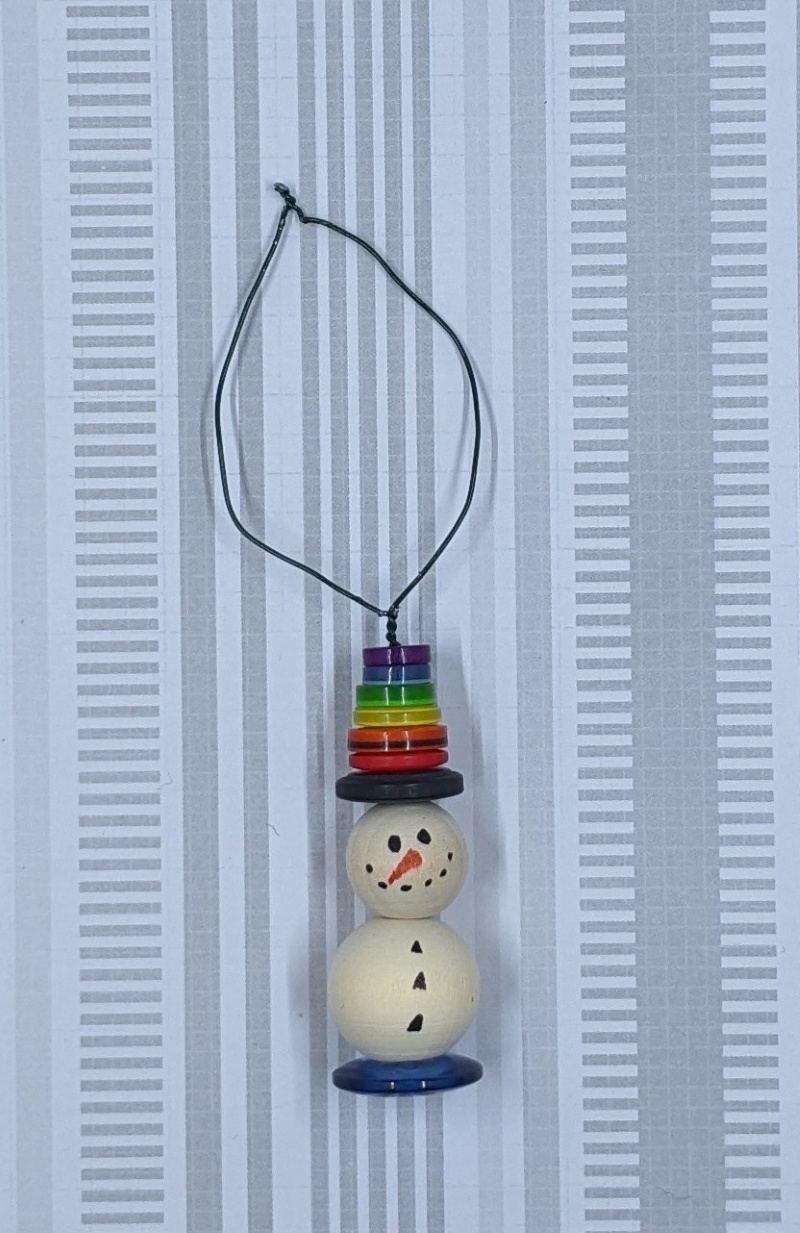
STEP 2 : Add both beads to the wire, with the larger bead next to the button
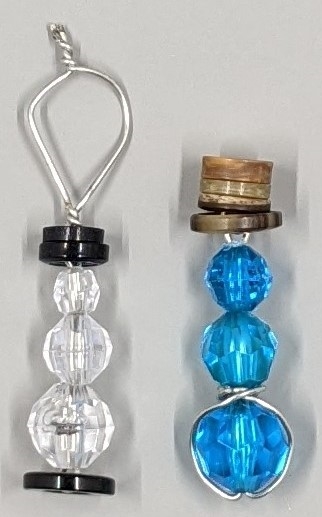
You don't need to use these exact beads. As long as you have one larger and one smaller bead, you can make these snowpeople! See the examples below, using tiny buttons and plastic craft beads.

STEP 3 : Add the buttons for the hat
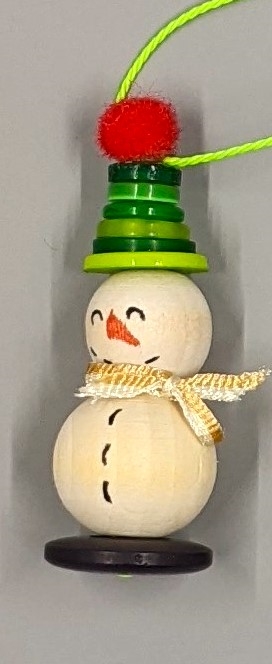
To make a TOP HAT or BOWLER HAT : Use a slightly larger button as the brim of the hat; it gets strung first. You can use 3 (bowler hat) or 5 (top hat) more buttons that are slightly smaller but relatively equal in size to each other as the crown of the hat.
To make a BEANIE or BOBBLE HAT : Use 5 or 6 buttons that gradually get smaller in size and top with a mini pompom. (See example below)

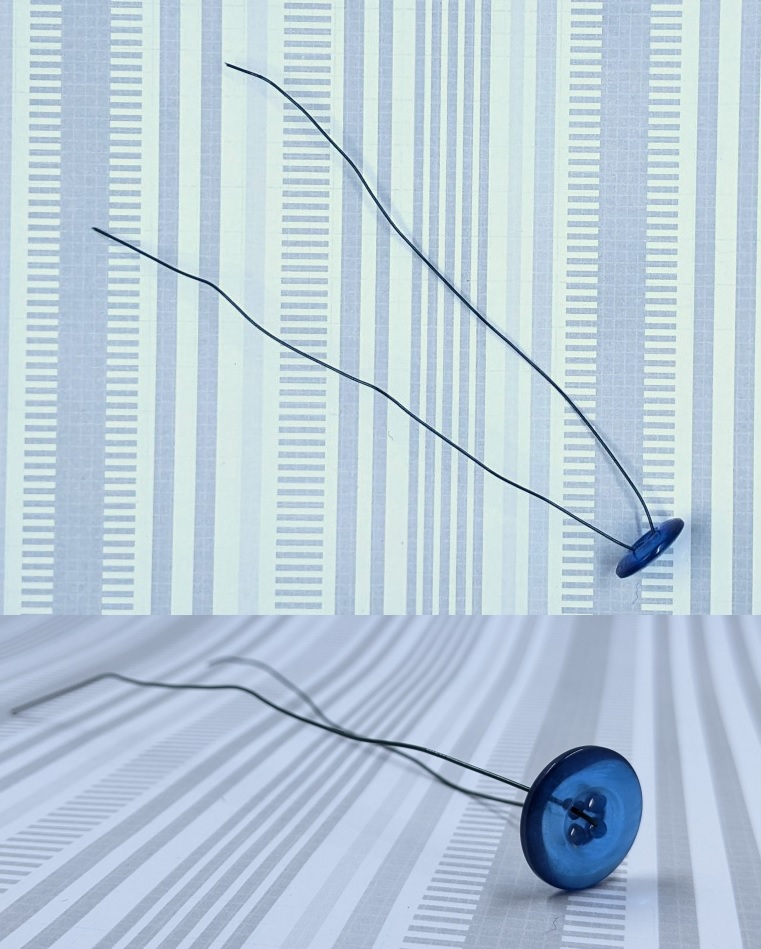
STEP 4 : Twist the wire to hold everything in place
Slide all the buttons and beads down as far as they'll go. Grip both wires about 1/4" above the top button with a pair of pliers. Use a very firm grip to keep them in place. Grasp your snowperson in your other hand and twist the entire thing around until the wires have twisted around themselves (as in the inset photo above).
If you don't want a hanging ornament, you can cut the wire off just above the twist and fold the wire down flat against the top button - skip to step 6.
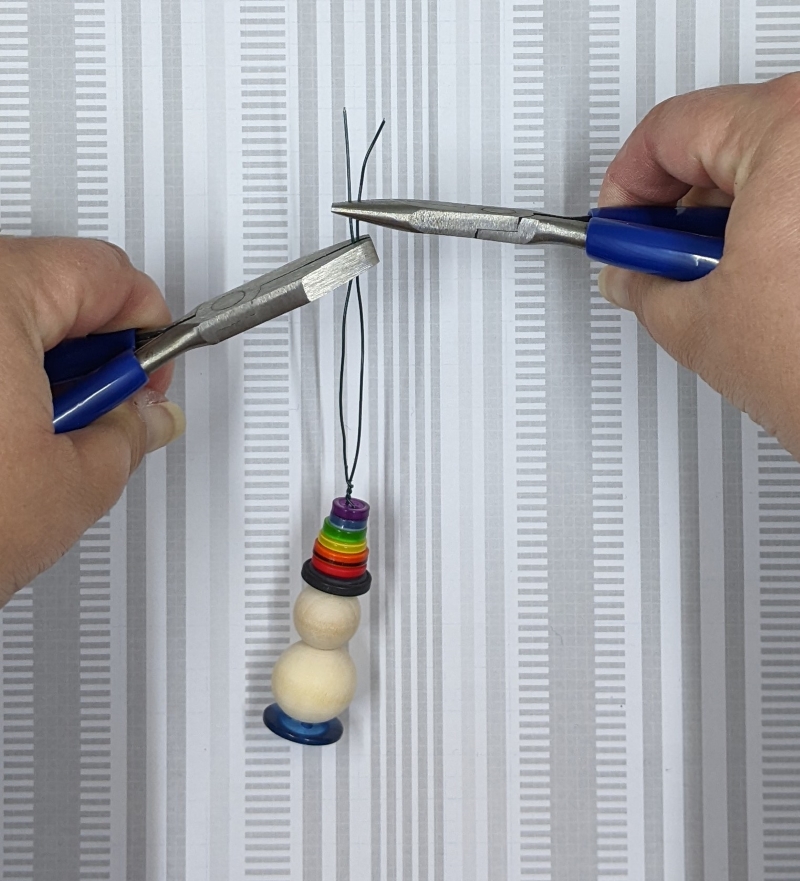
STEP 5 : Make the loop by twisting the wires together near the top
Determine how big you want the loop to be. Grip the wires with one pair of pliers just above where you want your loop to end. Use another pair of pliers to grip the wires about 1/4" above that. Use the top pair of pliers to twist the wires around each other. Cut off any excess wire using the wire cutters.
STEP 6 : Add the face and buttons using a permanent marker
Draw whatever kind of face you'd like!
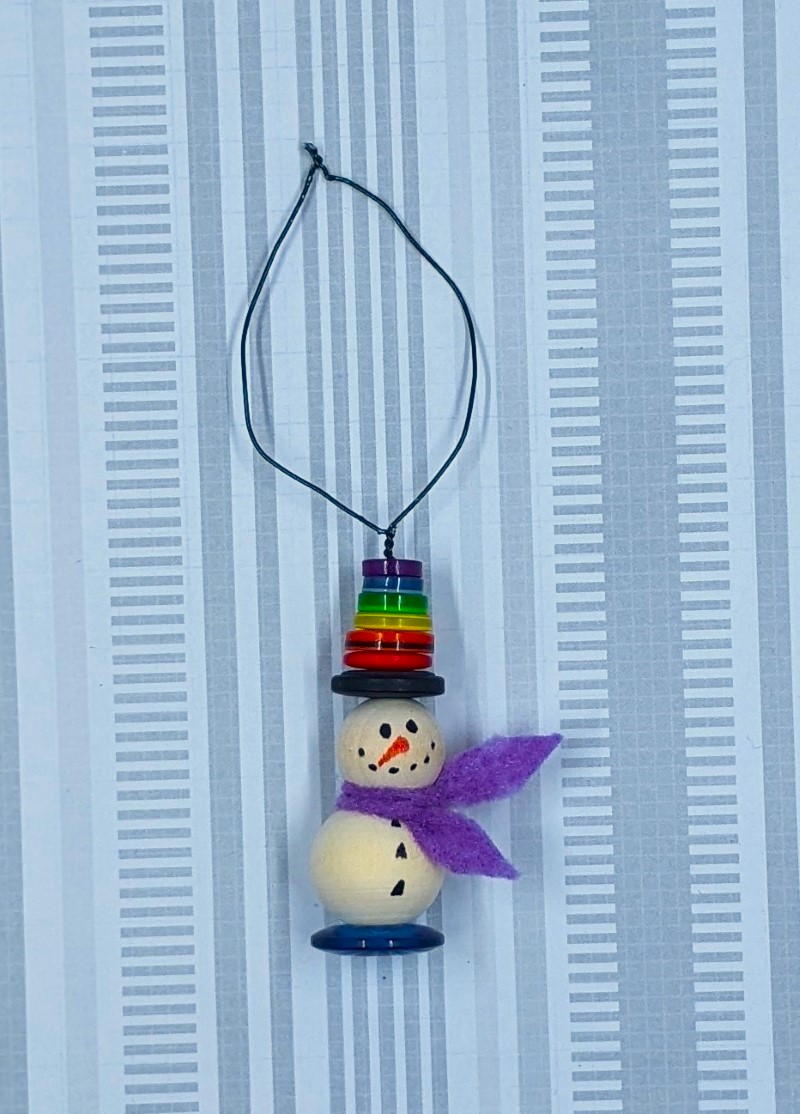
STEP 7 : Make a scarf by tying a thin strip of felt between the two beads
Tie a simple overhand knot (the first part of tying your shoelaces!) between the two beads. Trim the ends into points (or round them off or whatever shape you like!). You could also use ribbon, lace, yarn, or strips of fabric to make the scarf.

Now you can make a whole crowd of snowpeople!
Come visit us at Richland Library Ballentine for our Monday Morning Makers (for ages 6 and up) and our Adults Get Crafty (for adults) programs to learn more crafts!