Are you looking for a fun Spring craft to expose your preschooler to shapes, visual patterns, and bee bee-havior? This simple craft may be the solution!
Supplies needed:
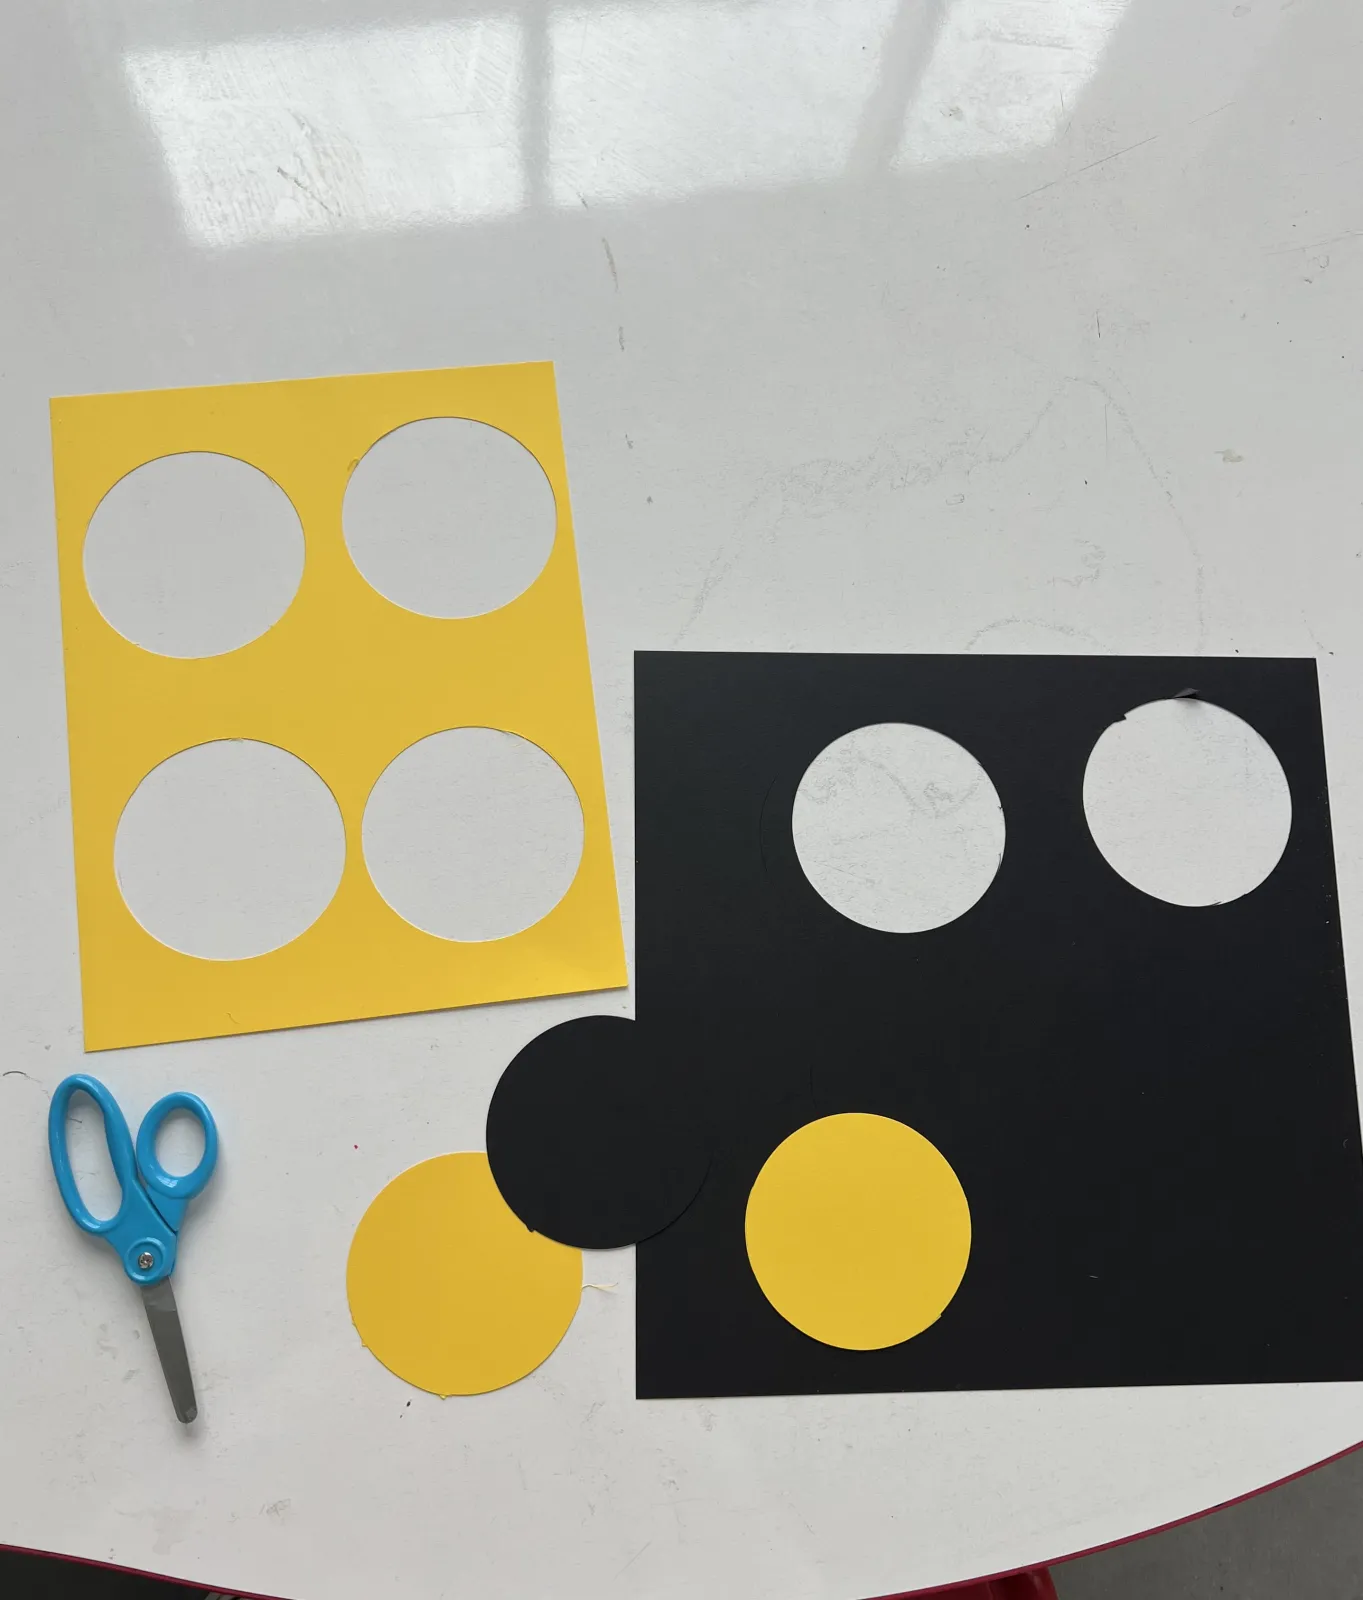
Yellow cardstock or construction paper
Black cardstock or construction paper
Cardstock or construction paper, color of your choice (for wings)
Scissors
Glue
Popsicle sticks
Marker
Glass/cup*
*You can use a glass/cup to trace a circle, but this is an optional step!
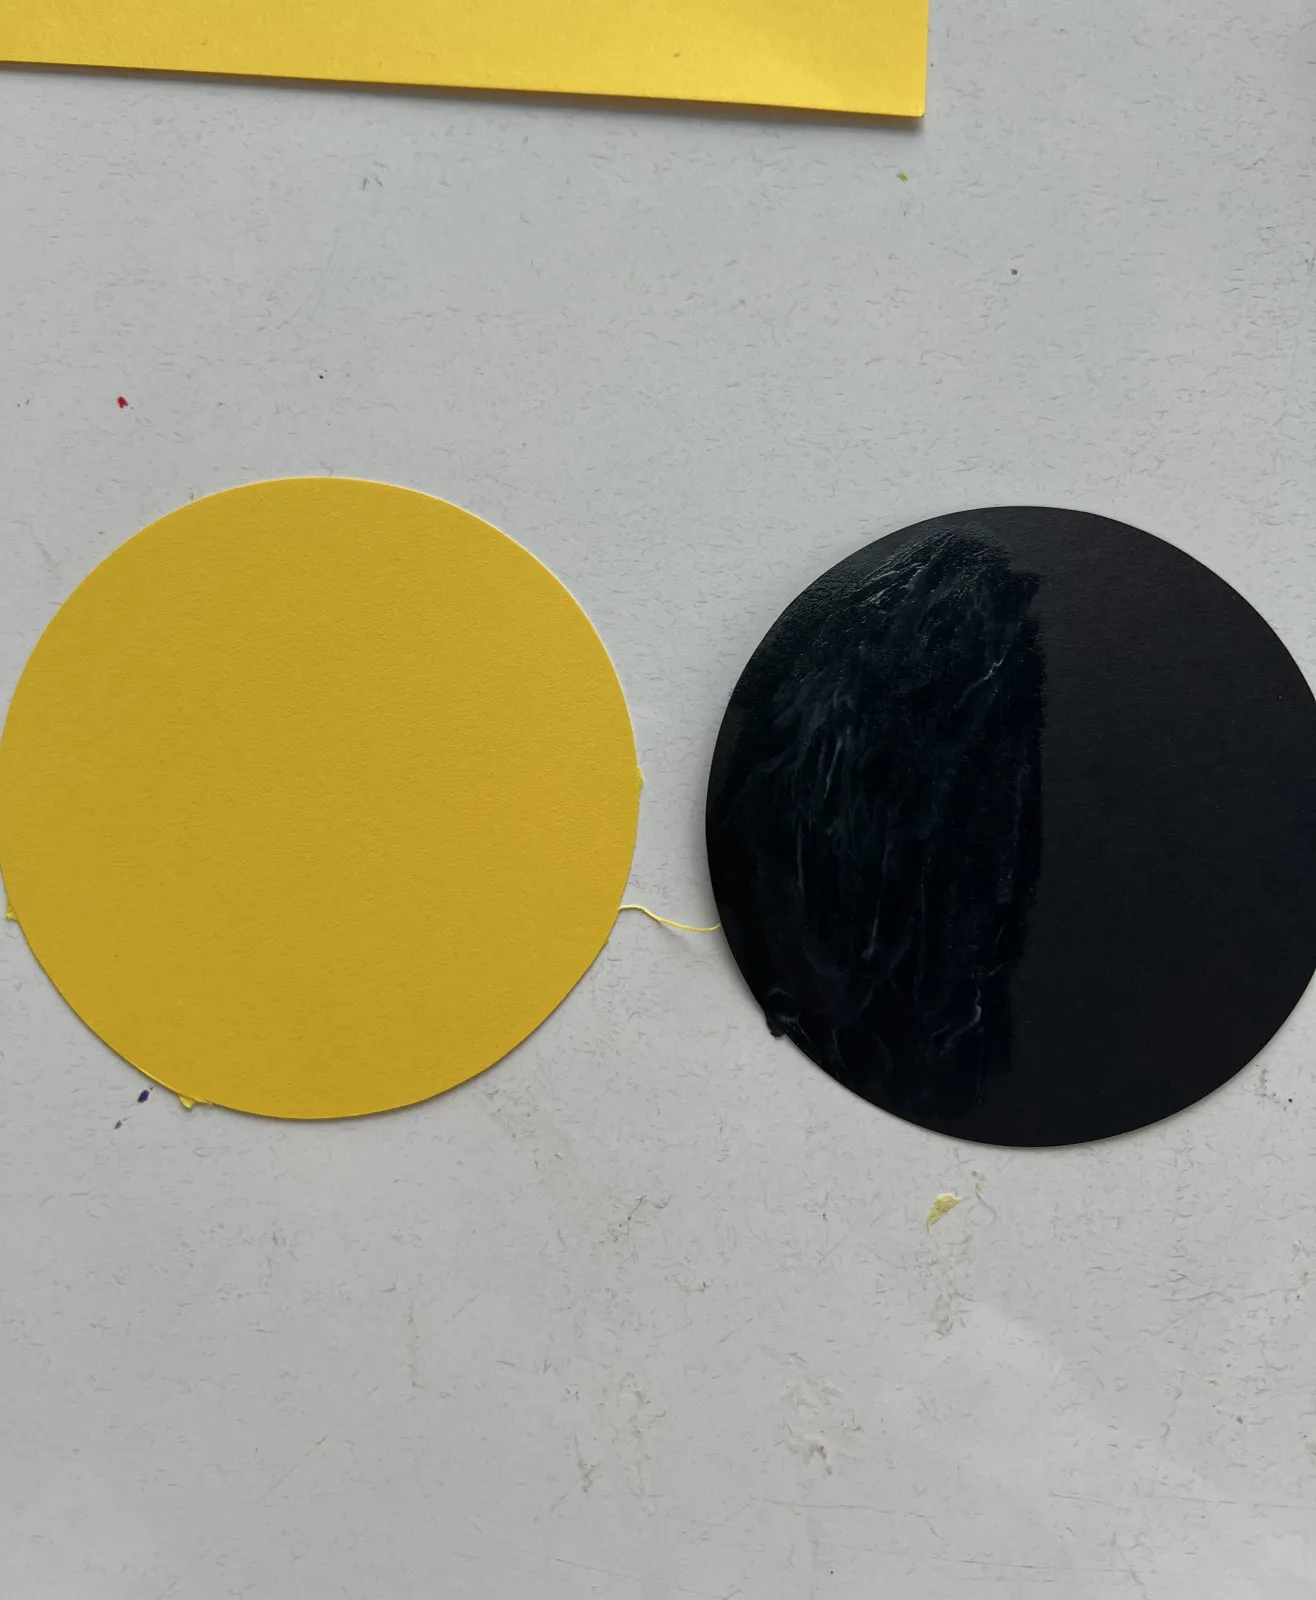
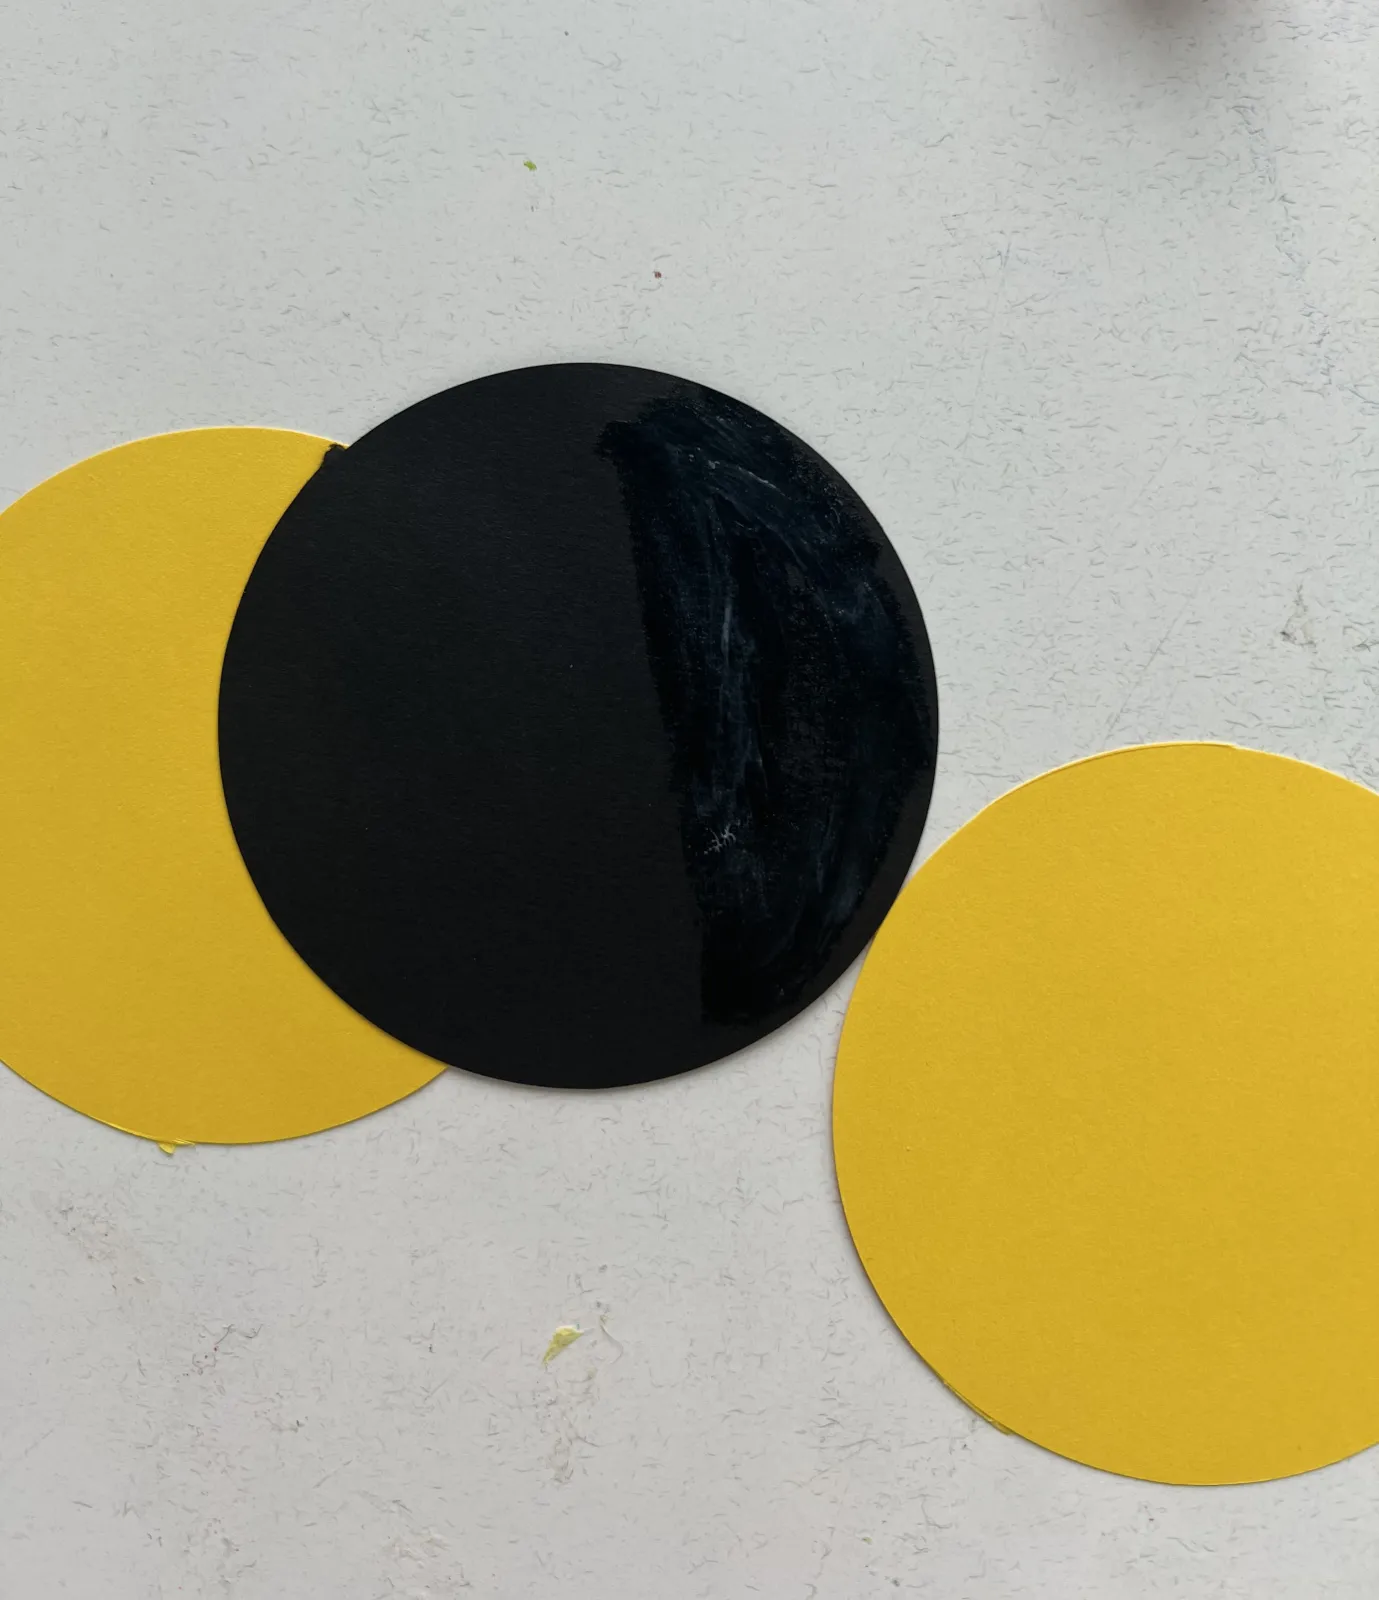
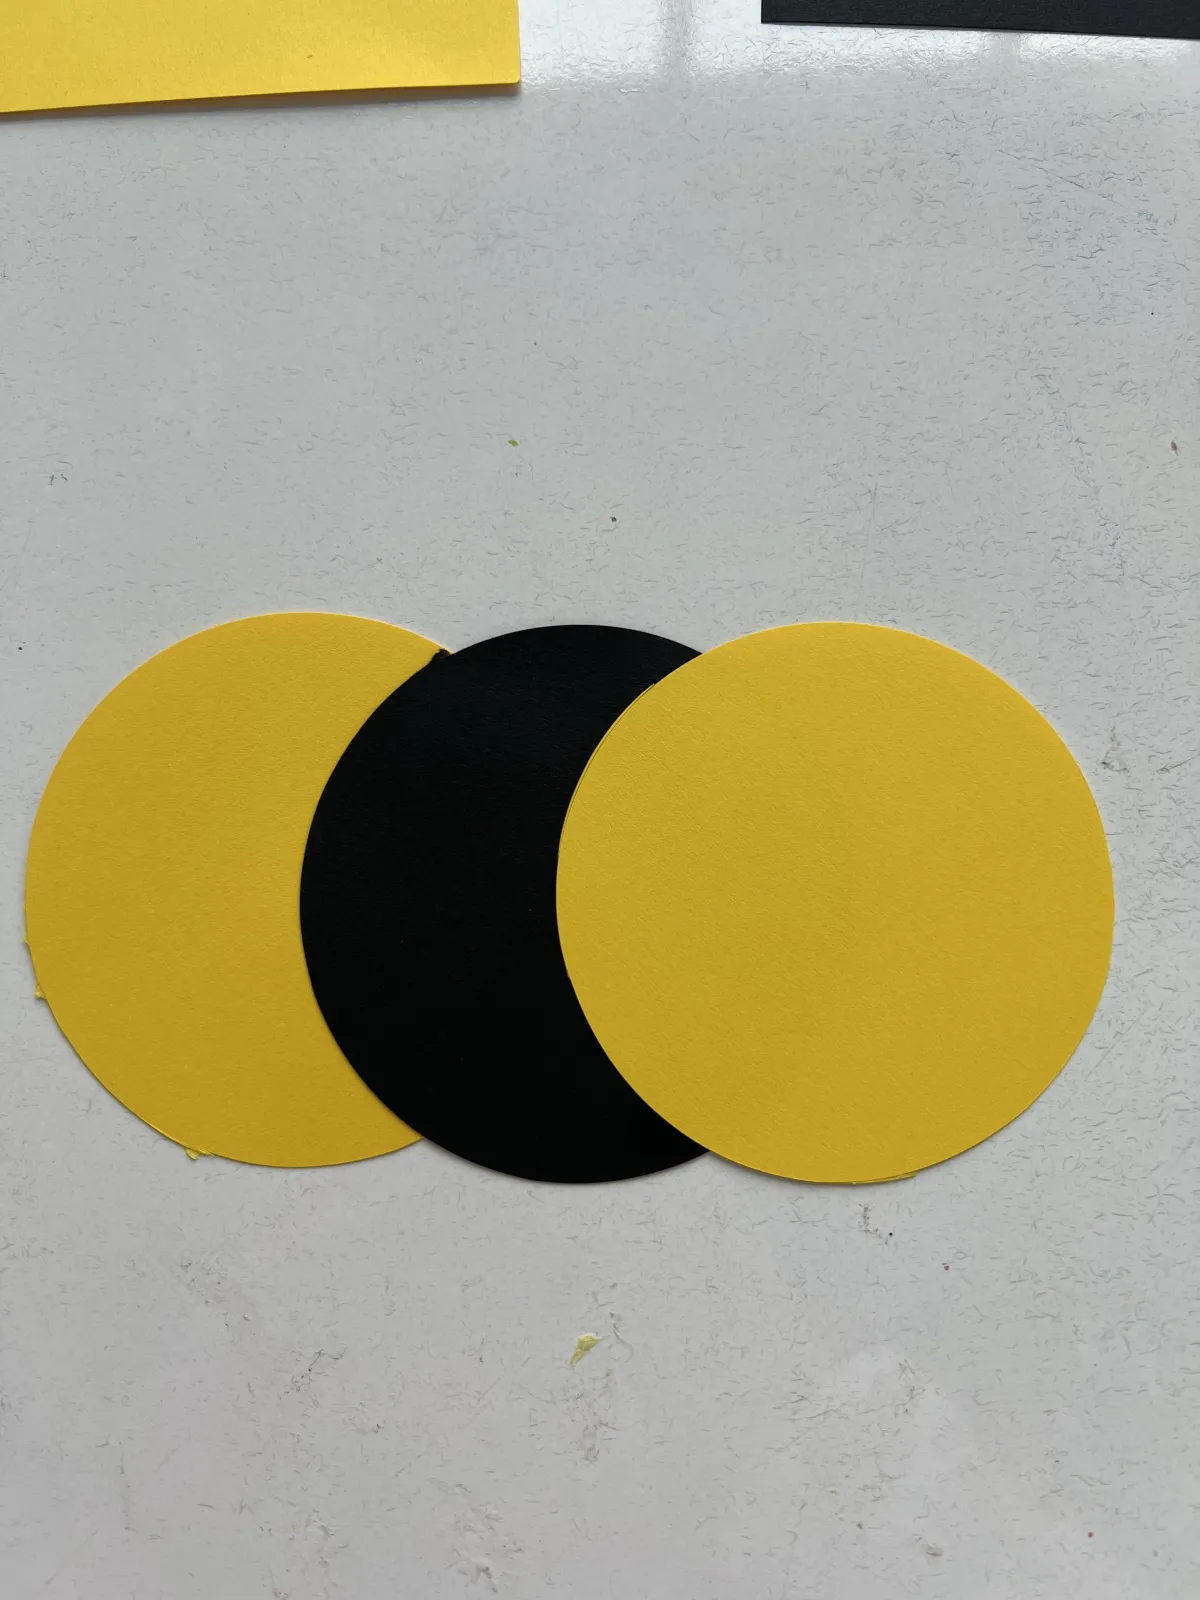
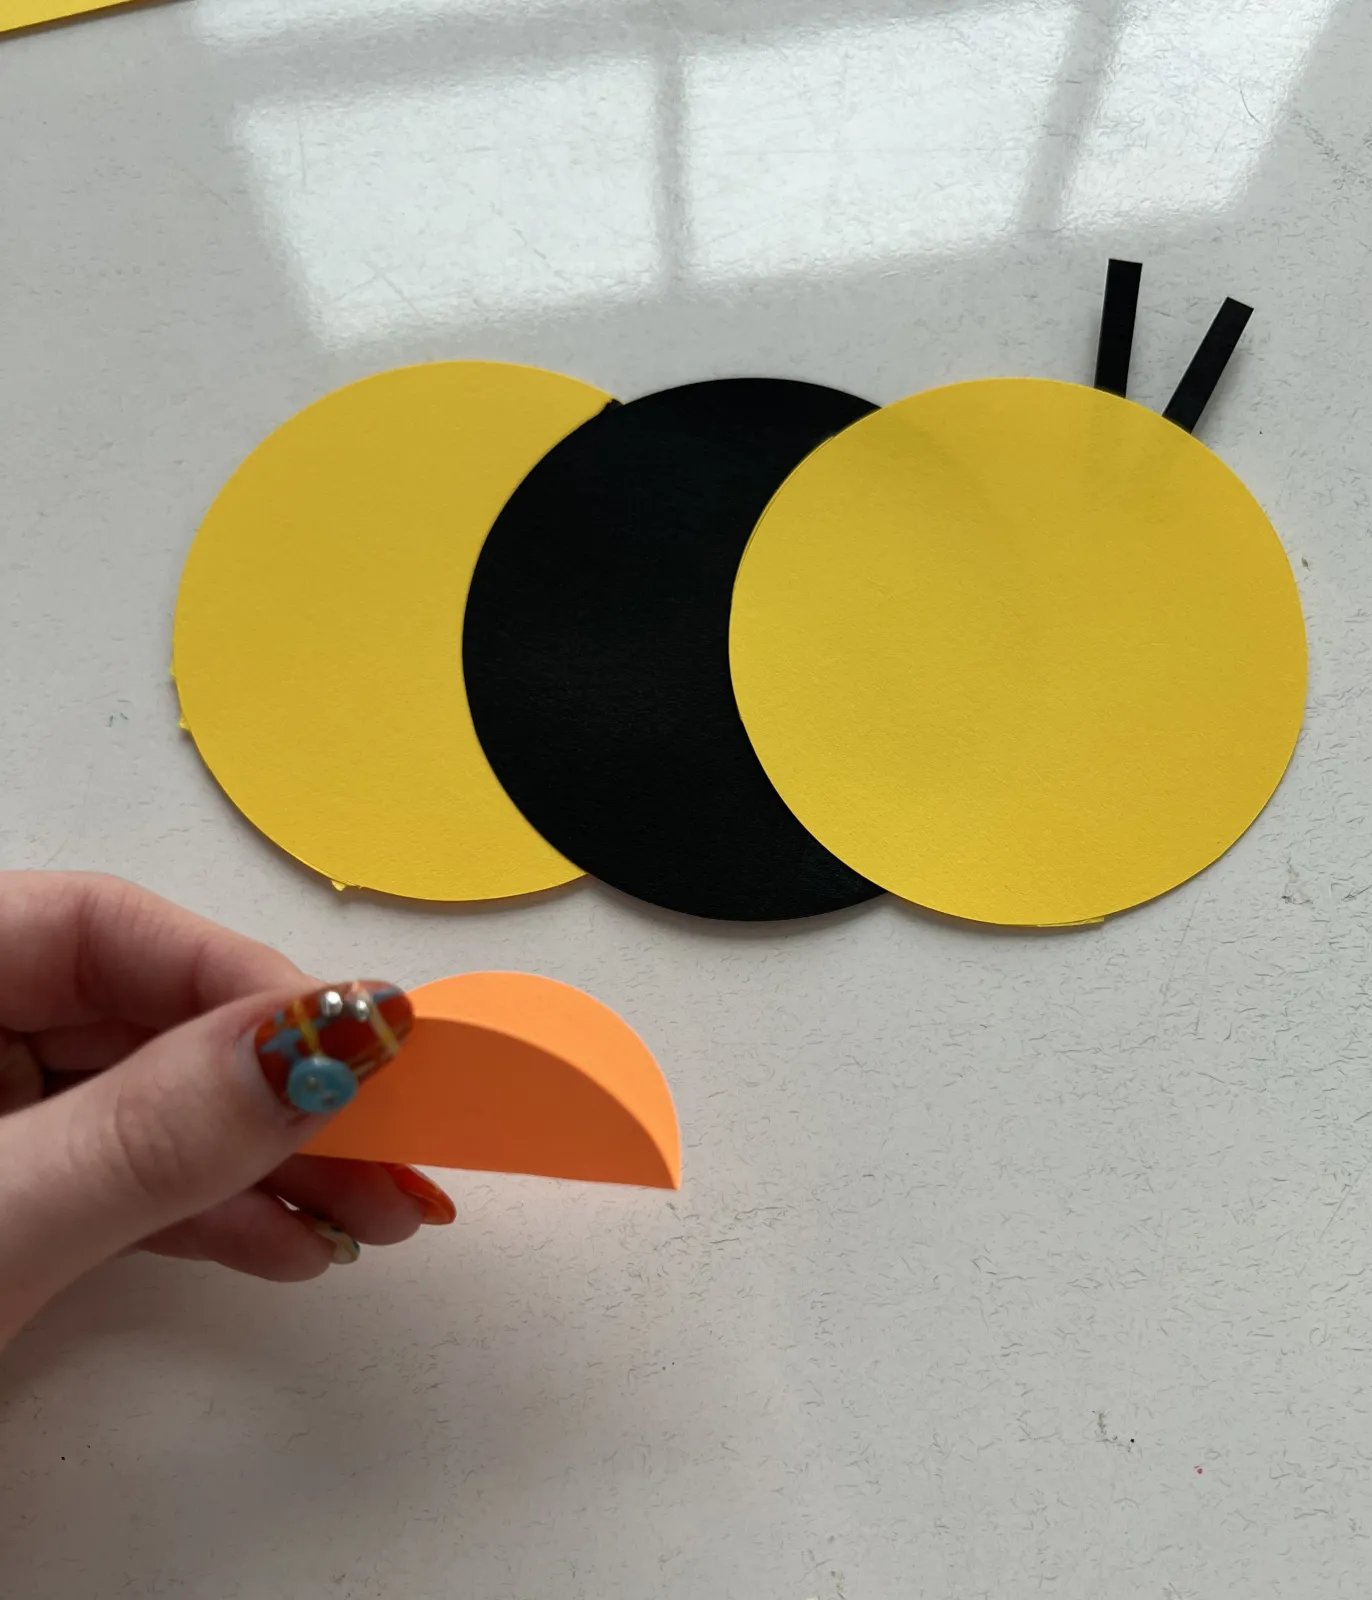
Once you have your supplies gathered, you can begin by cutting circles out of your cardstock or construction paper—you will need two yellow circles and one black circle.
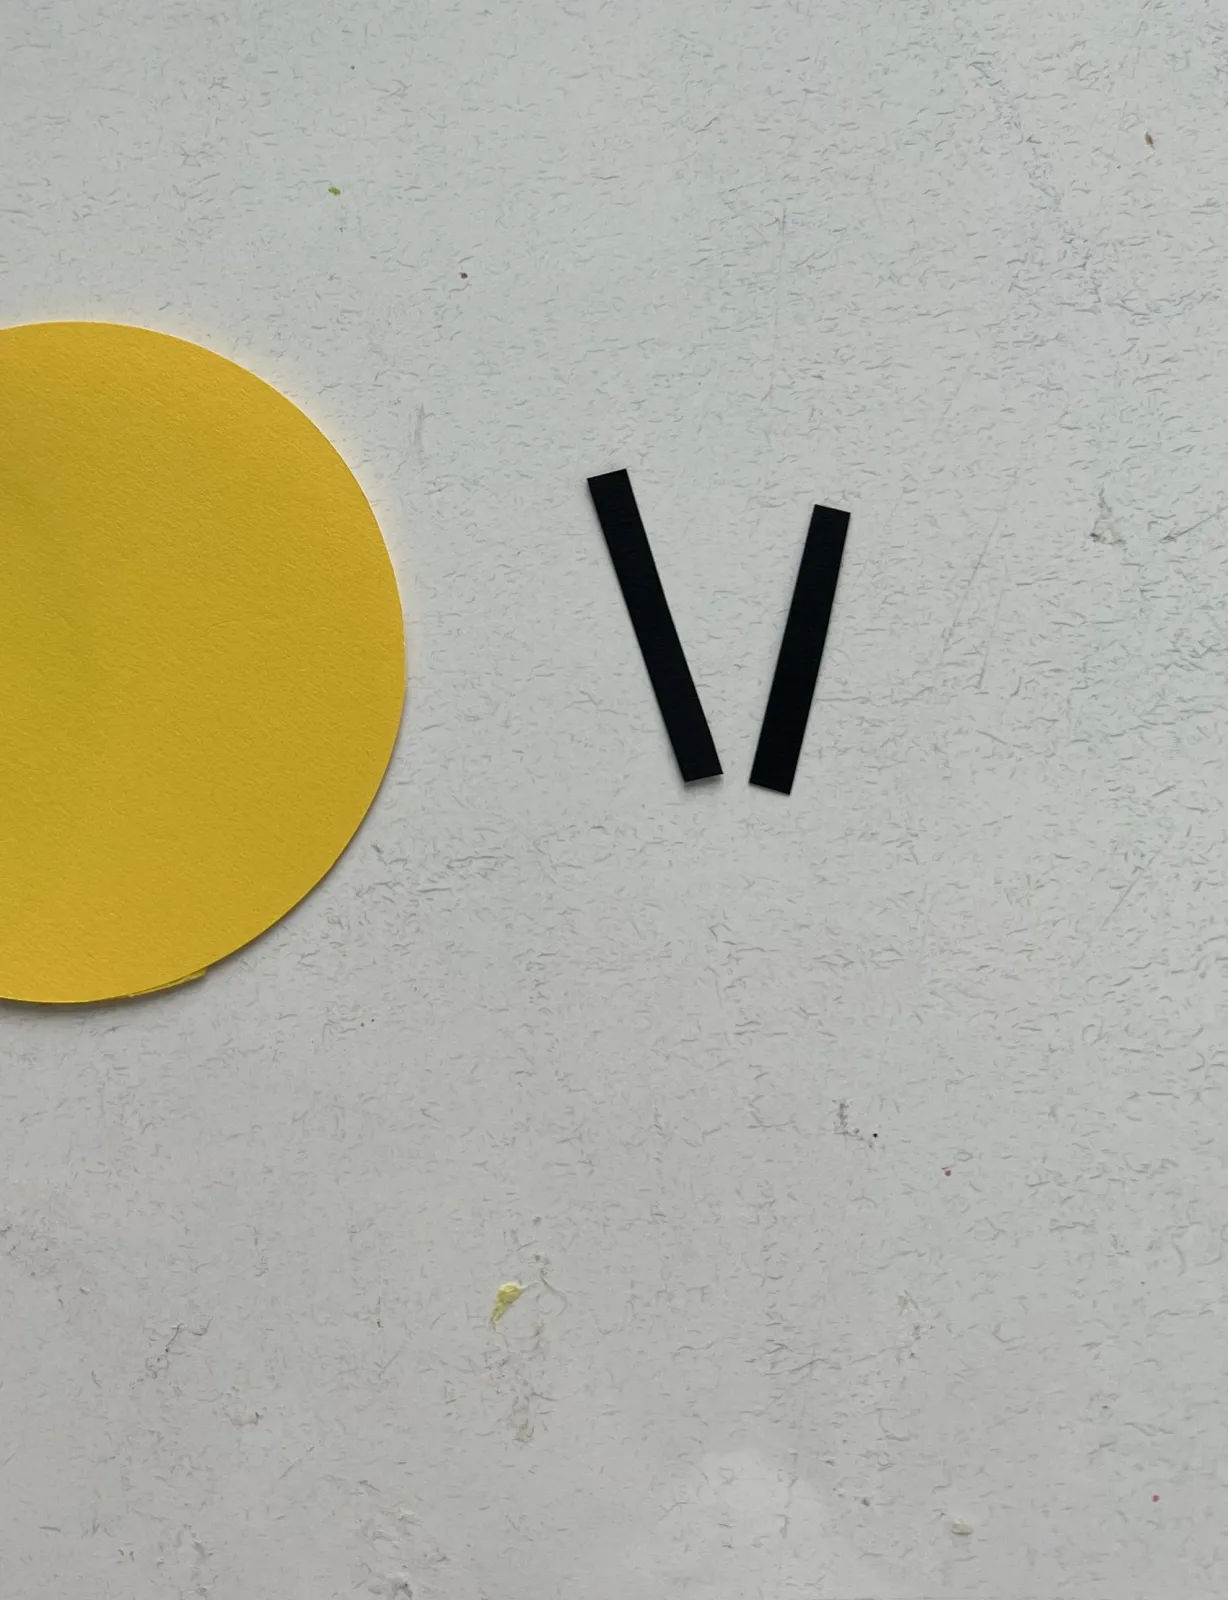
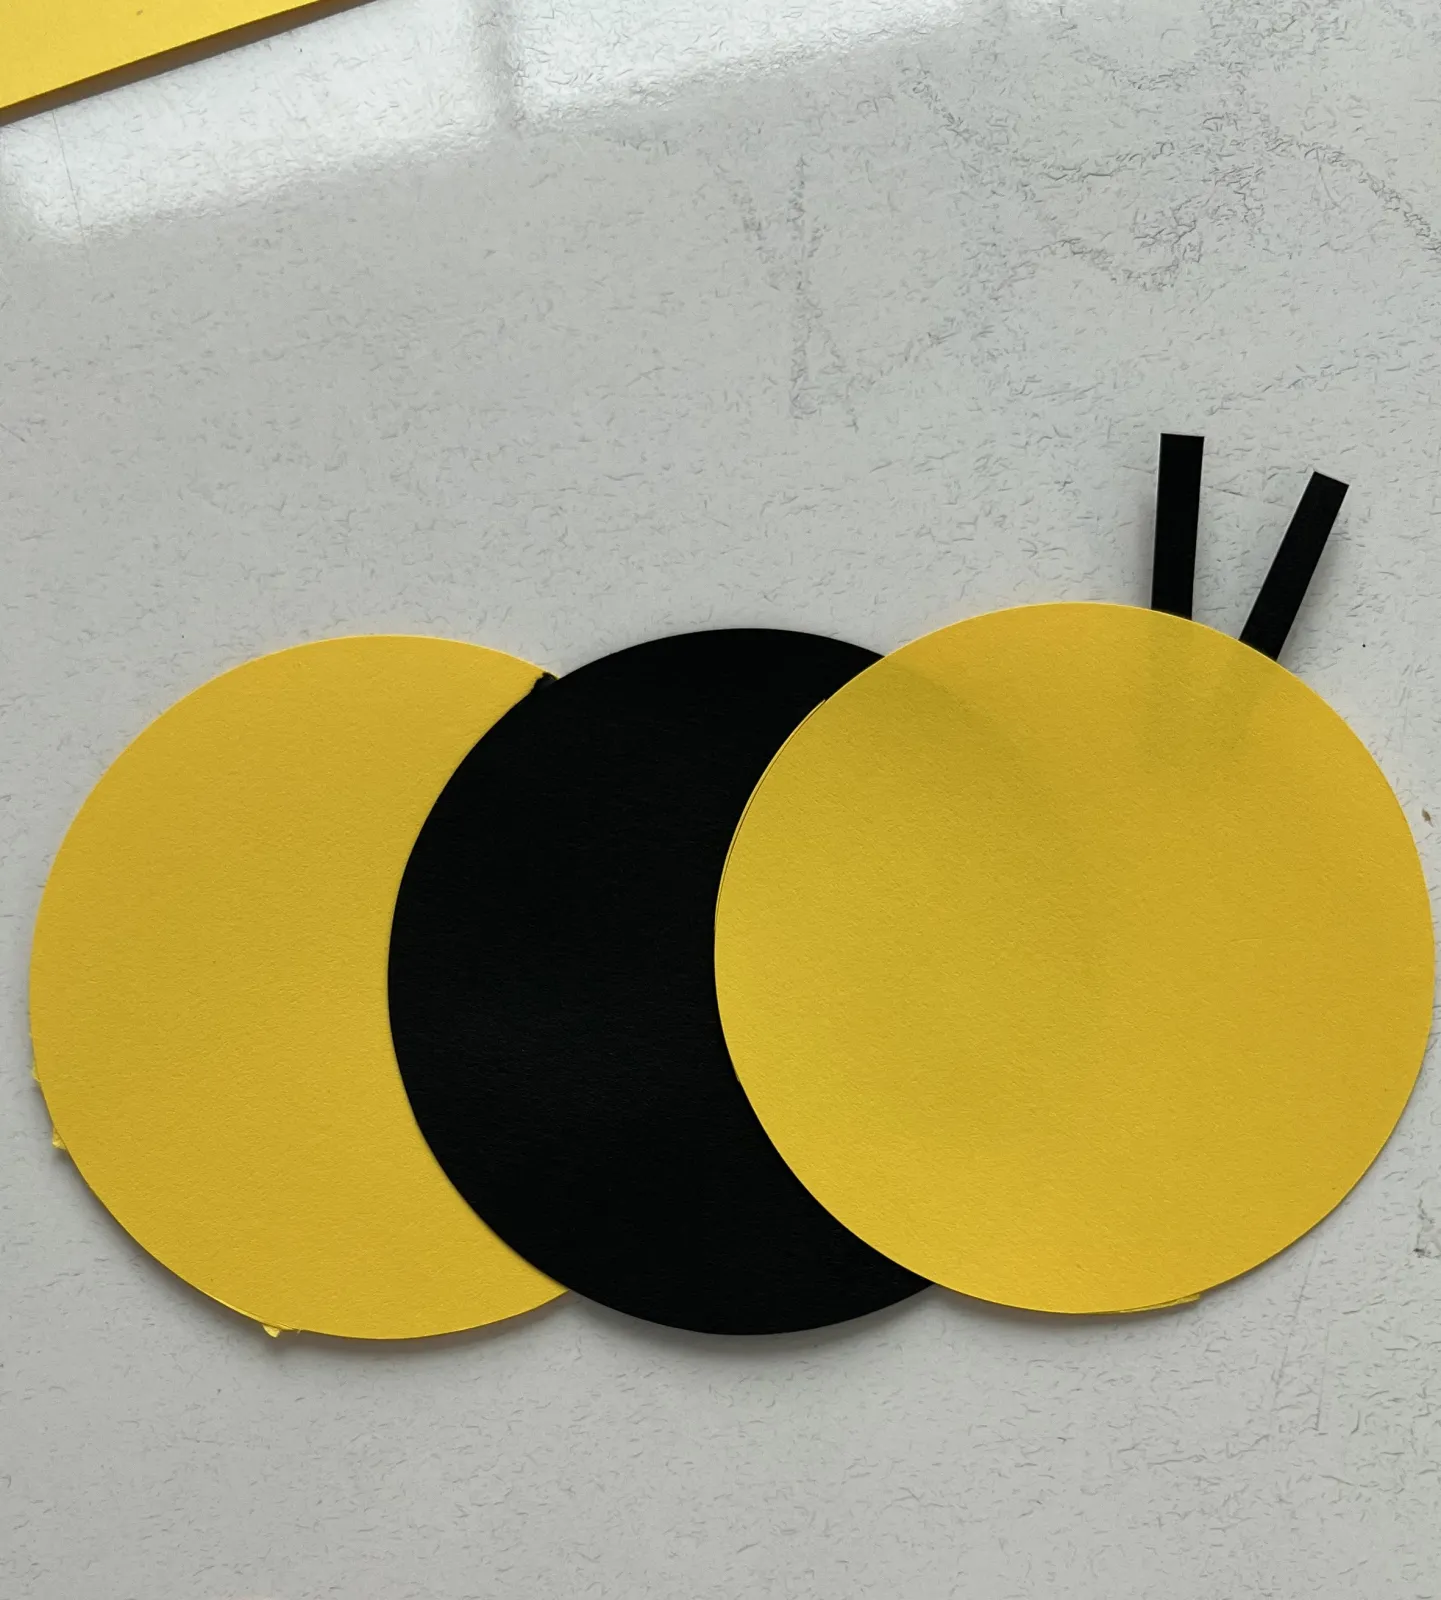
Next, cut a thin rectangle out of your black paper, about ½ of an inch wide. This thin rectangle will be used to make two tiny antennas for your bees. The antenna should be about three inches long, but you can make them any length that suits your bees!
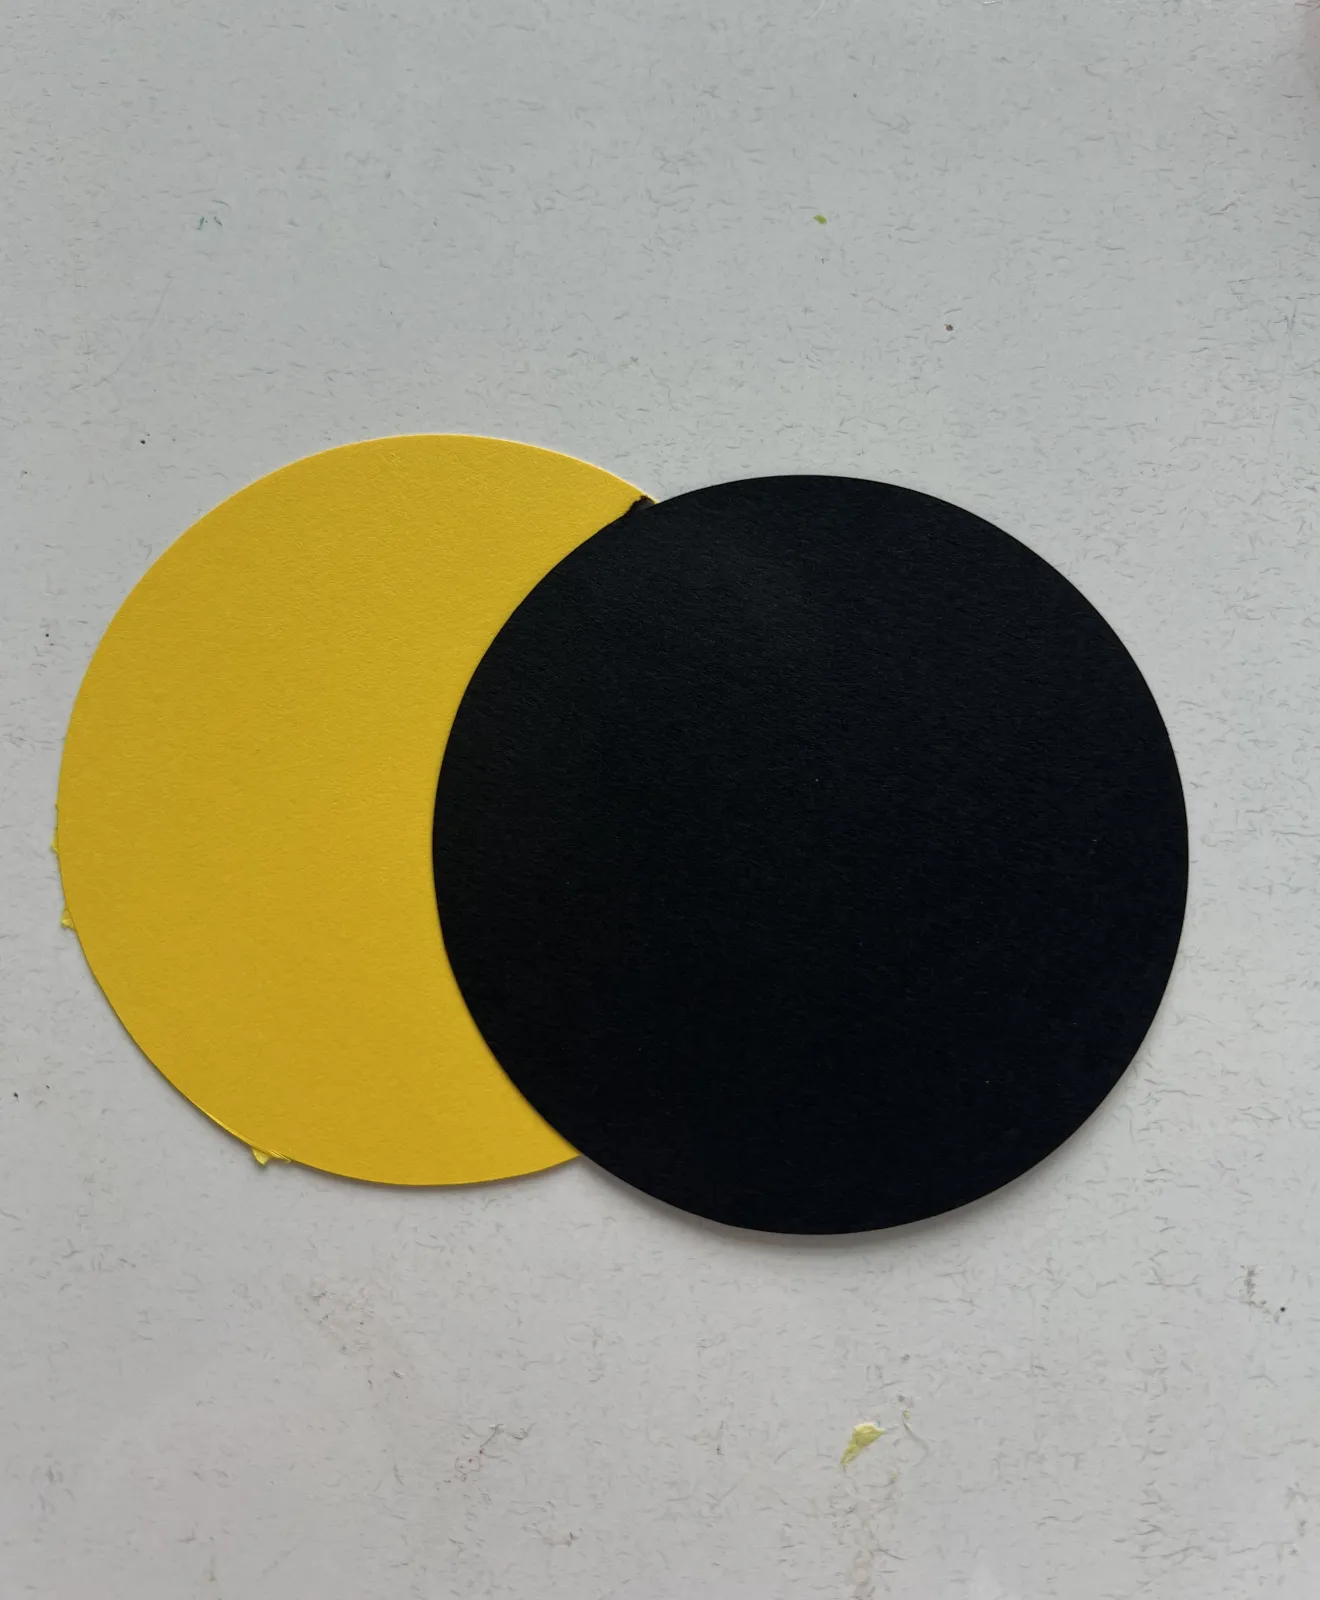
Now that all your shapes have been cut, begin by taking one of your black circles and putting a layer of glue around the edge of this circle.
Grab your black circle and press gently on the yellow circle until they stick together. Now half of your bee’s body has been made!
Repeat this step so that you glue the other yellow circle on top of the black circle, creating a pattern (yellow, black, yellow).
Your bee’s body is now complete!
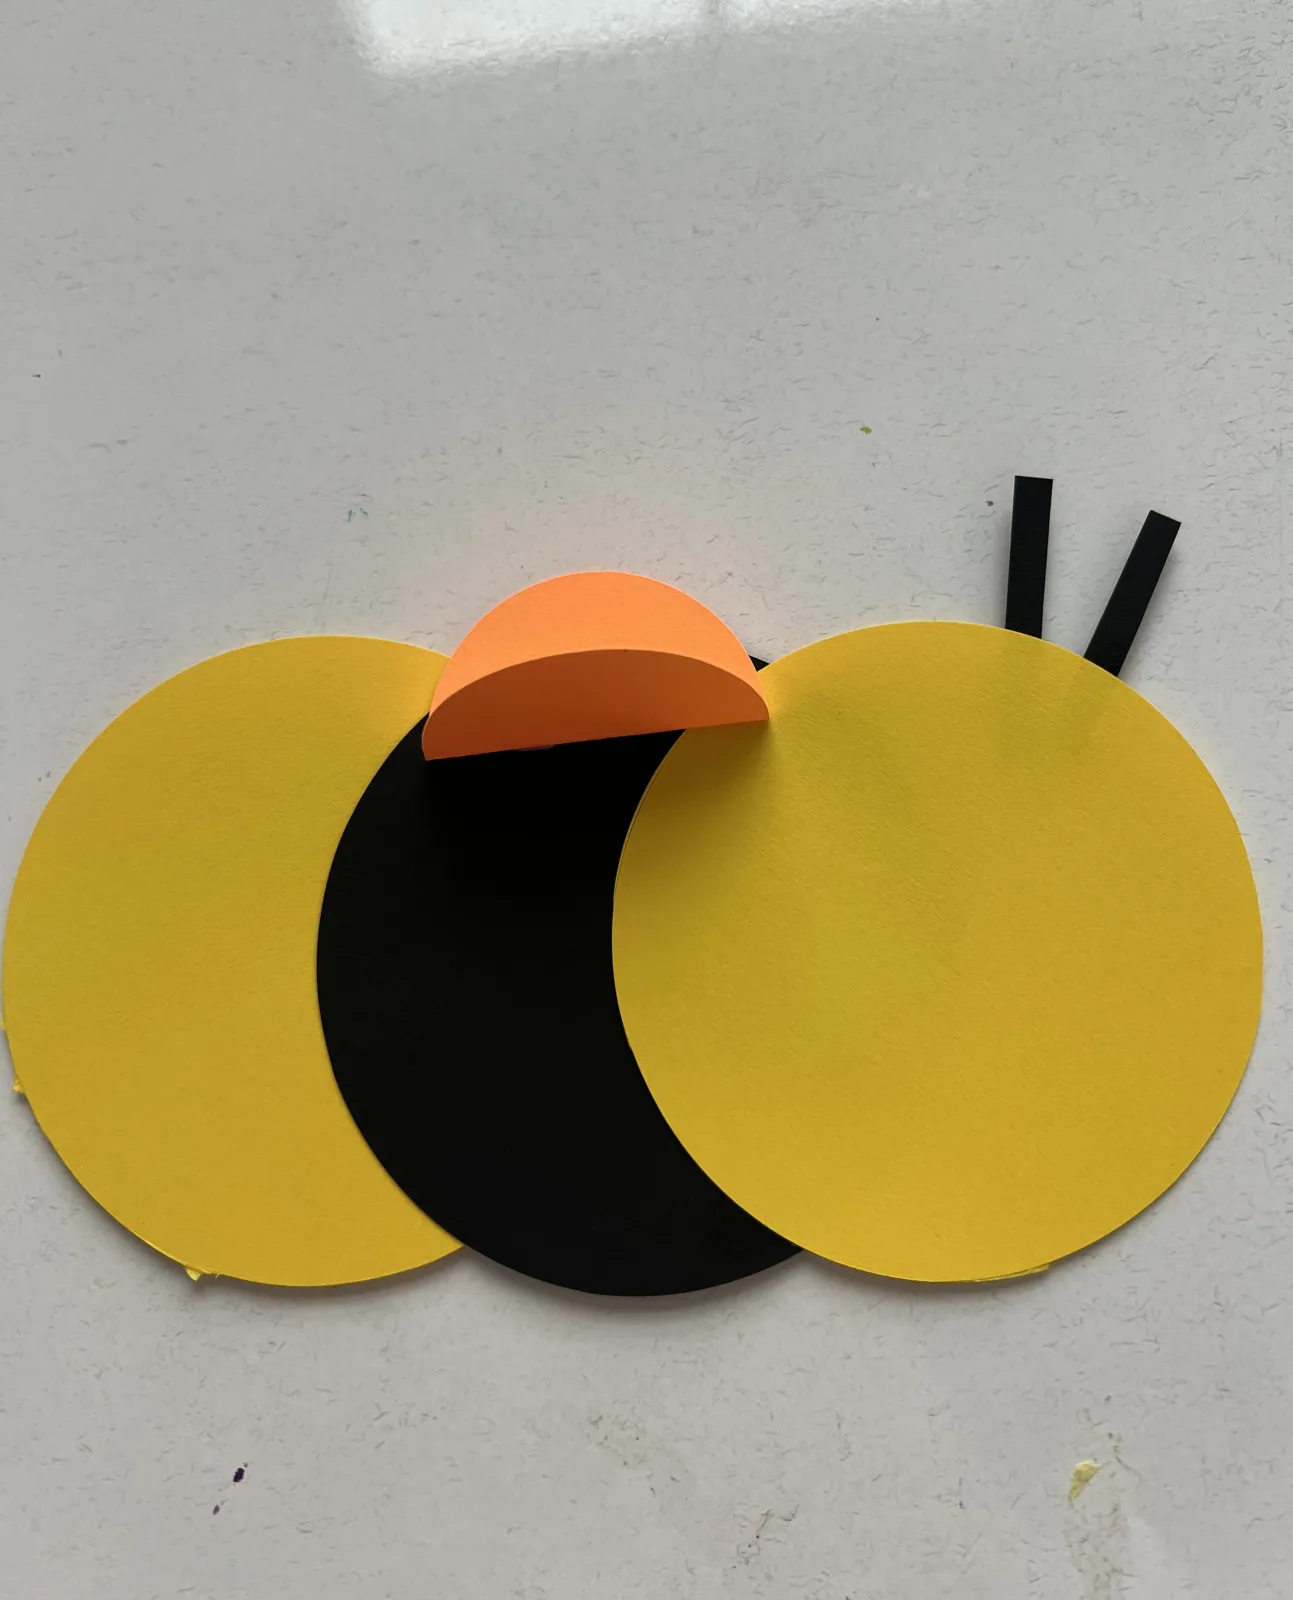
Now that your bee has a body, it’s time to give him a way to hear, smell, and see things better... his antennae! Coat the bottom half of each antenna with some glue, and then gently press the halves with glue against the back of your bee’s “head”.
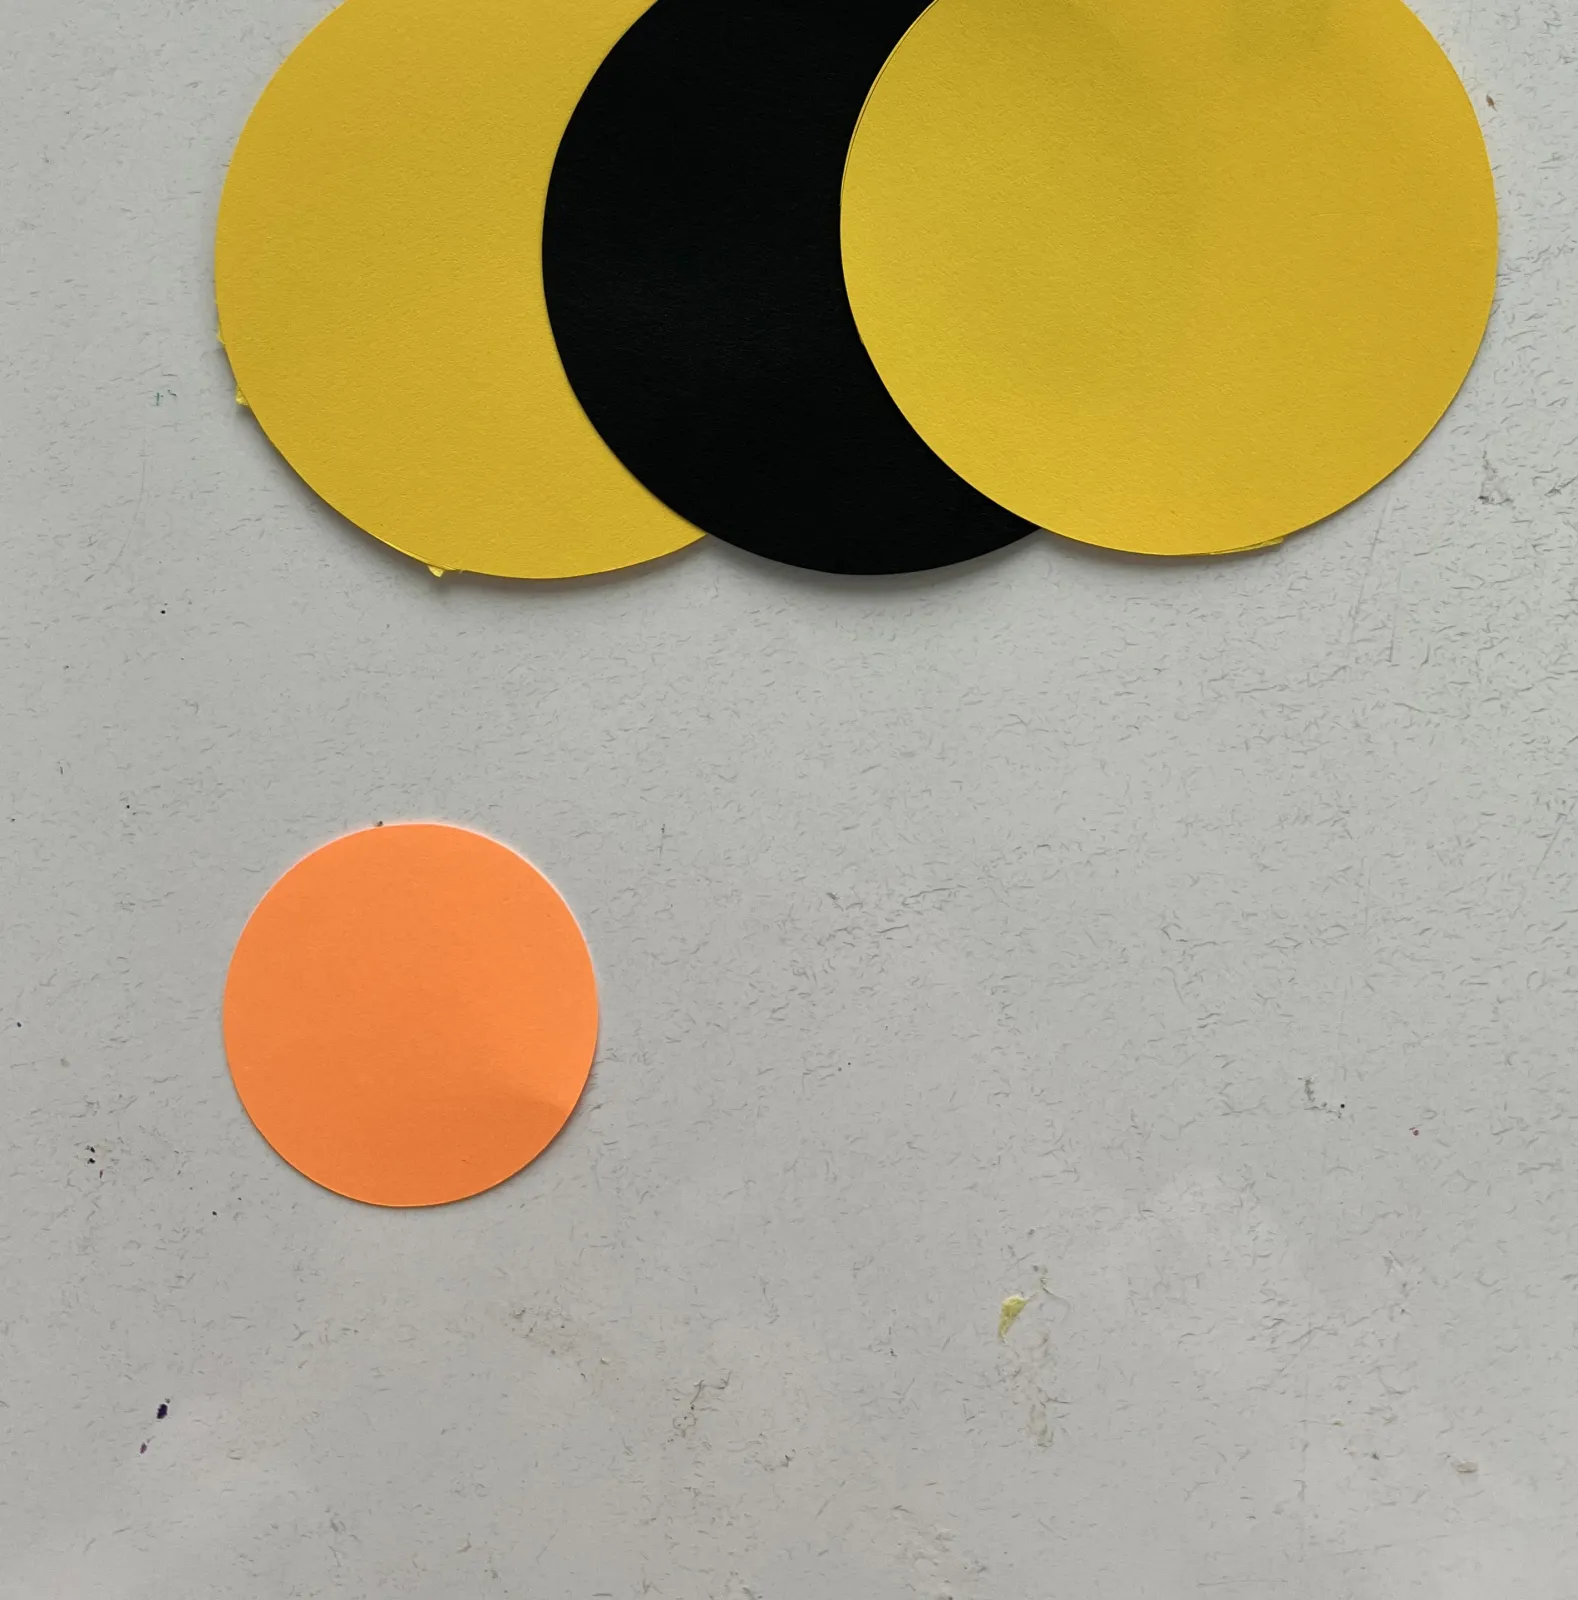
Your bee can now sense his surroundings much better! He’s still missing a few important parts, including the things that allow him to move from flower to flower... his wings! To make your bee’s wings, use the cardstock/construction paper that is a different color from your bee’s body that you chose. Cut a tiny circle from this paper that will serve as his wings.
Once you have your small circle cut, fold the circle in half. Spread one half of the circle out slightly to give a “fluttering” effect to your bee’s wings, then glue the flatter half of the circle to the middle of your bee’s body.
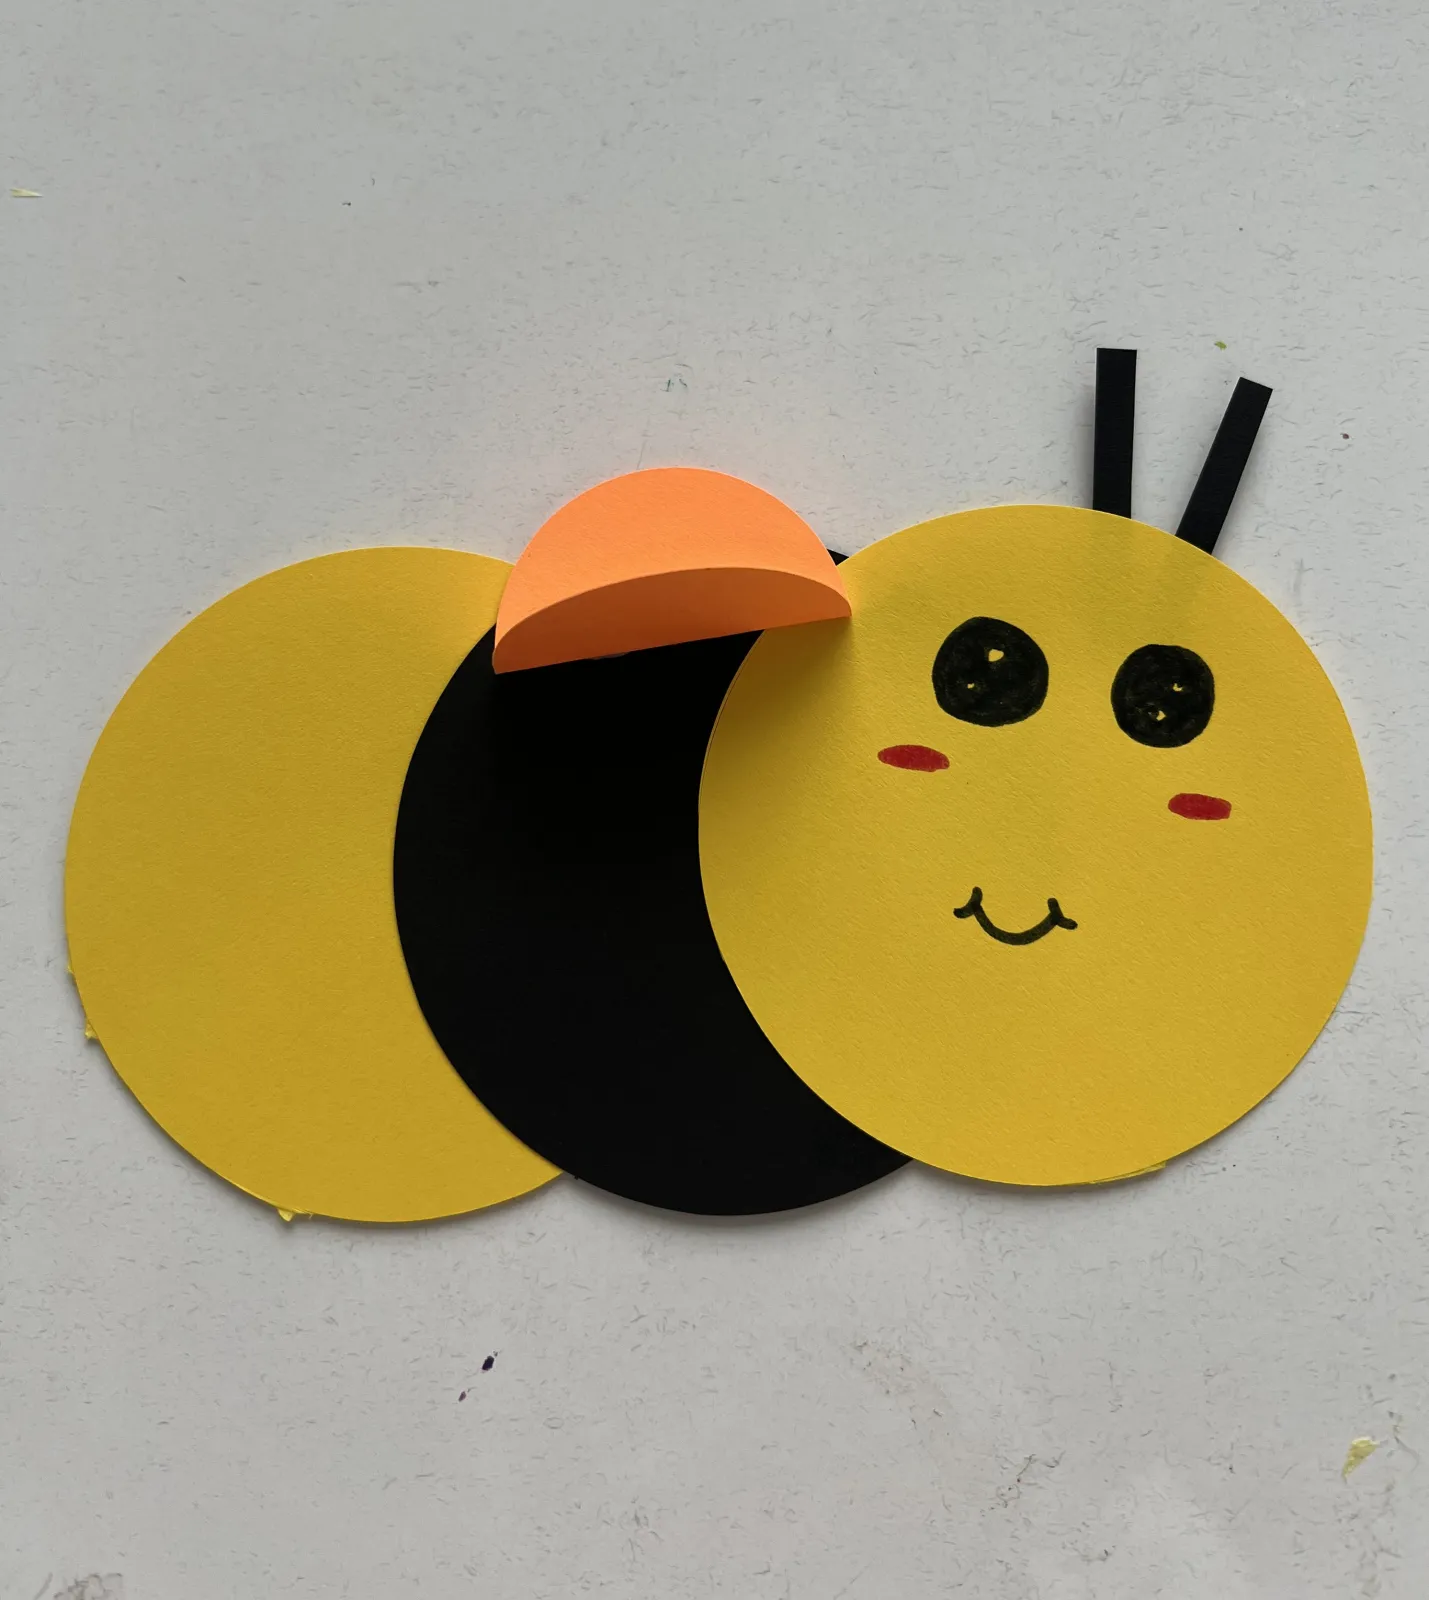
Your bee can now fly and mostly see where he’s going! He does need some eyes, however, to be able to confidently navigate to and from his hive. Add a face to your bee to help him fly smoothly!
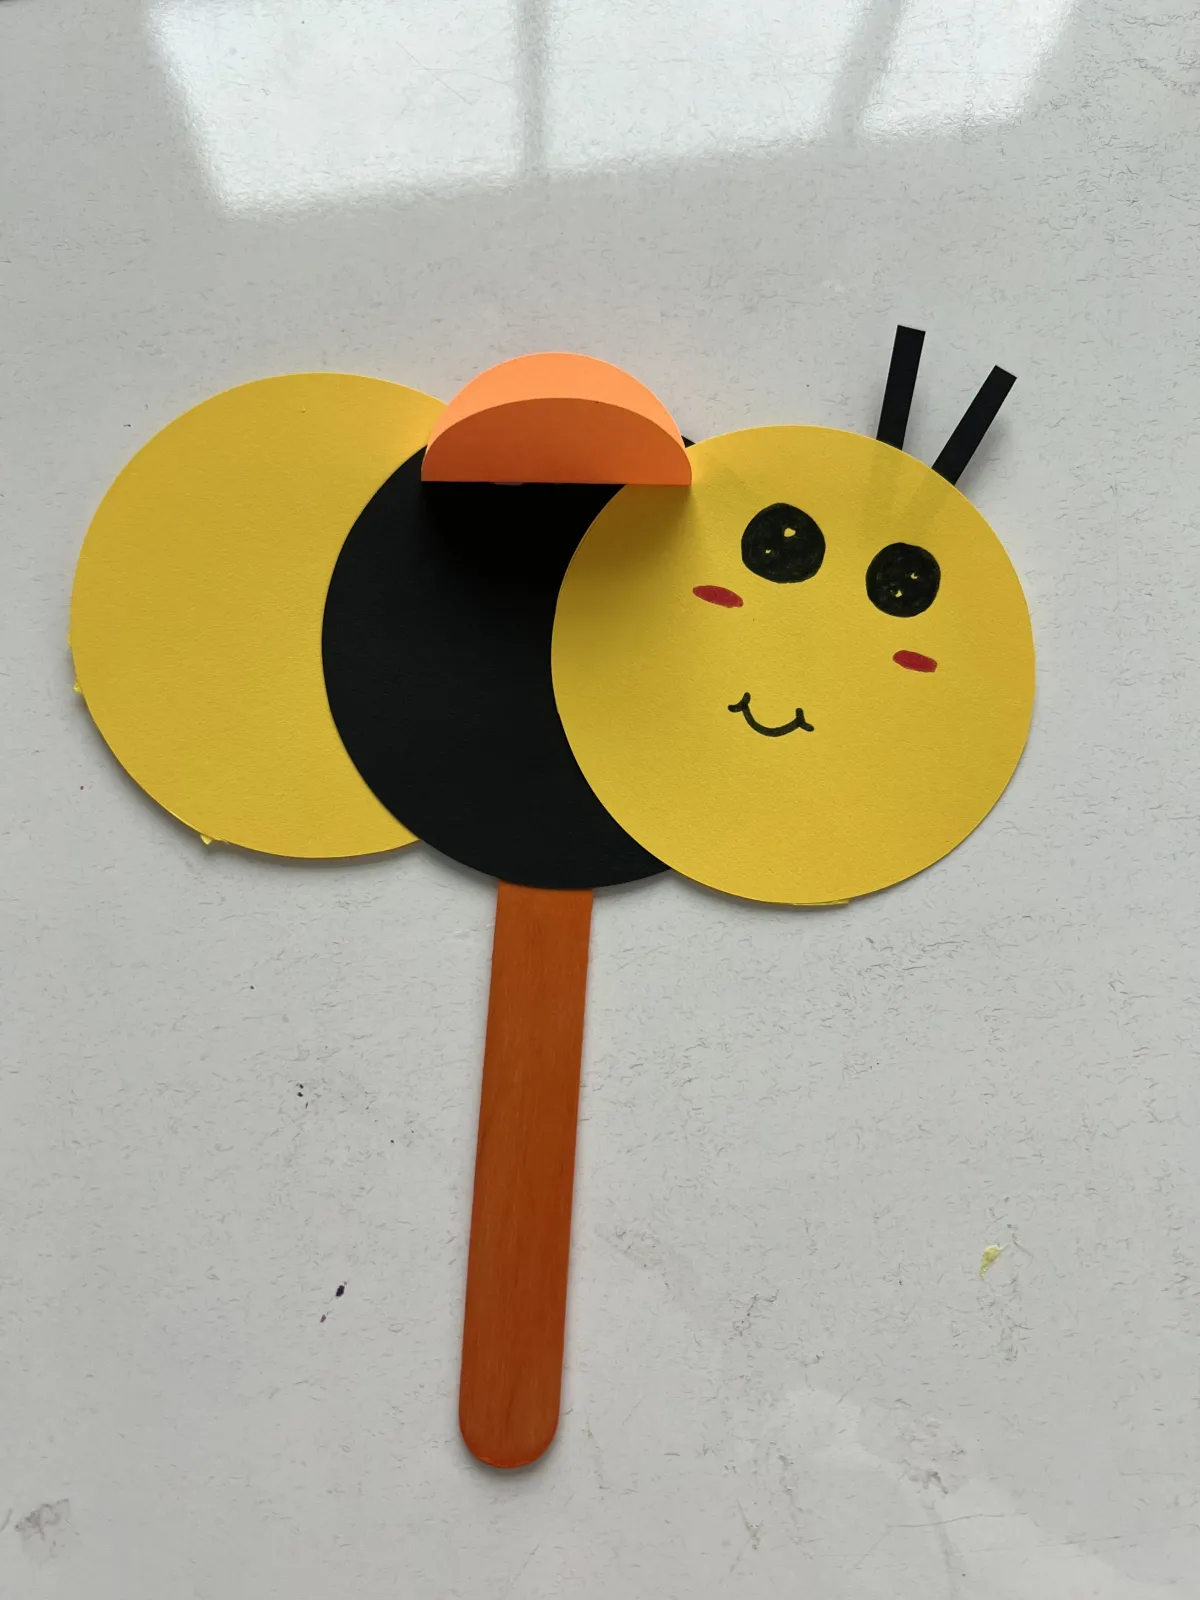
Now that your bee is completed, it’s time to add one more element that will really make him fly—your popsicle stick! Add a layer of glue to the top of your popsicle stick and firmly press your bee’s body to the stick.
Congratulations! You have made your very own bee out of circles and colorful patterns! He will now be free to buzz around and perform his important duties as a crucial pollinator this spring.