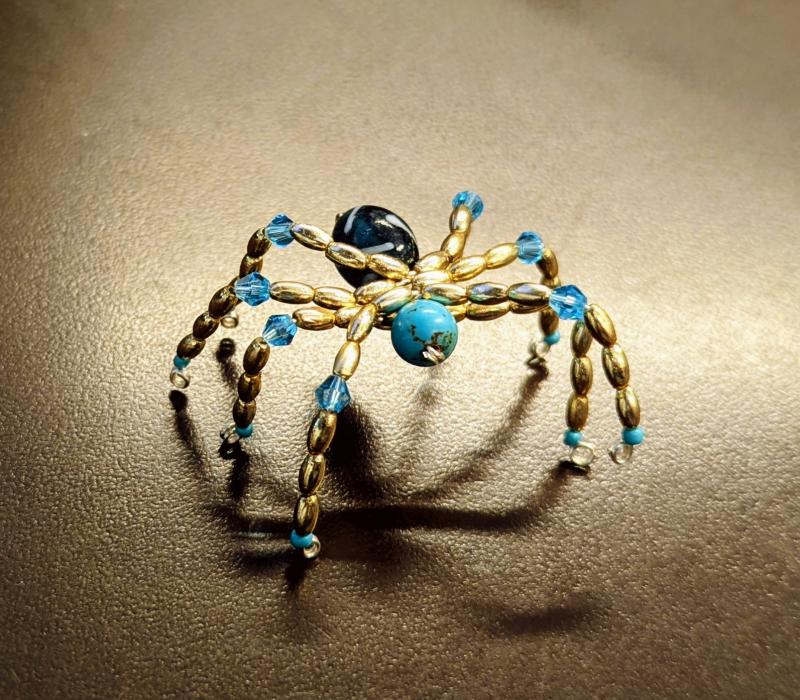
There's no place for arachnophobia with these sparkling spiders! Learn to make your own shiny spider companions with this tutorial.
TOOLS AND MATERIALS
Image
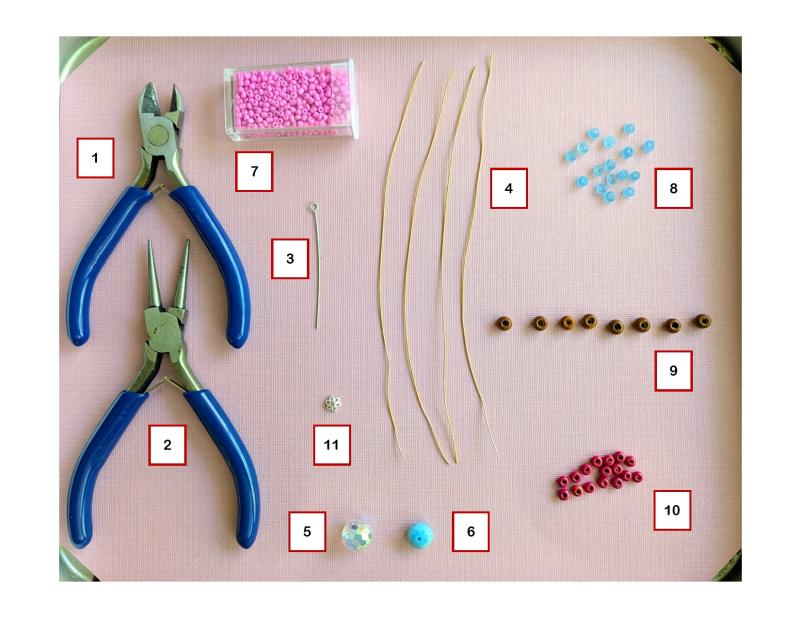
- Wire cutters (also called flush cutters)
- Pliers (round-nose pliers like this pair work best, but any pair of pliers with a small jaw will do)
- One 2" eye pin (this is a length of wire with a loop at one end)
- You can make your own using a 2.25" piece of wire that is a slightly smaller gauge than the one you're using for the legs - make sure your head and body beads fit on the wire
- Gauges for wire are a little counter-intuitive: the smaller the gauge, the larger the diameter of the wire (so, a 16g wire is bigger than a 24g wire)
- Four pieces of 22 or 24 gauge wire, each 6" long - make sure the beads you are using fit on the wire
- One large bead (for the body)
- One large bead (for the head - should be slightly smaller than the body bead)
- 140 seed beads (these are tiny beads)
- 16 small beads in one color
- 8 slightly larger beads in another color
- 16 small beads in a third color
- [Optional] One bead cap (a small cup-shaped bead, often made of metal, that fits around one end of another bead)
INSTRUCTIONS - LEGS
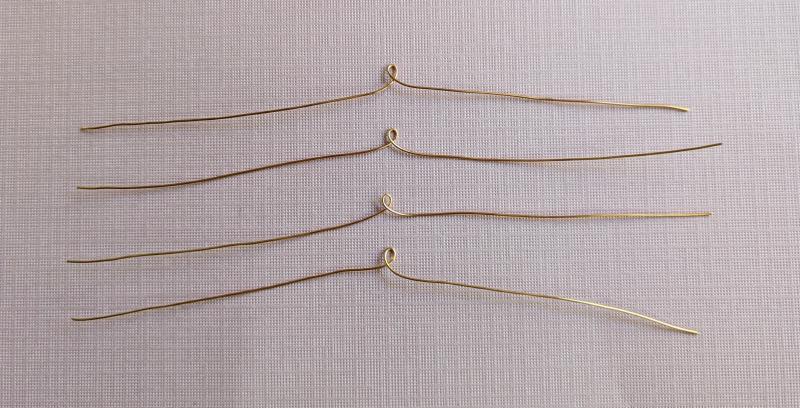
- For the legs, gently bend each 6" wire in half. Keep bending the wire and allow the ends to cross. Pull the ends apart until you have a small loop in the middle of the wire. The loop should be just big enough to fit on the eye pin. Straighten the legs. You should have four wires with loops in the middle - these make up the eight legs of your spider.
Image

Image
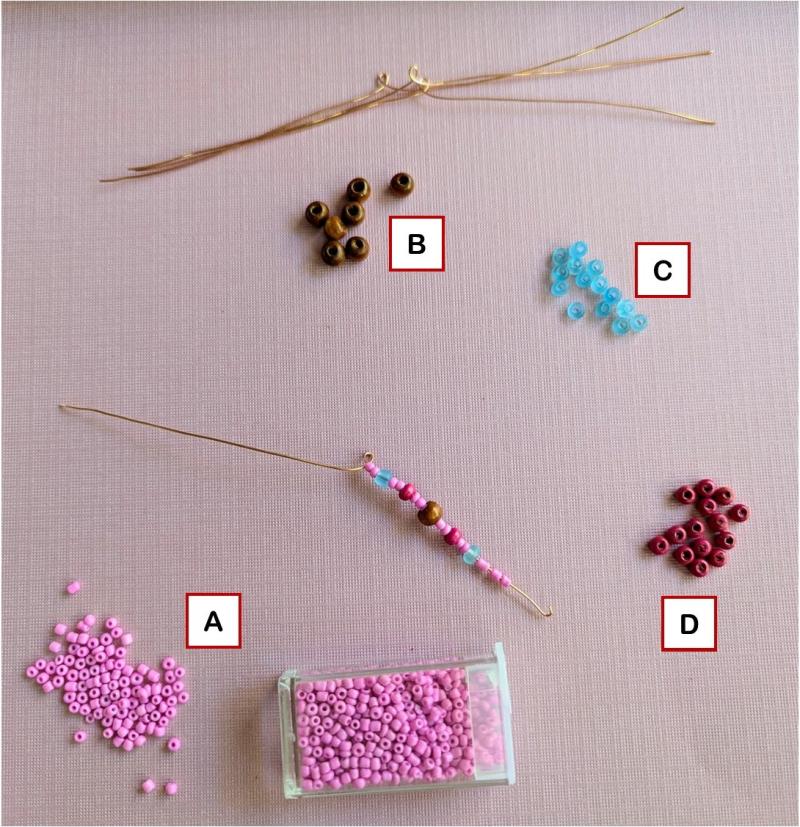
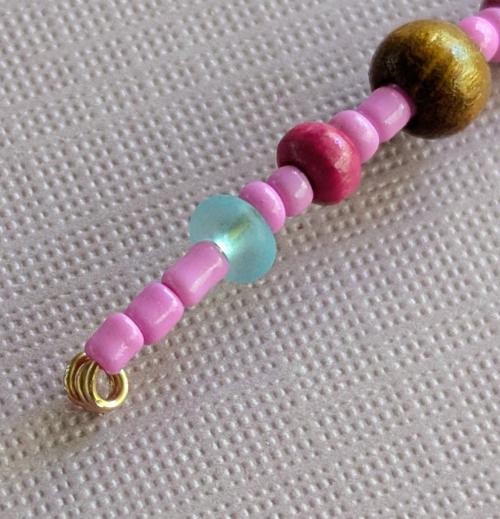
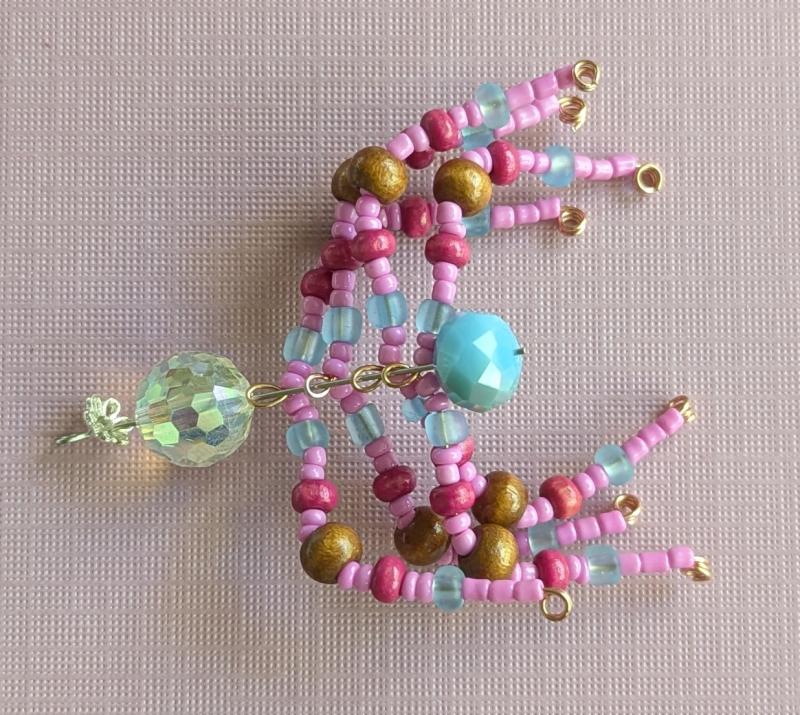
- For the purposes of this tutorial, the pattern of beads for each side of the wires is AA-B-AA-D-AA-C-AA-D-AA-B-AAA (see photo below). You can adjust that pattern as necessary to accommodate the beads you are using. Note: if you do use your own pattern, you will at least want to use your tiniest beads on either side of each loop - this helps the legs fit better between the head and body beads.
Image
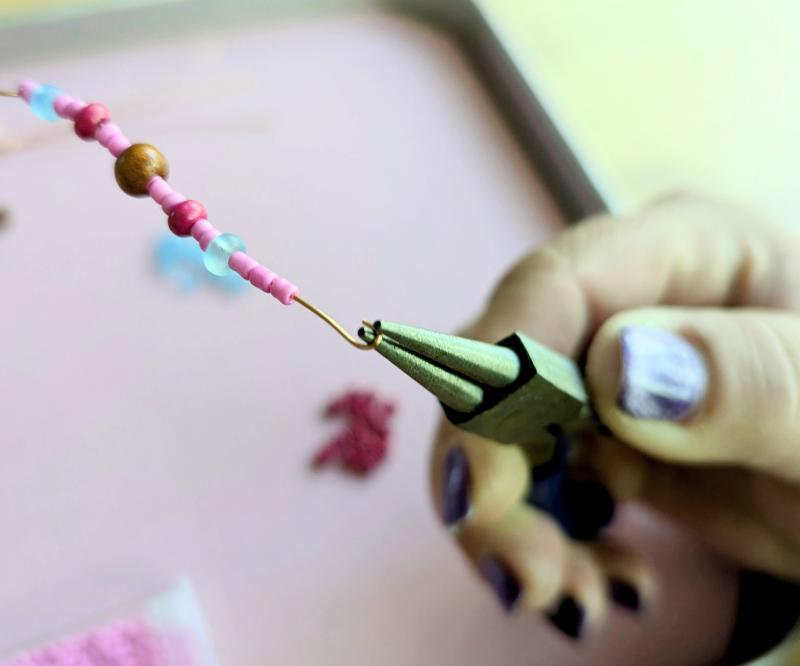
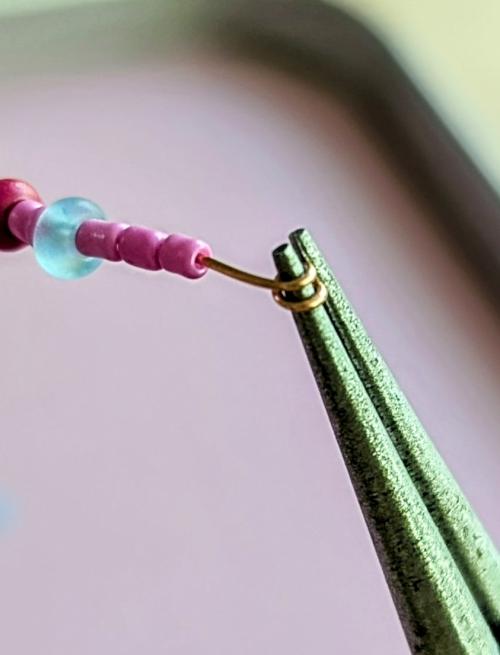
- To finish the end of each wire (and create your spider’s feet), grip the end of the wire between the tips of the jaws of your pliers. Curl the wire around one jaw of the pliers until the spiral meets the last seed bead. If the layers of the spiral are too far apart, use the pliers to squeeze them together.
Image
Image
Image
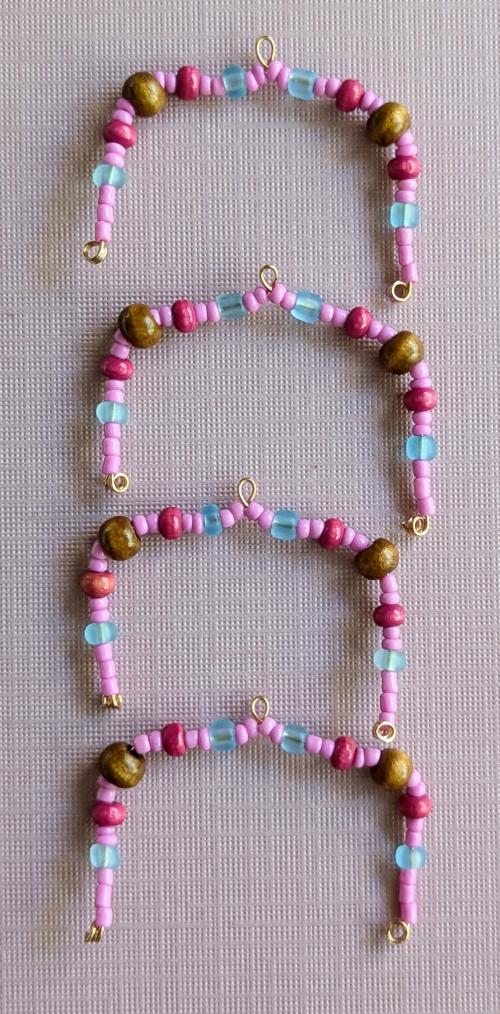
- Repeat the steps above for each side of each of the wires. Bend each side at the 'knee' as shown below.
Image
INSTRUCTIONS - ASSEMBLING YOUR SPIDER
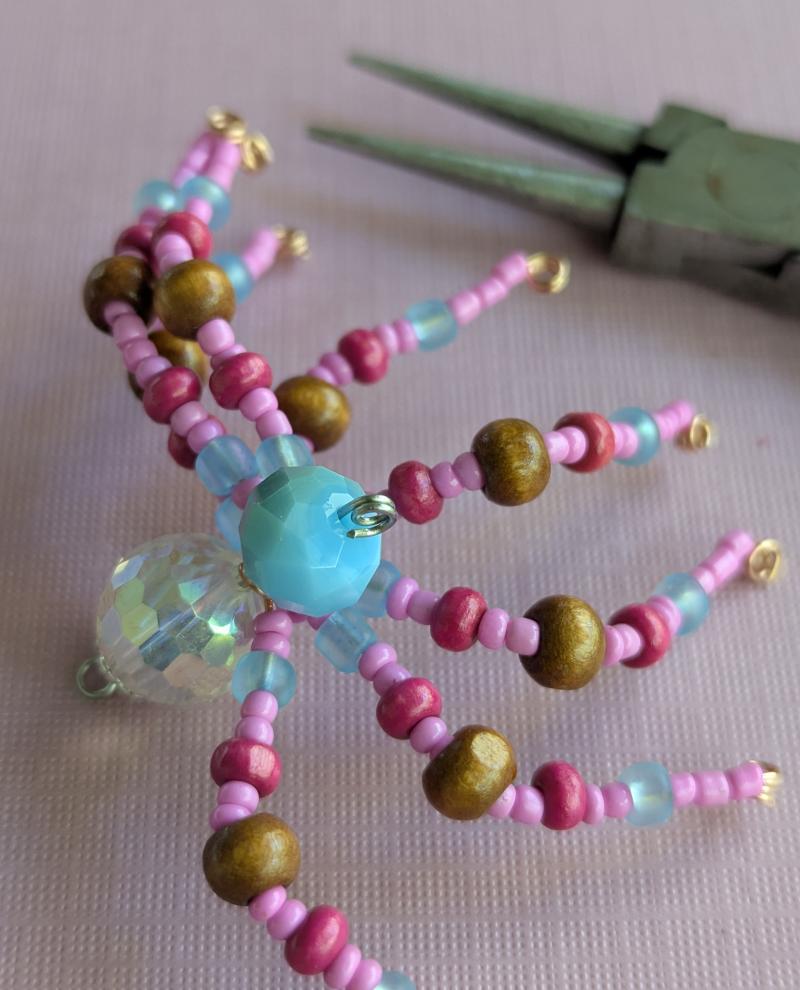
- On your eye pin, starting from the loop side, stack the parts of your spider in this order : bead cap—body bead—each spider leg—head bead. Make sure your bead cap is turned so that it is cupping the body bead.
Image
- Squish all of the body parts together and, using the same technique as you did for the spider’s feet, curl the end of the eye pin until it meets the head bead. Make sure you tighten it as much as you can since that’s what holds the legs in place.
Image
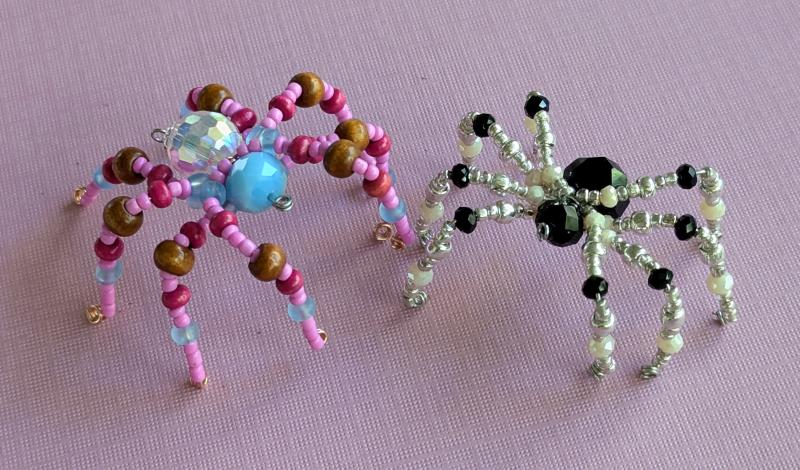
- Arrange and bend the legs until you are happy with their placement.
Image
SPINNING YOUR OWN WEB WEAVERS
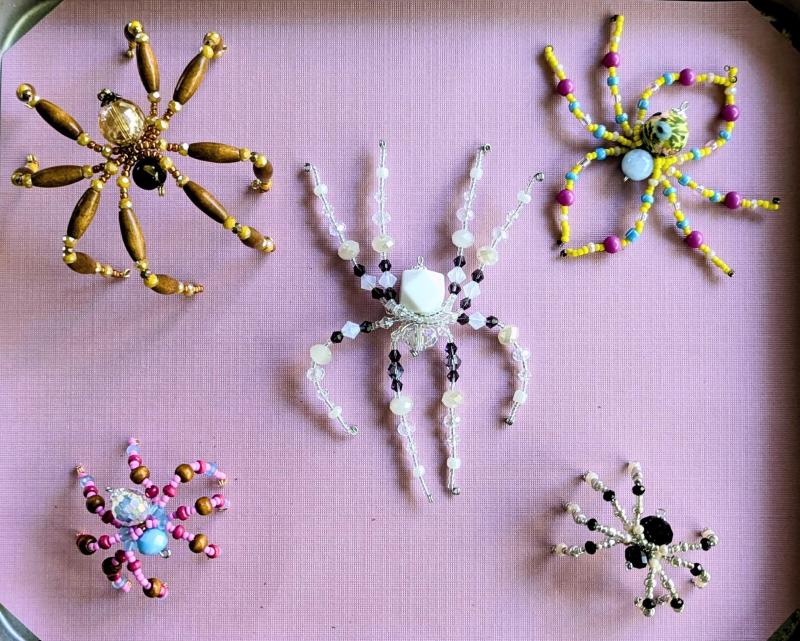
Once you have the basic techniques down, play around with colors and forms! If you need inspiration for patterns, look up real spiders or base your color choices on your favorite sportsball team or anime character.
You can make their legs very long - though you may want to use a smaller gauge (like 18g or 20g) wire to make them a little sturdier. You can use unusually shaped beads for the body or head.
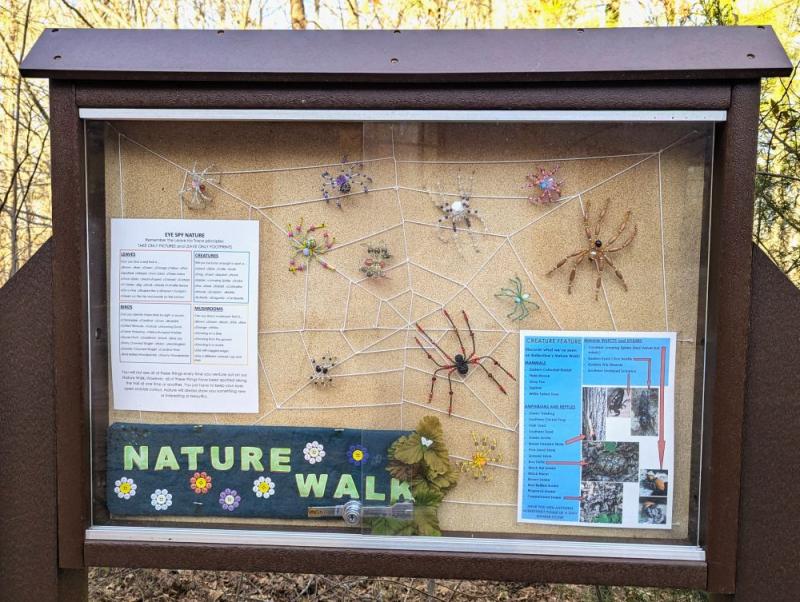
Explore the Nature Walk at Richland Library Ballentine to see more beaded spiders on display in our trail sign.
Image
Image
Image