Don’t throw away your favorite pair of socks just because they have a hole.
If you are like me, you hate spending money and love learning new skills to make life cheaper and easier. Darning your holy clothes is a great way to save them from the landfill. And if you can sew a stitch by hand, then you can darn anything!
Some holes are small enough to just sew the edges together, but some garments, especially knits, can unravel and stretch open. Sometimes you need a small patch of fabric to cover the hole. That's all that darning is. It's just filling in a hole with new fabric that you weave yourself out of thread.
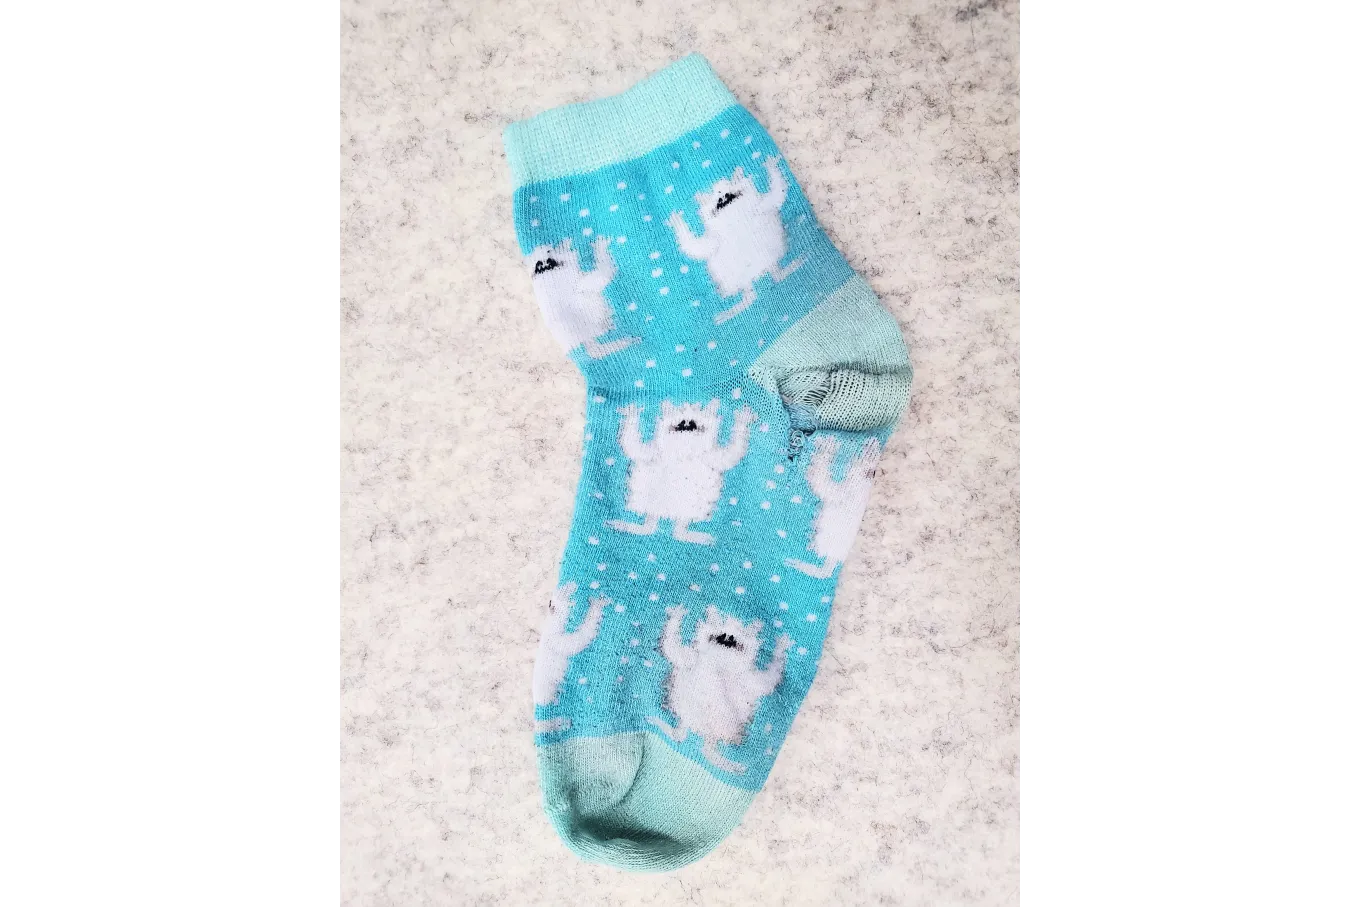
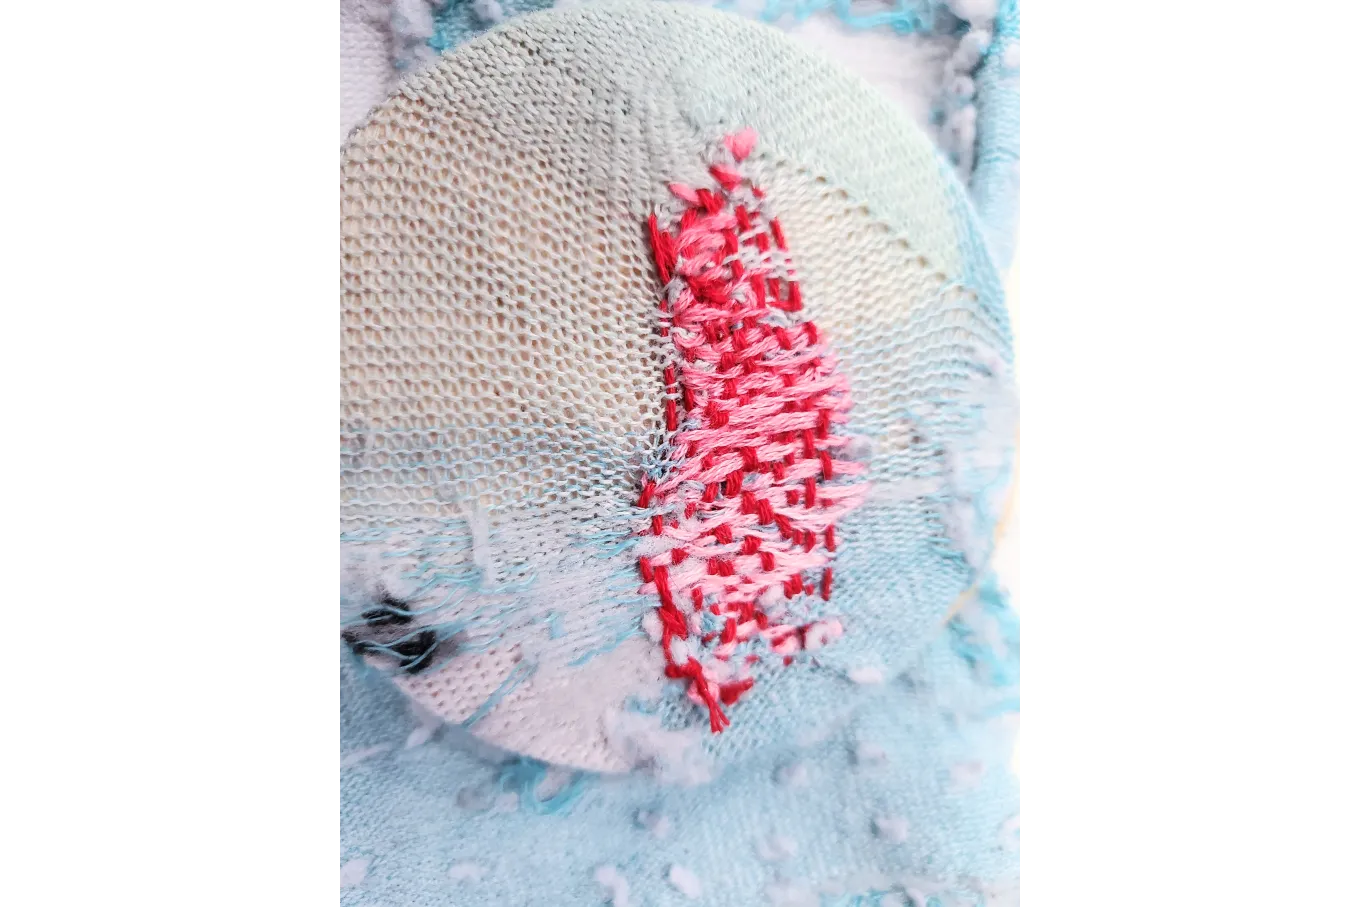
It sounds difficult and like it might take all afternoon, but I darned the blue sock below in less than 35 minutes on my lunch break.
Fixing a hole in a sock is easy, cheaper than buying new socks, and once you have the hang of it, you will be able to mend anything in your closet.
Supplies
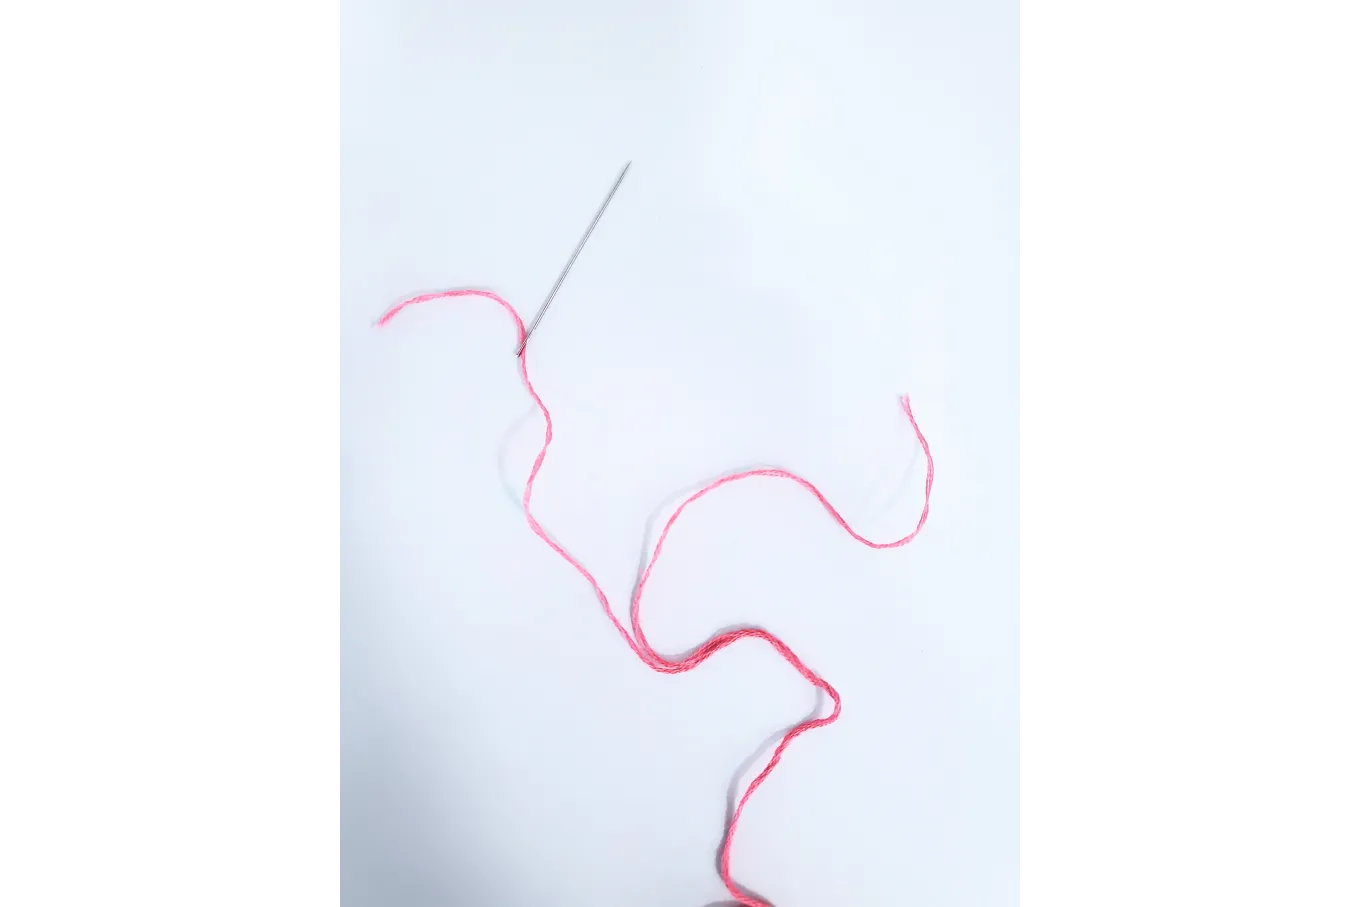
- Needle.
- Thread or Embroidery Floss split in half
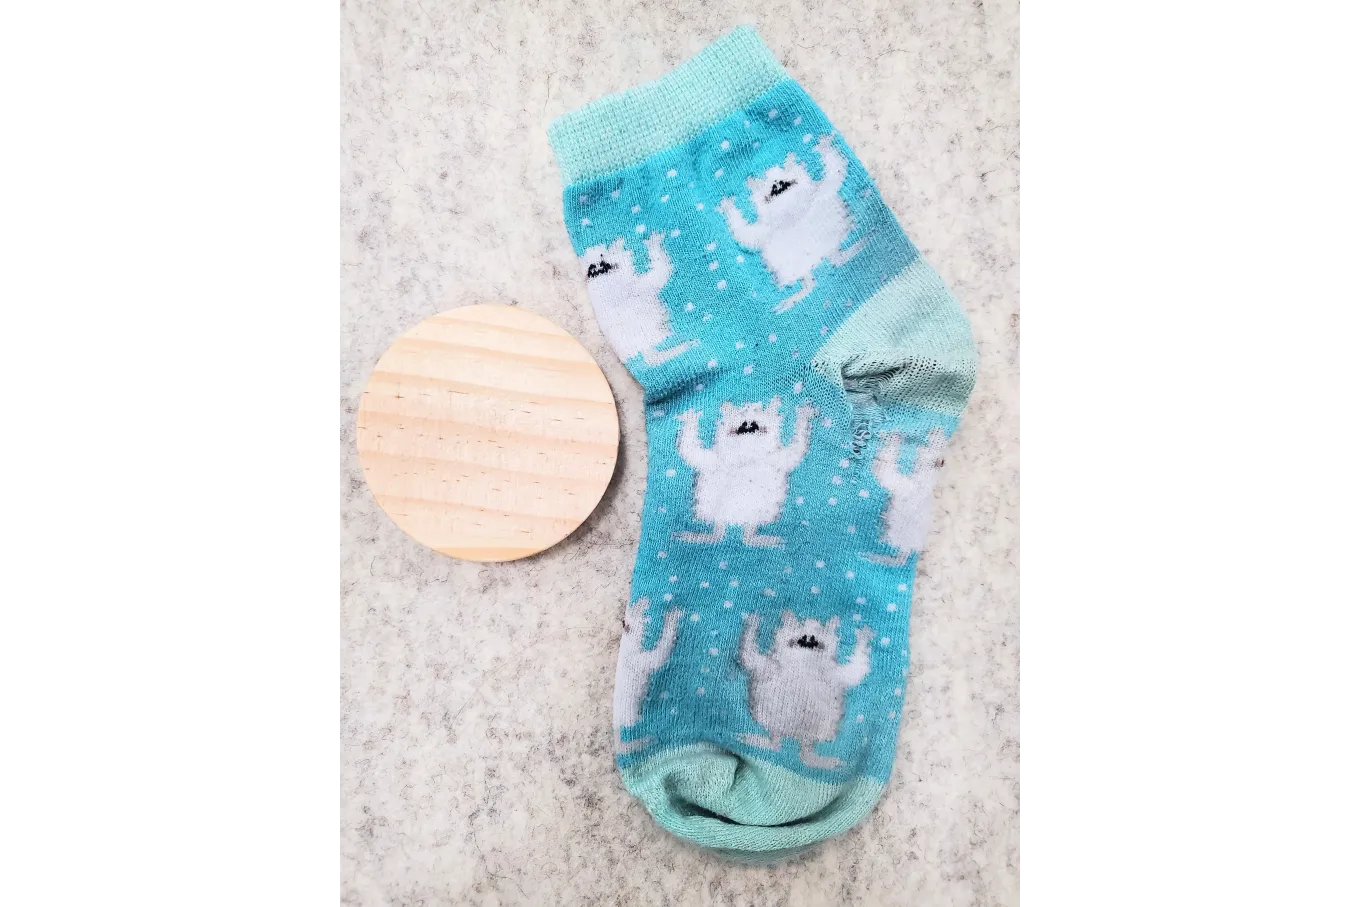
- A small round object to stretch the sock over.
Rubber band (optional) to hold the fabric tight on your round object
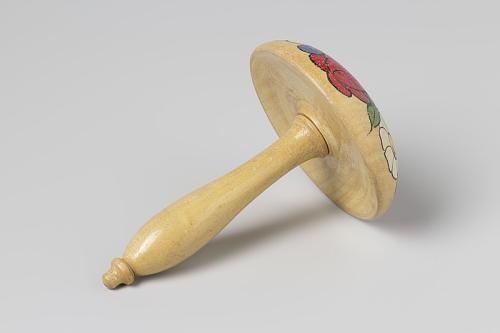
Traditionally, we use a darning egg or mushroom. These were designed to help hold fabric in place while hand mending. But You don’t need to buy a darning egg. There are plenty of objects you can use.
- Tennis Ball
- Small Jar
- Apple
- Light Bulb (if you've got the guts!)
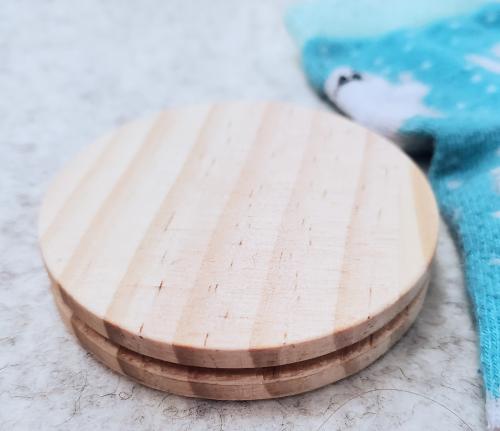
I’m using this piece of wood from the loom darning kit in the Fiberworks Studio.
Method
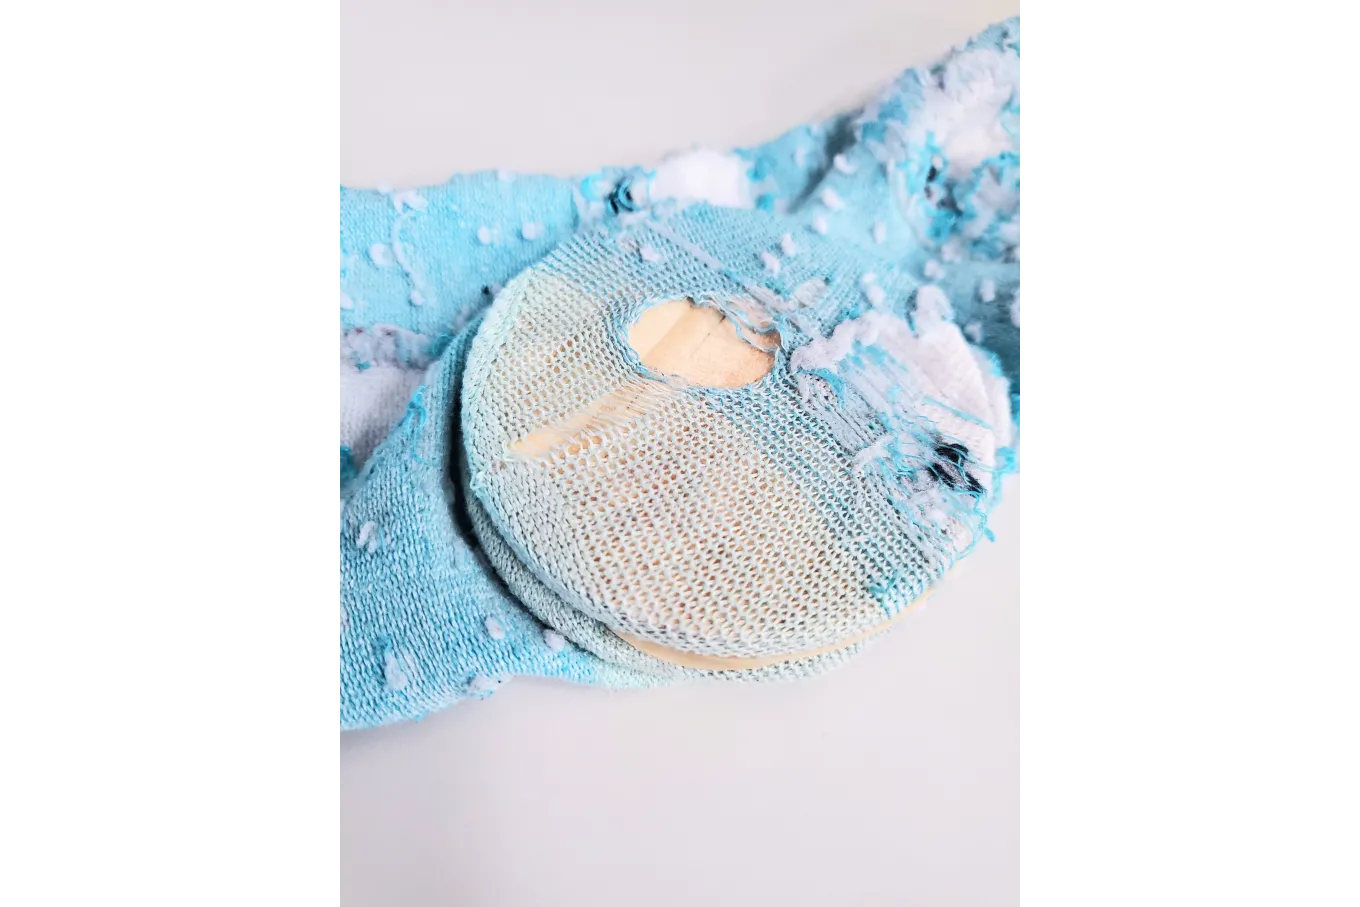
We are creating fabric to fill the hole.
Fabric is made of two layers of fiber woven together. One is called the Weft and the second is called the Weave
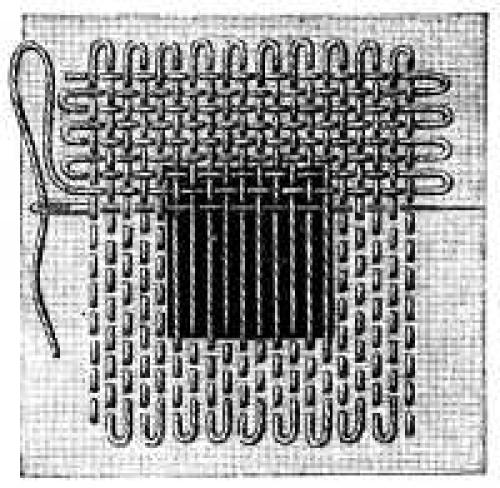
Basically, you are weaving a tiny tapestry into your sock hole.
- Turn your sock inside out
- Stretch it over your round object.
- Secure it with a rubber band.
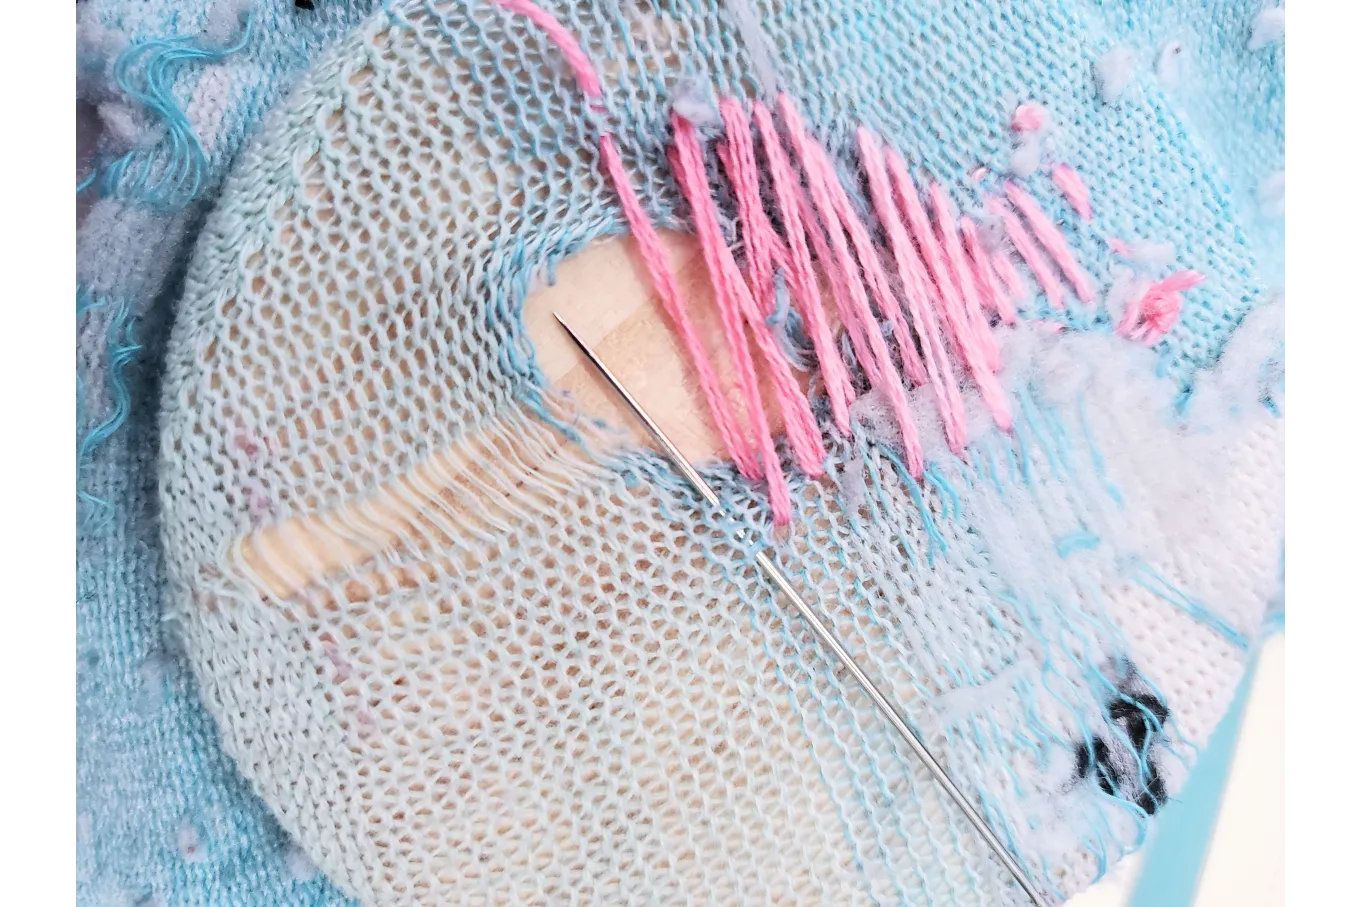
- Start your first stitches at least 1cm away from the edge of your hole so it has something to grab onto.
- Stitch clear across the hole and into the other side after clearing another cm.
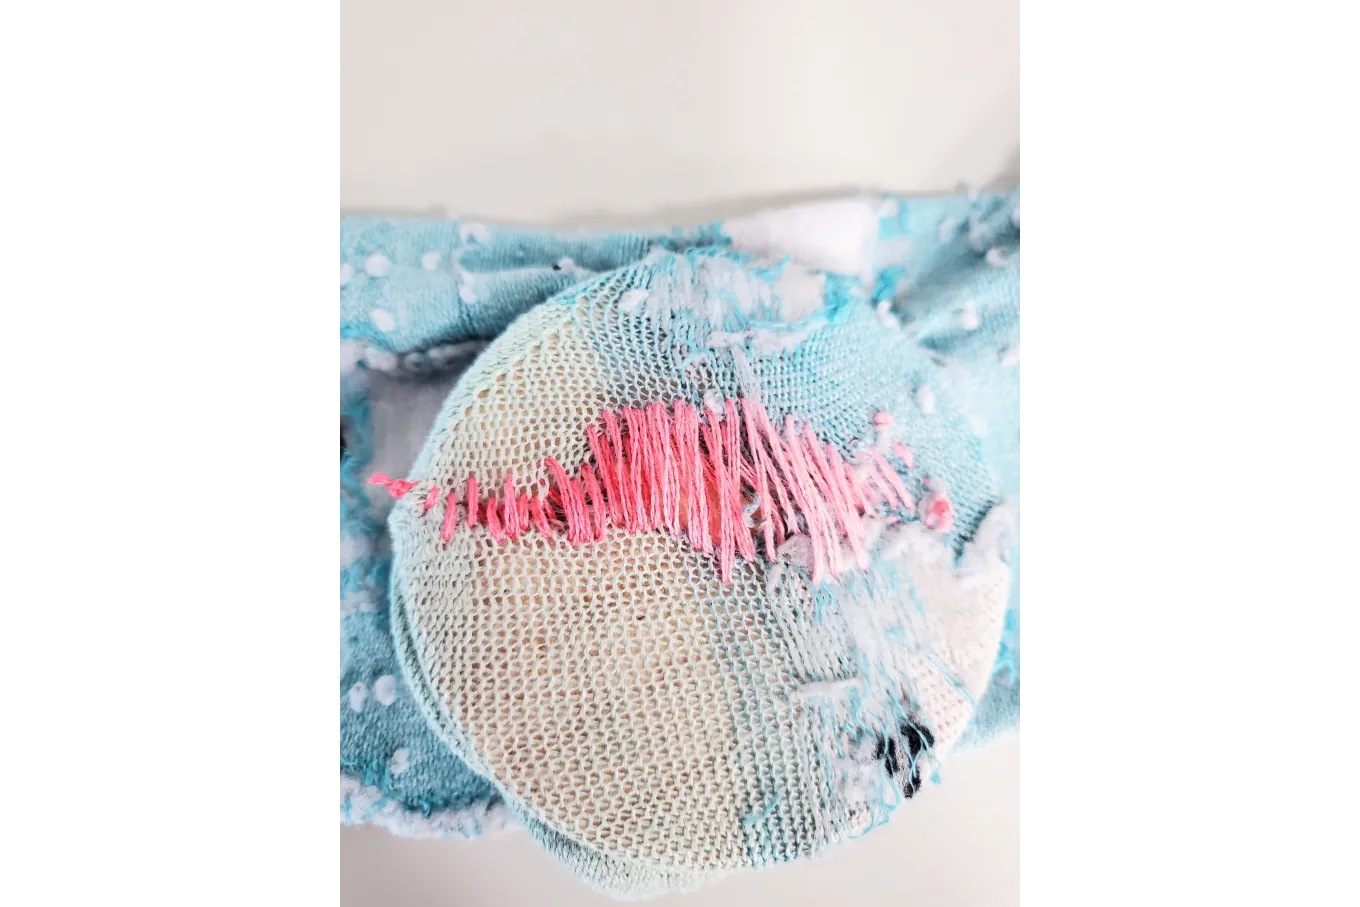
- Repeat this back and forth until you cover the hole. You have now created your weft!
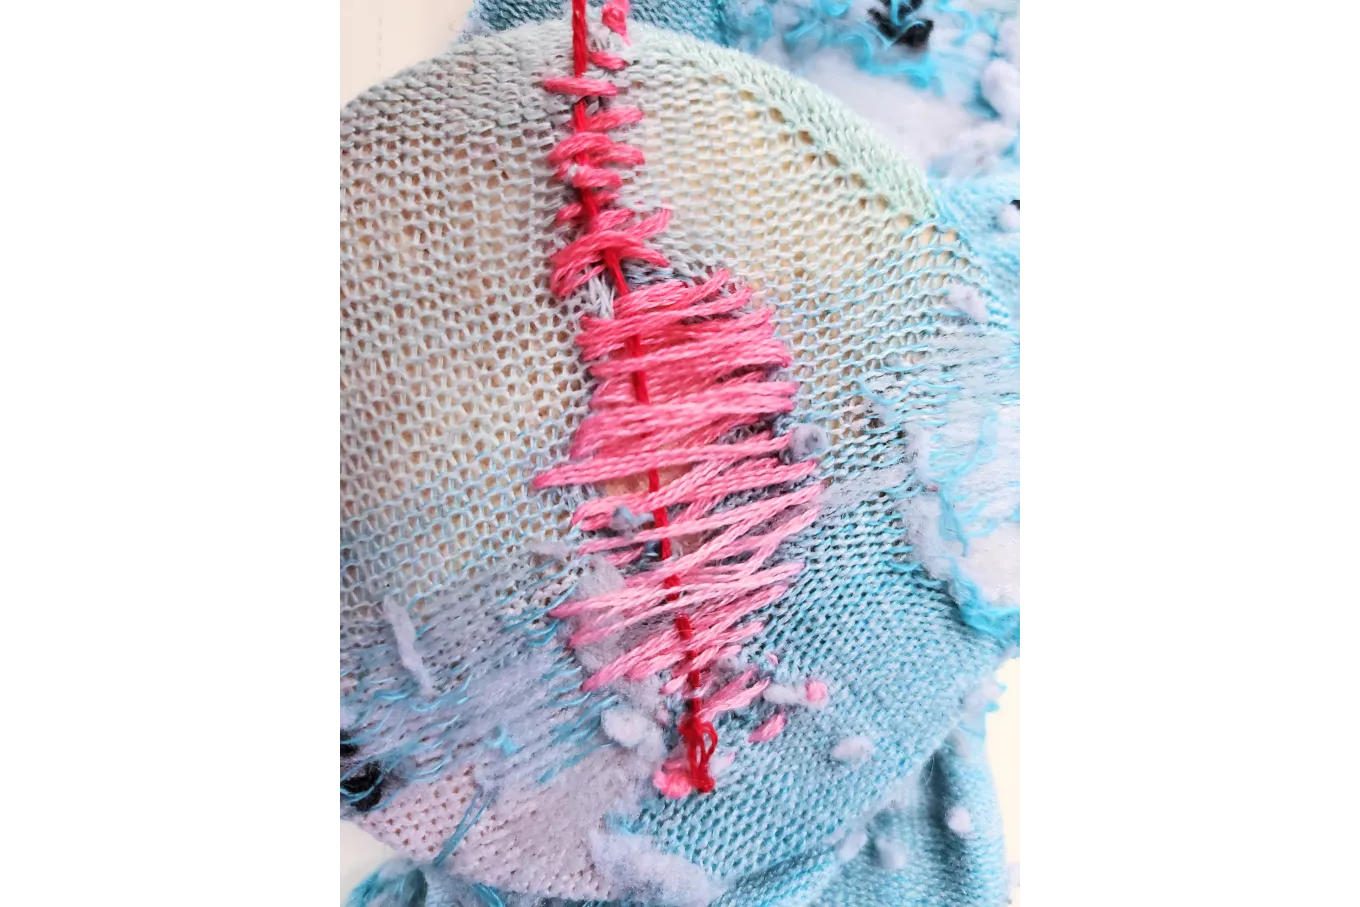
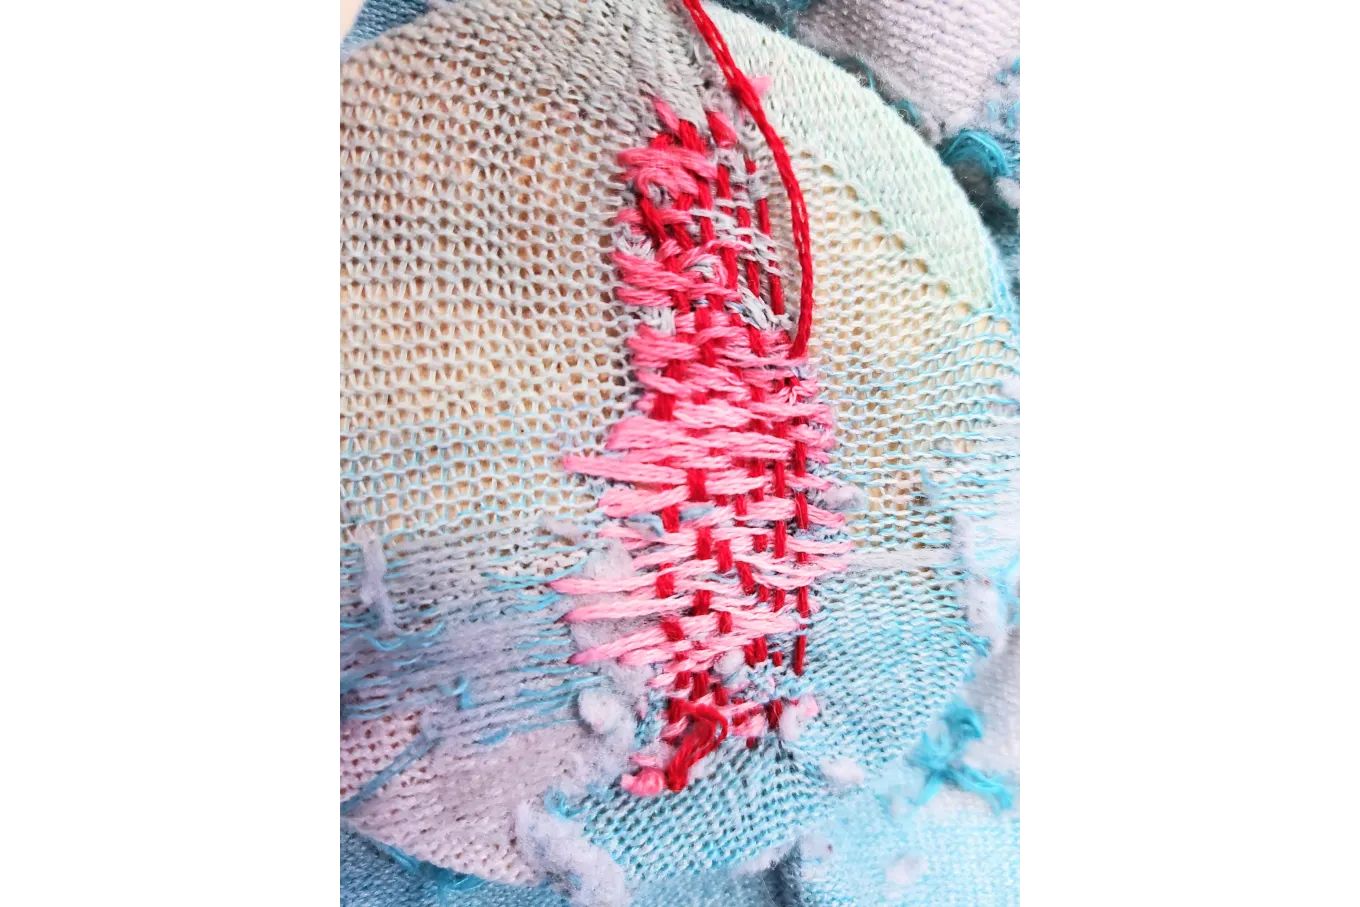
- Your next stitches with be perpendicular (left to right rather than up and down) to your first set of stitches.
- Get ready for the fun part!
- After you secure the thread an inch away from the hole, you are going to pass your needle through every other stitch so that you create a weave.
Once you've covered every last bit, tie it off and marvel at your craft.
(see photos of my blue sock below)


You can use the same technique on just about everything that might have a hole in it.
You won't need to throw away any more jeans that actually fit, flattering tops, or perfectly soft hoodies. Those things can be precious and even if they aren't, it's good for your wallet, soul, and planet to keep using them.
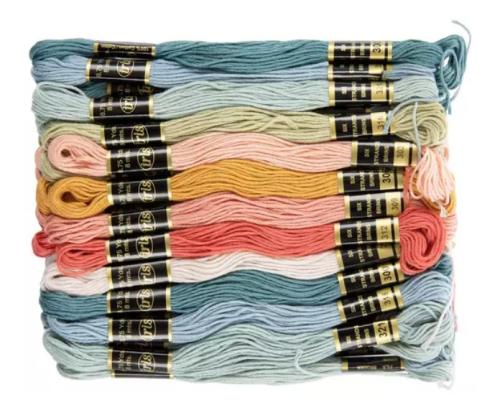
I recommend buying a multicolored set of embroidery floss. It can cost less than a cup of coffee and it's easy way to stay ready for the next hole you need to mend. Having color options may also inspire you to create something new and unique.
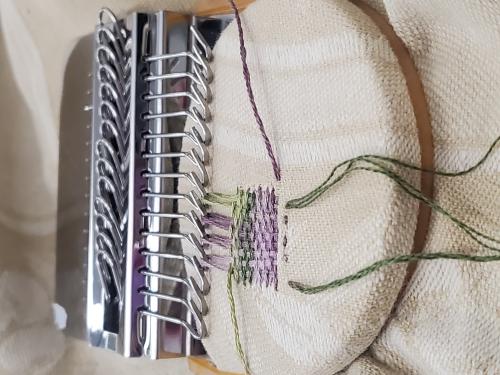
Our Fiberworks Studio has a darning loom that you can use to create a picture-perfect weave. You can sign up to attend our Loom Darning Class next week to learn how it works and try it out for yourself!
Want to just come in and get some in-person help? Check out our upcoming Mending Class or contact our Fiberworks expert for a one-on-one session.

Visible Mending

Creative Mending